WMA2S
Installation Instructions
16
8.
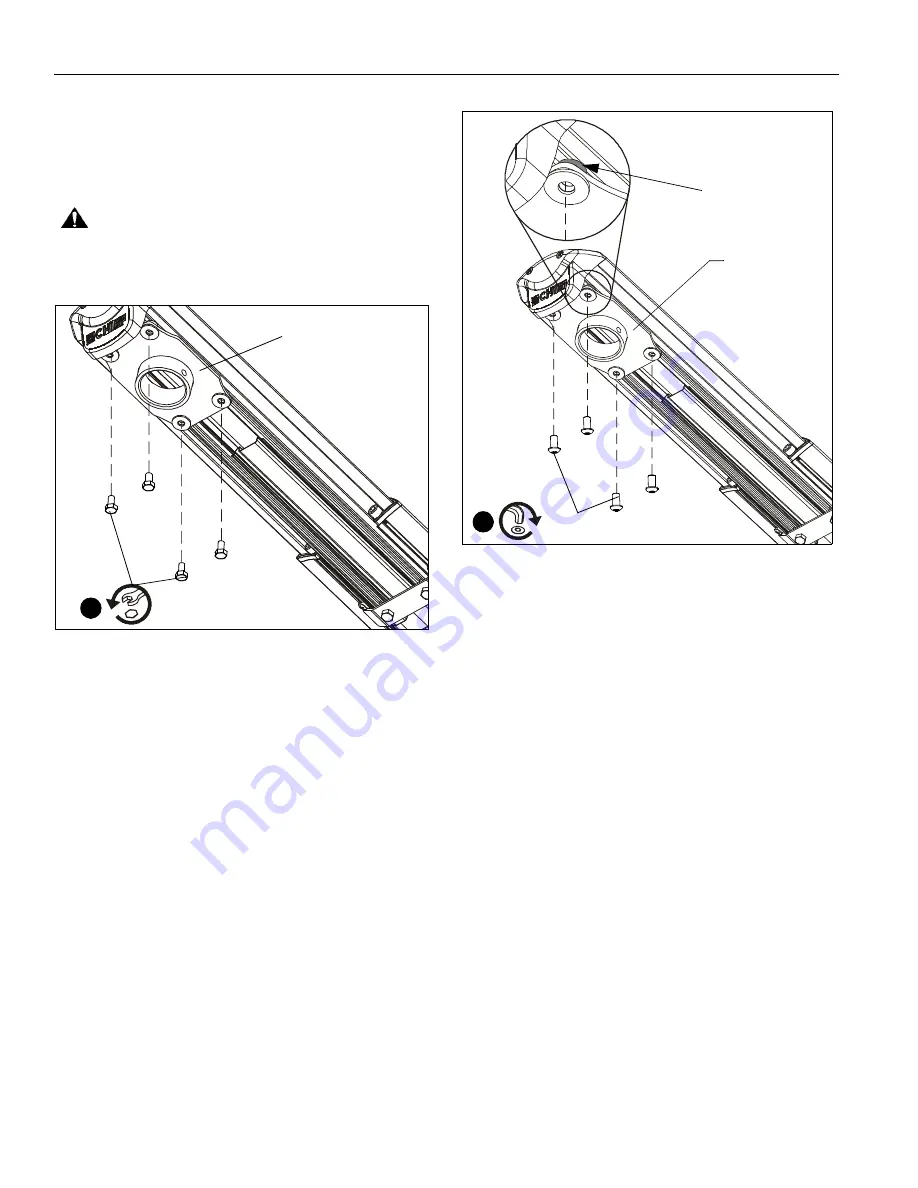
Remove one of four bolts from adapter plate. (See Figure 38)
9.
Install one 1/4-20 x 3/4" button head security screw (L) into
hole vacated by removing bolt in Step 8 and into plastic
spacer. (See Figure 39)
10. Repeat Steps 8-9 for remaining three bolts, one bolt at a
time.
WARNING:
It is important to replace adapter plate bolts
ONE AT A TIME or adapter plate could fall from mount during
installation!
Figure 38
Figure 39
Reinstall column according to column installation instructions.
Adapter plate
8
x 4
(one at a time)
Plastic spacer
Adapter plate
(L) x 4
(one at a time)
9
Содержание WMA2S
Страница 17: ...Installation Instructions WMA2S 17 ...
Страница 18: ...WMA2S Installation Instructions 18 ...
Страница 19: ...Installation Instructions WMA2S 19 ...


