10
11
This could cause accidental formation of running knots that
could lead to strangulation. This toy must only be used un
-
der adult supervision.
• Check the toy regularly for signs of wear and damage and
to ensure that it is assembled correctly. Should any part
be damaged, do not use the toy and keep it out of reach of
children.
• WARNING: never use the toy bar as a handle to carry the
bouncing chair.
• WARNING: this product must only be assembled by an
adult.
• WARNING: batteries must only be fitted by an adult.
• Only use alkaline batteries of the same type or equivalent to
the type recommended for the correct function of this prod
-
uct. (for the toy: LR6-AA ; for the vibration block : LR20-D).
• WARNING: make sure the batteries are fitted with their
poles in the right direction.
• Never mix new and old or different types of batteries.
• Always keep batteries and tools out of the reach of chil
-
dren.
• Do not short-circuit the battery terminals.
• Always remove spent batteries from the toy to avoid the
danger of leakage from the battery damaging the product.
• Always remove the batteries if the product will not be used
for a long period of time
• Remove the batteries from the toy before disposing of the
product.
• Do not burn or dispose of old batteries into the environ
-
ment. Dispose of them at an appropriate differentiated col
-
lection point.
• If the batteries happen to leak liquid, replace them immedi
-
ately, making sure you clean the compartment beforehand;
wash your hands thoroughly if you come into contact with
any such liquid.
• Always dispose of leaking batteries immediately: they can
cause burns or other types of injuries.
• Do not attempt to recharge non-rechargeable batteries:
they might explode.
• The use of rechargeable batteries is not recommended, as
the toy may not work properly.
• If using rechargeable batteries, remove them from the toy
before recharging them.
• Do not leave the product out in the rain; water infiltrations
will damage the electronic circuit.
CARE AND MAINTENANCE
FABRIC COMPOSITION
FABRIC COVER: All new materials. Outer cover: 100% polyes
-
ter. Padding: 100% polyester.
INSERT PILLOW: All new materials. Outer cover: 100% polyes
-
ter. Padding: 100% polyester.
BLANKET: All new materials. 100% polyester.
• This product requires periodic maintenance.
• The cleaning and maintenance operations must only be car
-
ried out by an adult.
• Periodically inspect the bouncing chair to check for broken,
torn or missing parts: if this is the case, do not use it.
• Please refer to the care label for instructions on cleaning the
chair.
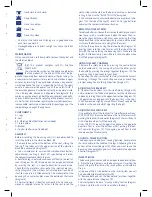
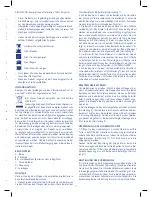
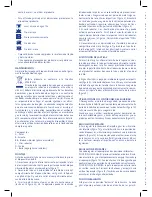
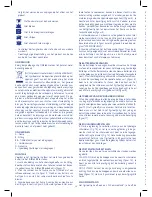
Hand wash in cold water
Do not bleach
Do not use a dryer
Do not iron
Do not dry clean
• Check that the fabric and stitching are in good condition
each time you wash it.
• Prolonged exposure to direct sunlight can cause the fabric
to fade.
MAINTENANCE
Only use water and a soft damp cloth to clean the toy bar and
the vibration block
(GB) This product complies with EU Directive
2002/96/EC.
The crossed bin symbol on the appliance indicates
that the product, at the end of its life, must be dis
-
posed of separately from domestic waste, either by taking it to
a separate waste disposal site for electric and electronic appli
-
ances or by returning it to your dealer when you buy another
similar appliance. The user is responsible for taking the appli
-
ance to a special waste disposal site at the end of its life. If
the disused appliance is collected correctly as separate waste,
it can be recycled, treated and disposed of ecologically; this
avoids a negative impact on both the environment and health,
and contributes towards the recycling of the product’s materi
-
als. For further information regarding the waste disposal serv
-
ices available, contact your local waste disposal agency or the
shop where you bought the appliance.
COMPONENTS
A - Legs
B- Seat
BB - Vibration block (batteries not included)
C – Insert pillow
D- Blanket
E – Toy bar (batteries not included)
ASSEMBLY
Before assembling the bouncing chair it is recommended to
insert the battery in the vibration block BB.
1. Remove the cover from the bottom of the seat, sliding the
fabric off the tubes until the upper section of the vibration
block BB is uncovered (diagram 1).
2. Use a screwdriver to unscrew the vibration block battery
compartment, see Diag.2. Insert a D type battery and screw
the compartment cover back in place.
3. Rotate the legs A outwards and connect them to the seat as
seen in Diagram 3A, 3B. This operation can only be performed
by inserting the legs in a specific direction to avoid errors.
Check that the metal pin sticks out of the relative holes cor
-
rectly (Diagram 4). You will hear it click into place; try and pull
it out to make sure it is fitted correctly. Also make sure that the
bouncing chair carrier handles are on the outside of the frame
(diagram 5).
4. The insert pillow C is ideal for use from birth and can be re
-
moved as required later on. To fasten it to the seat, insert the
crotch strap into the slots on the booster cushion, as indicated
in Diag. 6. See also the “INSERT PILLOW” paragraph.
5. Use a screwdriver to unscrew the battery compartment (dia
-
gram 7) at the side of the toy (E) . Insert 3 x AA type batteries
and screw the compartment cover back on.
REPLACING THE BATTERIES
To replace batteries: Loosen the screw on the battery compart
-
ment cover with a screwdriver and open the cover. Then re
-
move the spent batteries and fit new ones, ensuring that they
have been fitted in the correct polarity (as shown on the prod
-
uct), close the battery cover, and tighten the screw.
6. Fasten the toy bar on using the relative hooks (Diagram 8),
inserting them into the side fixtures, with the side of the toy
bar with the screws facing the bouncing chair. Make sure the
toy bar is fitted correctly: you will here it click into place when
it is fitted properly (diagram 9).
USING THE SAFETY HARNESS
7. Release the safety harness by pressing the centre button
on the buckle and at the same part extract the other part of
the buckle by pressing the prongs together (diagram 10). The
bouncing chair is now ready for your baby
When using the chair, remember to always fasten the harness
threading it through the crotch strap and always check they
are tight enough and in the right position (diagram 11).
ADJUSTING THE BACKREST
8. To adjust the backrest, turn the side fixtures (diagram 12)
and raise/lower it to the desired position: lock the side fixtures
in place by turning them in the opposite direction (diagram 13).
This operation can be done with the baby sitting in the chair.
It will however be slightly more difficult. Always support the
backrest with one hand whilst adjusting the height.
ADJUSTING THE FOOT-REST
It is possible to adjust the foot-rest to two different positions:
LOW POSITION: press the buttons on the front fixtures whilst
pushing the foot-rest downwards (diagram 14). You will hear it
click into place when it is fitted correctly.
HIGH POSITION: repeat the operation above in the opposite
direction. That is, press the buttons whilst pushing the foot-
rest upwards (diagram 15). Once again you will hear it click
into place when fitted correctly.
ROCKING CHAIR POSITION
The bouncing chair also has a “rocking” position. Simply rotate
the rear handle, in the middle of the legs A, following the indi
-
cations of the arrow (diagram 16). When you want to use the
bouncing chair normally again, turn the handle in the opposite
direction (diagram 17).
INSERT PILLOW
The bouncing chair comes with an octopus shaped insert pillow.
9. Place the insert pillow C on the bouncing seat, inserting the
crotch strap into the slots on the insert pillow, as indicated in
Diag. 6..
Inside one of the 2 side pockets on the insert pillow you will
find a double pile blanket (diagram 18).
10. Remove both ends of the blanket and join them together
with the velcro fastener (diagram 19).
The insert pillow also has a “crunchy crinkly” section (diagram
20) and a starfish with a rattle to entertain the baby.
Содержание SDRAIETTA BOUNCER
Страница 4: ...4 C D 3B 4 B B D E C BB A 2 3A E 1 5 6 CLICK ...
Страница 5: ...5 7 8 9 10 13 16 17 11 14 12 15 CLICK CLICK CLICK 18 ...
Страница 45: ...45 ереме ируется p3 твенно устрой оторый ля ног м ручки блоке ерхней разря новые делии пора SA ...
Страница 46: ...46 3A 3B ...
Страница 47: ...47 ...


