SKU 93632
For technical questions, please call 1-800-444-3353.
English
Page 9
2.
Squeeze the Power Switch. The tool will start to operate. The speed of the drill will increase as the Trigger
is squeezed tighter. The speed will lessen as the Trigger is released.
3.
Stop the tool by releasing the Power Switch.
Note: The Forward/Reverse button is located behind the Trigger (46). When button is pushed in on the left side
of housing (see photo on cover), the drill will rotate in Reverse (counterclockwise). When button is
pushed in on the right side of housing, the drill will rotate in a Forward clockwise direction.
Reversing Direction of the Drill
Caution: Never attempt to change direction of the drill while the drill is operating. Always wait for the drill
to come to a complete stop before changing direction.
1.
Most drill bits are designed to work while turning in a clockwise direction. When drilling, confirm that you
are using a standard type drill bit and that the drill is set to turn in the correct direction.
2.
Occasionally the drill bit may become stuck, or it is desired to reverse drill direction.
3.
To reverse direction, wait for the drill to come to a complete stop. Press the Forward/Reverse button as
described in the Note above.
Using the Heavy Duty Drill
Before using the Heavy Duty Drill, be sure all work area safety precautions are being observed. Be sure
to wear ANSI-approved eye protection.
NOTE: The motor will heat up as it is used. To avoid motor burn out, do not use continually for more than
20 minutes at a time. Allow the tool to cool down for at least 10 minutes before resuming work.
1.
Place the drill tip on the work piece, and Start the tool.
2.
Apply light pressure on the tool to help it drill into the workpiece. Do not overload the tool. If the speed
noticeably slows down, release some downward pressure from the drill.
3.
When the hole has been drilled, remove the bit from the hole and release pressure from the Trigger,
allowing the tool to stop operating.
4.
Unplug the tool and store it in a safe place.
MAINTENANCE AND INSPECTION
1.
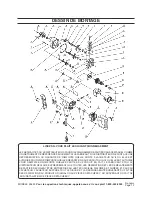
The Armature (25) and Stator (29) comprise the main part of the tool. Protect these electrical components
from moisture or oil intrusion.
2.
Inspect the Carbon Brushes (34) regularly. Replace them is they are more than 1/3 worn or are chipped or
cracked. When handling them, be careful not to damage them. To reduce wear after inspection, replace
them in exactly the same way as they were removed.
3.
Regularly inspect all components and fasteners to be sure they are properly installed, not damaged, and
tight. Tighten any loose parts. Repair or replace any damaged components.
4.
If the tool is damaged or does not function properly, take it to a qualified service technician.
5.
Clean the tool after each use, and store it properly. Keep it out of reach of children and other unauthorized
persons. Protect it from moisture and corrosive materials.


