SKU 66745
For technical questions, please call 1-800-444-3353.
Page 15
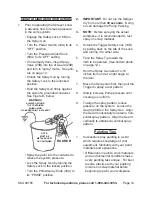
It is critical that the surface be
•
properly prepared before painting.
It will be difficult to achieve a satis
-
factory painted surface if the original
surface is dirty, rough, or wet.
Properly mask your paint surface
•
from any adjacent areas you do not
want to paint. Use drop cloths or
other covers to protect adjacent ob
-
jects from paint dust or overspray.
In most cases, it is best to move the
2.
paint spray from side to side, overlap-
ping the previous paint. To paint in
this way, the spray pattern should be
set to vertical.
It is important to prevent excess
•
paint at the beginning and end of
each stroke. Holding the Spray
Gun away from the workpiece,
squeeze the Trigger to start the
spray. Then move the Spray Gun
in to within 14-16 inches of the
workpiece. Move the Spray Gun
smoothly across the workpiece,
keeping a consistent distance. At
the end of each stroke, pull the
Spray Gun away from the work-
piece as you release the Trigger.
As you work, observe the way the
•
paint accumulates on the work
surface. It is more important to
maintain a good paint surface than
to form an opaque (thick) paint coat.
You can always apply a second coat
to get the coverage you want. If
the surface is ruined, however, you
will have to start over with surface
preparation.
If the surface does not smooth out
•
in a few seconds after applying the
paint, your paint mixture is probably
too thick. Thin your paint slightly
and test on scrap material. If the
paint goes on very thin and threat-
ens to run, stop spraying immediate-
ly. Add more paint to your mixture
to thicken the paint. Test on scrap
material before resuming work.
maintenance and
serVicing
Procedures not specifically
explained in this manual must
be performed only by a qualified
technician.
tO preVent
seriOus injury
FrOm accidental
OperatiOn: prior to cleaning,
lock the trigger. turn the
pressure adjust Knob (69a) to
“OFF”. then open the prime/
spray Knob (39a) to release
all pressure.
prior to storing or performing
service and repairs, turn the power
switch (33a) of the sprayer to its
“OFF” position, unplug the sprayer
from its electrical outlet, and
relieve pressure from the system.
tO preVent seriOus injury
FrOm tOOl Failure:
do not use damaged equipment. if
abnormal noise or vibration occurs,
have the problem corrected before
further use.
BeFOre each use
1.
, inspect the
general condition of the Airless Spray-
er. Check for loose screws, misalign-
ment or binding of moving parts,
cracked or broken parts, damaged
electrical wiring, damaged hoses, and
any other condition that may affect its
safe operation.


