CPI User Manual for eConnect PDU and Electronic Lock Kit 02/20.v2 18
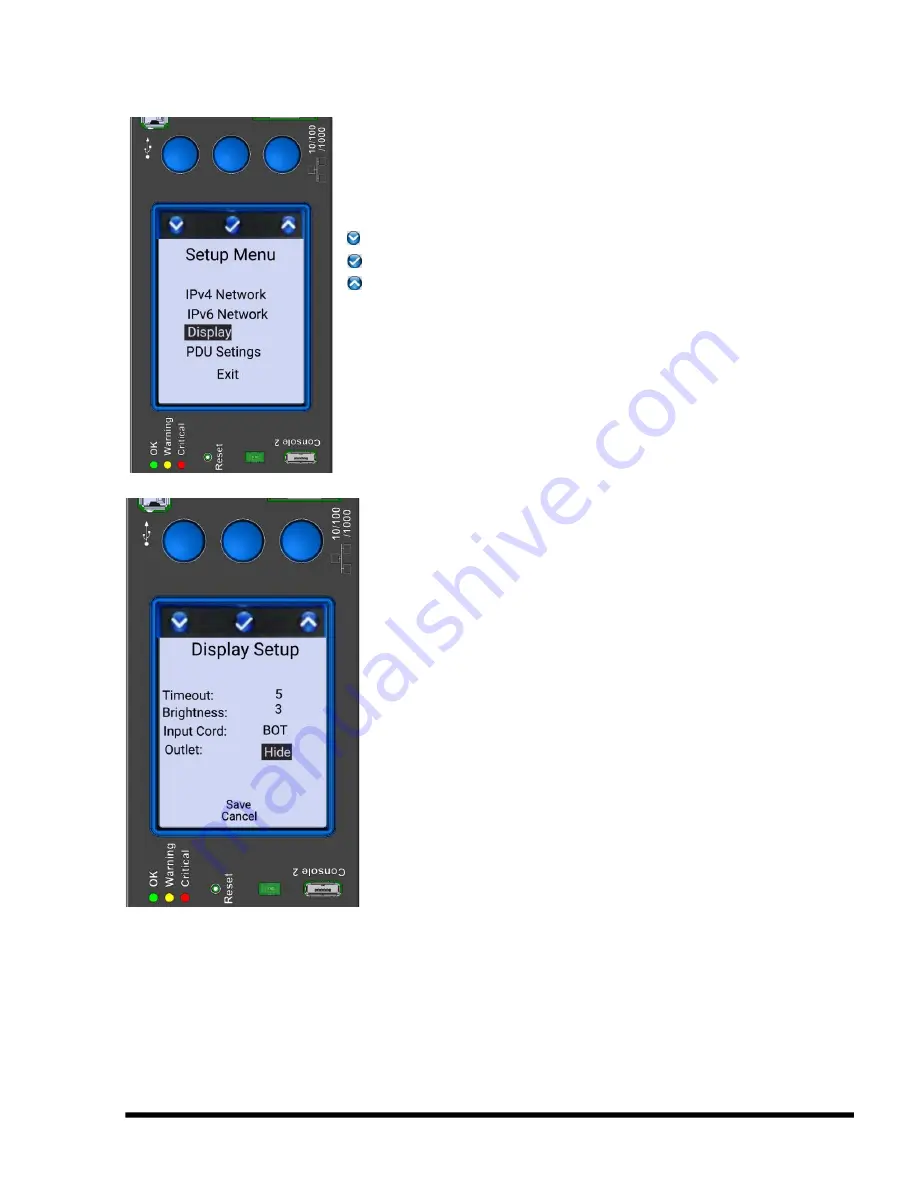
Display Setup
Return to the Setup Menu.
Use the Left button to select Display.
Click on middle button
to set up the Display
Click on:
Left button
to traverse down the list of options
Middle button
to select the highlighted option
Right button
to traverse up the list of options
Timeout
– Controls how long display remains on (minutes)
Brightness
– Controls display brightness (1-9)
Input Cord
–
Controls display orientation (TOP or BOT
input cord location). This rotates the display 180° so that it
can be easily read regardless of whether the PDU is
mounted with the cord toward the top or bottom of the
cabinet. The display will automatically orient on power up.
Outlet
–
Controls whether individual outlet current
measurements are displayed (Show or Hide) on Monitored
Pro and Switched Pro models
Select
Save
or
Cancel
to exit this screen
Save
updates IP information immediately
Cancel
makes no changes to the setup
Содержание eConnect EA Series
Страница 63: ...CPI User Manual for eConnect PDU and Electronic Lock Kit 02 20 v2 63...
Страница 65: ...CPI User Manual for eConnect PDU and Electronic Lock Kit 02 20 v2 65...
Страница 69: ...CPI User Manual for eConnect PDU and Electronic Lock Kit 02 20 v2 69...
Страница 71: ...CPI User Manual for eConnect PDU and Electronic Lock Kit 02 20 v2 71 HiD iClass Card...
Страница 72: ...CPI User Manual for eConnect PDU and Electronic Lock Kit 02 20 v2 72 MiFare Classic Card...
Страница 74: ...CPI User Manual for eConnect PDU and Electronic Lock Kit 02 20 v2 74 APPENDIX 2 Command Line Interface...


