Page 1
MDS-6 Installation Manual
Recommended Cables:
Category-5 or Category-3 (4 twisted pair stranded), shielded or unshielded.
16-4 or (2) 16-2 speaker cables.
To keep the installation process as simple as possible for first time users, please follow these simple steps. These instructions
are written assuming that you are using the MCS-1 controller. If you have the MCS-2 controller, there are additional steps
involving teaching the controller IR commands.
Please refer to the MDS-6 Reference Manual for additional steps.
Section 1:
I
nstallation of Controller Cables and Speaker Cables.
1. Controllers should be located between wall studs. Locating controllers beside light switches is OK as long as the Cat-5 cable
and AC wiring (romex) are not bundled together and in their own box. Each controller cable is home run between each zone
and the MDS-6 unit.
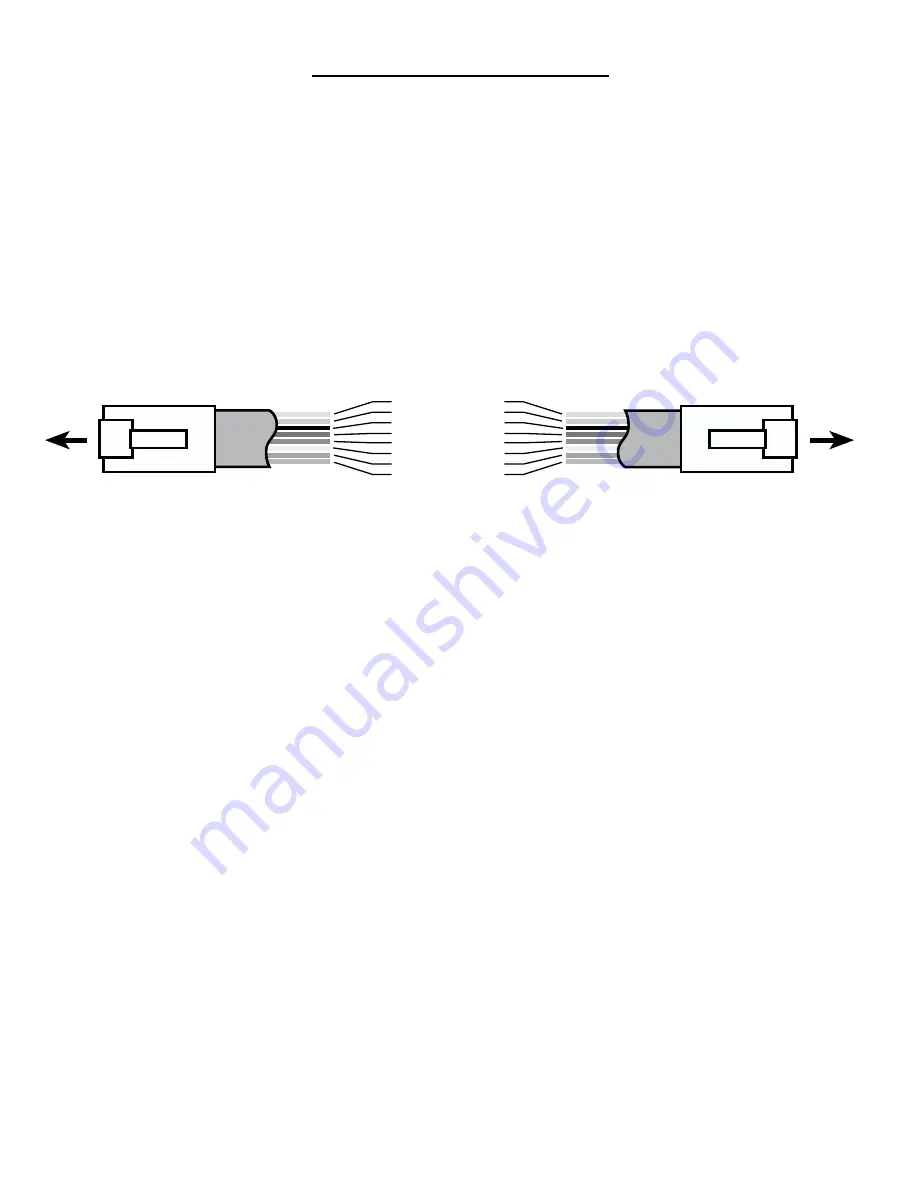
2. The ends of the Cat-5 cable are terminated with RJ-45 crimp on connectors (unkeyed). The proper wiring is the same as
standard phone company wiring: pin 1 to pin 8, pin 2 to pin 7, pin 3 to pin 6, pin 4 to pin 5,...etc. (see d i a g r a m b e l o w ). Cable
testers are available from your local distributor.
3. Each speaker cable is also home run between each speaker and the MDS-6 unit. One pair of 6-8 ohm speakers per zone
is recommended. The speaker wires are attached to the 4-pin terminal blocks located in the back of the MDS-6 (these are easily
removable for ease of installation). Please observe proper polarity and left-right orientation.
4. All controllers and speakers can then be hooked up to their proper cables
but not to the MDS-6 yet.
Section 2:
Installation of the MDS-6 unit.
1. Place the MDS-6 in its permanent position in a rack or on a shelf. This unit generates large amounts of heat so please
remember to allow for adequate ventilation.
The top clearance must be at least 1 inch (25mm).
2. Attach the AC power cord to the unit and plug the cord into the wall.
At this point the Power switch should be off. The Standby LED should be on but the On LED should be off.
3. Select which device will be source 1 and attach the audio outputs from it to the audio in terminals on the MDS-6 using standard
RCA cables. At this point place this source into play so that you will have audio to monitor.
4. Now attach the speaker connector for zone 1 to the MDS-6 (you decide which room will be which zone, and you should write
these assignments down for future reference).
5. Now press the Power button in to activate the MDS-6 (you should now see both the ON and the STANDBY LEDS lit
on the MDS-6).
6. Now attach the zone 1 controller to the zone 1 controller input on the MDS-6.
7. Now go to zone 1 controller. If the source 1 equipment is playing you should see two LEDs lit on the controller. The red led
that indicates the MDS-6 is powered up and 1 of 6 green LEDs that indicate which source is selected (if the green LEDs are
not lit, try pressing the mute button. This button mutes the source audio in this particular zone). Select the proper source by
pressing the corresponding button on the left of the controller. Press the volume up button to adjust the listening level.
8. If you do not have sound, please review steps 1-7. If you do have audio please attach the remaining sources to the MDS-6.
If all sources are playing, you should now be able to select whichever source you want to listen to. A more detailed description
of controller operation is in the MCS-1 operation manual.
9. Once you are comfortable with the operation of one zone you can proceed with wiring the other zones in the same way.
Section 3: Infrared Repeater:
The MDS-6 has a built-in IR repeater system. This works by sensing any IR commands issued by an IR remote in any zone
and passing it through the Cat-5 cable and into the MDS-6 unit. From here it goes to the emitter outputs on the back of the
MDS-6. Any IR emitters plugged into the jacks will flash depending on which source is selected and which jack that emitter is
plugged into. The jacks labeled Source Outputs 1-4 will flash only when that particular source is selected. The jacks labeled
Sum Outputs A-D will flash when any source is selected.
1. Plug an emitter into Source 1 emitter out. Attach the flasher end to the face of the source equipment, making sure to cover
the IR sensor window.
2. You should now be able to select Source 1 on the keypad and, using that sources remote, control that source. Make sure
you point the remote at the rectangular IR window located at the top of the MCS-1.
*SPECIAL NOTE*
IR receivers in consumer electronics operate at different modulation frequencies. The most common is 38khz (kilohertz).
However, some satellite receivers operate at 56khz and some equipment operates at 32khz. Still other equipment is not even
compatible with this type of IR system. The MDS-6 will work with the majority of consumer audio/video equipment. However,
some models will not operate. It is up to the installer to determine compatibility.
WIRING DIAGRAM FOR REMOTE ROOM CONTROLLERS
TO MCS-1 or MCS-2
DATA LINE C
DATA LINE B
DATA LINE A
+5 VOLT D.C.
GROUND
IR SIGNAL
CLONE
STANDBY
TO MDS-6
1
2
3
4
5
6
7
8
8
7
6
5
4
3
2
1
RJ-45
PLUG
RJ-45
PLUG
CLIP
CLIP
Содержание CHANNELPLUS MDS-6
Страница 3: ......
Страница 8: ...MDS 6 INSTALLATION MANUAL TM...


