background image

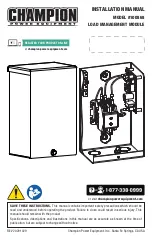
100868 - LOAD MANAgEMENT MODULE

INSTALLATION

9

INSTALLATION

Unpacking

Carefully unpack the LMM. Inspect closely for any damage that might have occurred during shipment. Check 
that all packing material is completely removed from the LMM prior to installation. Handle LMM carefully 
when installing. Do not drop. Always protect the LMM against impacts and against construction grit and 
metal chips. Never install an LMM that is damaged.

Tools Required

Not Included

3/16 in. Flat Screwdriver

Mounting Hardware

P2 Phillips Screwdriver

Line Voltage Wire

1/4" Blade Screwdriver

Conduit

Pliers

Fittings

Wire stripper

Twist on wire connectors – as needed

Installing the Load Management 
Module (LMM)

The enclosure is NEMA type 3R rated and is suitable 
for indoor/outdoor installations.

General guidelines:


Mount to a surface that can support the 2.3 lb. 
(1050 g) weight of the module that adheres to 
all local codes


The enclosure must be installed with NEMA type 
3R hardware and connections when mounted 
outdoors


Level and plumb the module enclosure to 
prevent deformation.


Never install the module where any corrosive 
substance may come in contact with the 
enclosure.


Protect the module at all times against 
excessive moisture, dust, dirt, lint, construction 
grit and corrosive vapors.

1.  Remove the cover.

2.  Break the lead to the load using code 

compliant wire.

Содержание 100868

Страница 1: ...ns important safety precautions which should be read and understood before operating the product Failure to do so could result in serious injury This manual should remain with the product Specificatio...

Страница 2: ...y Instructions 4 Safety and Dataplate Labels 6 Safety Symbols 6 Controls and Features 7 Electrical Installation Diagram 8 Installation 9 Unpacking 9 Installing the Load Management Module LMM 9 Connect...

Страница 3: ...rt has been made to ensure the accuracy and completeness of the information in this manual at the time of publication and we reserve the right to change alter and or improve the product and this docum...

Страница 4: ...bligation or liability whatsoever The manufacturer cannot anticipate every possible circumstance that might involve a hazard The warnings in this manual tags and decals affixed to the unit are therefo...

Страница 5: ...tor manual section to locate aXis ENGINE CONTROL module lock out procedure CAUTION Consult with your Local municipal State and National electrical codes for proper mandatory wiring methods NOTICE Impr...

Страница 6: ...l entretien DANGER PELIGRO DANGER K 485 Colors LPN 1973 L SF Rev A Size 50 x 25mm Artwork Notes dius 2mm safe margin to be printed trate Revision Changes to Champion Power Equipment The contents are...

Страница 7: ...remote LMM turns power on and off to the load by using a Power Line Carrier PLC signal The unit is capable of controlling resistive loads up to 50 Amps when wired into the load circuit The load shoul...

Страница 8: ...100868 Load Management Module Controls and Features 8 Electrical Installation Diagram HOME PANEL METER GENERATOR UTILITY LOAD MANAGEMENT MODULE AIR CONDITIONER ATS 200 50...

Страница 9: ...nduit Pliers Fittings Wire stripper Twist on wire connectors as needed Installing the Load Management Module LMM The enclosure is NEMA type 3R rated and is suitable for indoor outdoor installations Ge...

Страница 10: ...nd L2 Line to the top of the contactor relay LINE connections 4 Connect the L1 and L2 lines to the bottom of the contactor relay LOAD connections 5 Connect the ground to the ground terminal 6 Max Torq...

Страница 11: ...are the designated ON or OFF position settings for the DIP switches DIP Switches 1 3 on LMM circuit board are used to communicate with the ATS circuit board and create a hierarchy Switches 1 2 are us...

Страница 12: ...utage 6 Return UTILITY circuit breaker to the ON position ATS will transfer load back to utility and generator will cool down and shut off 7 Repeat this process if LMM units are added or removed from...

Страница 13: ...ONS Unit Enclosure type NEMA 3R indoor outdoor Amperage 50A resistive Nominal Voltage 240VAC Height 8 2 in 208 mm Width 5 2 in 133 mm Depth 3 8 in 97 mm Torque Neutral Bar 18 10 AWG Cu9Al 35 in lb 14...

Страница 14: ...he life of a part or the equipment as a whole Installation Use and Maintenance This warranty will not apply to parts and or labor if the product is deemed to have been misused neglected involved in an...

Отзывы: