11-10
CFMOTO
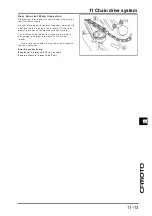
Engine Sprocket Installation
Ÿ
Replace the sprocket washer and axle cotter pin.
Ÿ
Install the engine sprocket [A] so that
“
OUTSIDE
”
letters face outward.
Ÿ
Apply molybdenum disulfide oil solution to the
threads of the output shaft and seating surface of
the engine sprocket nut.
Ÿ
After torquing the engine sprocket nut, bend the
one side of the washer [B] over the nut.
NOTE
○
Tighten the engine sprocket nut while applying
the rear brake
Ÿ
Tighten
:
Engine Sprocket Nut
:125N
·
m(12.7kgf
·
m,
92ft
·
lb)
Speed Sensor Bracket Bolts
:
9.8N
·
m(1.0kgf
·
m,87in
·
lb)
Ÿ
Install the engine sprocket cover, and tighten the
bolts.
Ÿ
Adjust the drive chain slack after installing the
sprocket (see Drive Chain Slack Adjustment in the
Periodic Maintenance chapter).
Ÿ
Bend the end of axle cotter pin surely after tighten-
ing the axle nut (see Rear Wheel Installation in the
Wheels/Tires chapter).
Rear Sprocket Removal
Ÿ
Remove the rear wheel (see Rear Wheel Removal
in the Wheels/Tires chapter).
Ÿ
Remove the rear sprocket nuts [A].
Ÿ
Remove the rear sprocket [B].
Rear Sprocket Installation
Ÿ
Install the sprocket facing the tooth number mark-
ing [A] outward.
Ÿ
Tighten the rear sprocket nuts.
Rear Sprocket Nuts torque
:59N
·
m(6.
0kgf
·
m,44ft
·
lb)
Ÿ
Install the rear wheel (see Rear Wheel Installation
in the Wheels/Tires chapter).
W arn ing
Do not let the break disc or chain
sprocket down to the ground or the
sprocket or disc will be damaged. Put a
heel block under the ground to avoid
touch the gr ound.
Содержание CF400-A 2017
Страница 1: ...WWW CFMOTO COM Service manual CF400 A CF650 7B ...
Страница 2: ...All right reserved ZHEJIANG CFMOTO POWER CO LTD Sep 2017 WWW CFMOTO COM ...
Страница 31: ...2 13 2 Periodic maintenance 2 Special tool ...
Страница 74: ...3 2 CFMOTO Exploded View ...
Страница 109: ...3 EFI System 3 37 3 Intake temp and pressure sensor Wiring diagram 1 ECU 2 Intake temp and pressure sensor ...
Страница 148: ...4 2 Exploded view ...
Страница 153: ...4 Cooling system 4 4 7 Special tool Bearing pressor Oil seal pressor ...
Страница 168: ...5 3 5 Engine top 5 Exploded view ...
Страница 170: ...5 5 5 Engine top 5 Exploded view ...
Страница 174: ...5 9 5 Engine top 5 Special tool and sealant ...
Страница 203: ...6 2 CFMOTO Exploded view ...
Страница 206: ...6 Clutch 6 5 6 Clutch holder Sealant Special tool and sealant ...
Страница 210: ...6 Clutch 6 9 6 Clutch Cover Disassembly Remove Oil Seal A Needle Bearings B Remove the oil level gauge A Clutch Cover ...
Страница 220: ...7 2 CFMOTO Exploded view ...
Страница 222: ...7 4 CFMOTO Engine Oil Flow Chart ...
Страница 223: ...7 Engine Lubrication system 7 5 7 Engine Oil Flow Chart ...
Страница 237: ...8 2 CFMOTO Exploded view ...
Страница 245: ...9 3 9 Crankshaft Transmission 9 Exploded view ...
Страница 247: ...9 5 9 Crankshaft Transmission 9 Exploded view ...
Страница 284: ...10 2 CFMOTO Exploded view ...
Страница 287: ...10 Tire and rim 10 10 5 Special tool Bearing pressing tool Screw driver Jack Jack accesesories Bearing remover ...
Страница 300: ...11 2 CFMOTO Exploded view ...
Страница 314: ...12 Breakingsystem 12 3 12 Exploded view Front break ...
Страница 316: ...12 Breakingsystem 12 5 12 Exploded view Rear break ...
Страница 319: ...12 8 CFMOTO Special tool Retainer plier Hand tester Jack Jack accessories ...
Страница 335: ...13 2 CFMOTO Frontfork exploded view ...
Страница 337: ...13 4 CFMOTO Rearswing armexplodedview ...
Страница 350: ...14 2 CFMOTO Exploded view ...
Страница 372: ...16 4 CFMOTO Parts location 1 2 3 4 5 6 7 8 9 10 11 12 13 14 15 16 17 18 19 20 22 21 ...
Страница 402: ...Ignition System Ignition system wiring diagram 16 34 CFMOTO ...
Страница 409: ...16 Electrical system 16 41 16 Starting system Starting system wiring ...


