background image

Page 17

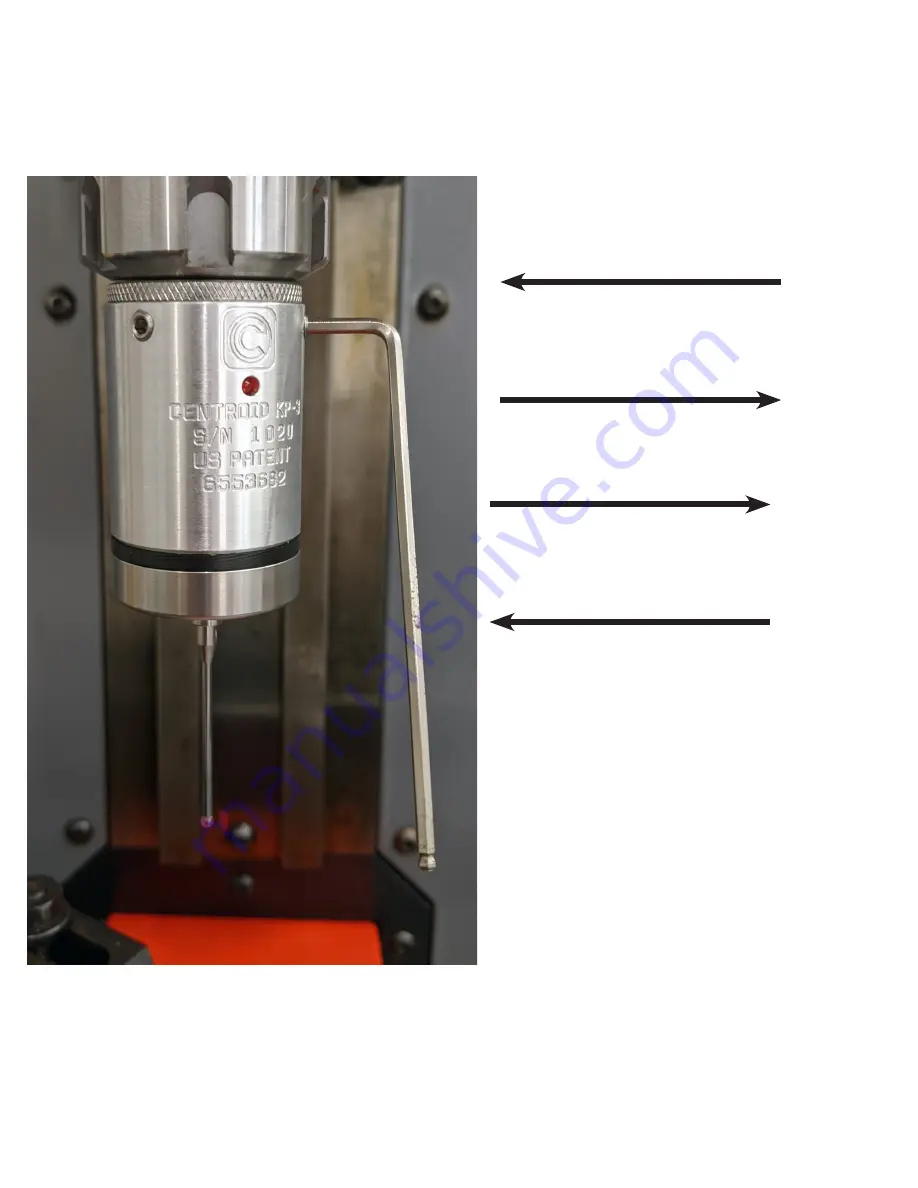
STEP 5: Repeat steps 4 until no run-out of the tip is visible on the dial indicator needle. If a set screws become too tight 

before you have finished the adjustment, do not force them, instead loosen the setscrew that corresponds with the highest 

reading on the dial indicator,  and tighten the set screw at the lowest reading.  Only adjust a set screw when it is directly 

above the indicator finger. This way you can see the full effect of the adjustment you are making. The final small adjust

-

ment is best made by loosening a set screw at the high point of run-out.

Turning the set screw Clockwise moves the 

screw in,

Causing the probe body to move out.

Turning the set screw Counter Clockwise 

moves the screw out, 

causing the probe body to move in.

Содержание Acorn KP-3

Страница 1: ...mponents Connections to Acorn KP 3 CNC Touch Probe 2 Specifications 7 Acorn KP 3 Wizard Setup 9 Stylus Installation 11 Testing 13 Styli Diameter Pre travel Calculation centroid_kp 3_cnc_touch_probe pd...

Страница 2: ...KP 3 Description Probing directions X Y Z Unidirectional repeatability 2 sigma 0 00006 1 5 micron Practical use on good milling machine 0005 Probe deflection force X Y 3 ounce minimum with 40mm stylu...

Страница 3: ...le KP 3 to Acorn schematic download Mounting The standard 1 2 mounting shank design allows installation in commonly available tool holders Other mount ing options can be created by the user and instal...

Страница 4: ...32 hex RED LED indicator light Off ready ON Probe Tripped End Cap Stylus mount boss 2 5 mm carbide stem ruby tipped stylus Concentricity adjustment screws 3 32 hex Electrical connector Probe Body Styl...

Страница 5: ...3 2 1 HB COM H10 OUTPUT STATES ACORN 190201 Acorn_rev3 has REMOVABLE green screw terminal blocks Acorn_rev2 has FIXED green screw terminal blocks How to tell the difference between Acorn_rev2 Acorn_re...

Страница 6: ...6 KP 3 Probe cable connector Connect the 1 8 mini jack connector into the KP 3 body and fully seat the plug Incorrect probe cable connector is not fully seated Correct probe cable connector is fully s...

Страница 7: ...Page 7 KP 3 Acorn Wizard configuration 1 Select the Probe input type from the drop down box 2 click and drag ProbeDetect and ProbeTripped to inputs 6 and 7 respectively...

Страница 8: ...P 3 Acorn Wizard configuration 1 Select the Probe menu under Touch Devices 2 Choose KP 3 in the Probe Type Drop down menu 3 Press Write Settings to CNC control and follow the instructions on the scree...

Страница 9: ...2 Thread the stylus into the probe stylus mount boss using fingers only The shoulder of the stylus threads should meet the face of the stylus mount boss with minimal twisting effort If there is a gap...

Страница 10: ...s KP 3 Stylus installation Stylus Removal If the stylus must be removed insert a pin in the stylus wrench hole and slowly loosen The stylus mount boss will turn with the stylus and begin to retract in...

Страница 11: ...e KP 3 plugged in make sure Plug is FULLY seated manually trigger the probe by gently touching the stylus to trigger the probe observe the Probe state indicator graphic on the screen If the probe is c...

Страница 12: ...y test a Touch Probe using a Automatic probing cycle 1 With the KP 3 plugged in make sure Plug is FULLY seated and in the machine tool Turn down the Feed Rate Over ride to 10 or 20 2 Position the Touc...

Страница 13: ...be ready to use Probe Alignment Center the Ball of the stylus so that it is concentric with the spindle Using an indicator and the three run out adjustment screws on the body of the probe we will adju...

Страница 14: ...align ment procedure should be repeated to ensure accuracy The user should also repeat the alignment procedure if the unit is dropped or receives any sudden external shock It is good practice to perio...

Страница 15: ...wrench counter clockwise while watching the dial indicator reading decrease Turn the hex wrench clockwise and watch the dial indicator reading increase Run Out 0 STEP 3 Rotate the spindle by hand with...

Страница 16: ...the indicator finger in the counter clock wise direction the dial indicator will show the reduction in the run out Stop loosening this set screw and tighten the set screw that was nearest the low run...

Страница 17: ...ndicator and tighten the set screw at the lowest reading Only adjust a set screw when it is directly above the indicator finger This way you can see the full effect of the adjustment you are making Th...

Страница 18: ...lash and input latency also contribute to the need to calibrate the stylus diameter Each stylus has its own Stylus diameter calibration procedure 1 Fixture a precision ring gauge on the machine tool T...

Страница 19: ...and with the measured diameter in step 3 is displayed as 9199 99996 9199 08006 The calibrated probe tip diameter with probe pretravel compensated for is 08006 for this sty lus 4 Test the new Probe Di...

Страница 20: ...measuring the ring gauge diameter with a good probe and a machine in good condition The Probe Stylus Calibration is now complete Probe is ready for probing and digitizing Each different Stylus will ha...

Страница 21: ...just the stylus tip run out after checking the Angular Alignment Note Special cases When the stylus tip and stem are nearly the same diameter this adjustment is critical to keep the stem from contacti...

Страница 22: ...H SIGNAL BLK RED INPUT 772 TT DETECT HOUSING PN 5918 BLU TO PIN 3 COM SUPPLY WHT HEAT SHRINK PN 1783 1 LONG SHIELD CABLE 22 GA8 COND SHIELDED PN 1754 TERMINALS PN 5511 6 1 2 BLK WHT HOUSING PN 1008 7...

Страница 23: ...IMP PIN PN 982 Circular SHIELD DRAIN Barrel 7 STRAIN RELIEF PN 879 BLK NOT USED 5 PIN 3 5mm STEREO AUDIO BARRELPLUG W CORD RED TP1 TP2 TP7 TP4 TP6 SHIELD BLK YEL to pin 2 BUSS to pin 3 BUSS to pin 5 2...

Страница 24: ...t 121 0 020 0 508 Grid digitizing minimum Z pullback 122 0 0002 0 005 Grid digitizing dead band distance 123 0 Radial clearance move 151 0 Repeatability tolerance 153 1 Probe protection enable 155 0 P...

Страница 25: ...of the KP 3 is 5 to 24 Vdc If you cut into the 3 5 mm Barrel plug cord there are three wires as seen below KP 3 wiring and use with other CNC controls The KP 3 itself has an output signal is that of a...

Страница 26: ...trigger event not during a probing cycle it will only allow the user to jog in the opposite direction that the probe was moving when the contact occurred to prevent the user from accidentally moving...

Страница 27: ...bOMSKYuy6g KP 3 Setup Video https youtu be a6LVseKI7do Acorn Probe and TT setup Manual https www centroidcnc com centroid_diy downloads acorn_documentation acorn_probe_setup pdf All Acorn Documentatio...

Отзывы: