background image

GB 5

GB

1.


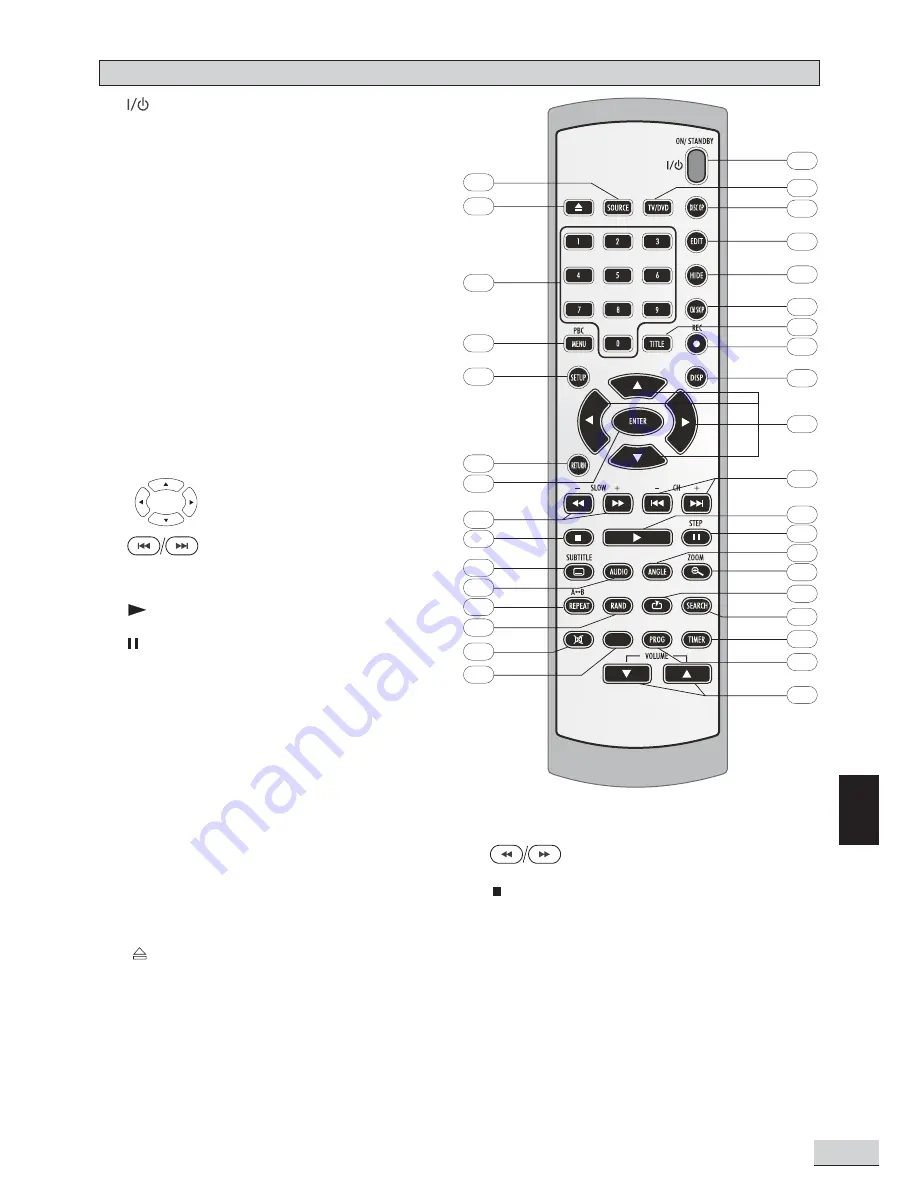
ON/STANDBY

toggles between Power On

and Standby mode

2.

TV/DVD  

switches between TV and DVD mode

3.

DISC OP

  Enters DVD+R / DVD+RW operation

menu include Disc info, finalize, Title delete,
Erase disc, Lock disc, Compatible disc

4.

EDIT

  Enters the DVD+R / DVD+RW disc editing

menu

5.

HIDE

  Makes the entry and exit points for

hidden chapters

6.

CM SKIP

 Jumps 30 seconds to skip commercial

during DVD playback mode

7.

TITLE

Turns on DVD title menu

8.

REC

  Starts DVD+R recording with the current

source input

9.

DISPLAY 

calls up the display menu and disc

navigation menu

10.

(Active Navigation keys) a

dvan

ce

in indicated directions for making
selections in menus

11.

 (

- CH +

)   1) skips backward/forward

in DVD mode to the previous or next chapter/
track, 2) channel up/down in TV mode

12.


starts playing

13.


pauses playing

14.

ANGLE   

switches between different view angles

(depends on disc), should press ENTER to
confirm selected angle.

15.

ZOOM

 selects zooming options when playing

DVD by pressing repeatedly

16.

BOOKMARK  

bookmarks the current position

17.

SEARCH

  Enters the search time

18.

TIMER

  enters the Timer setup menu

19.

PROGRAM

  programs CD / VCD playback

20.

VOLUME

   adjusts volume level

21.

SOURCE

    switches between AV1/AV2 signals

22.  

opens or closes the disc tray

23.

0 - 10 

(Numeric keys)   uses for direct

numerical entry or selections of title, chapter,
track, tuner channel and time input

24.

MENU / PBC

  turns on DVD disc menu; PBC on/

off in VCD mode

25.

SETUP

 enters or exits the setup menu

26.

RETURN   

exits or returns to the previous

REMOTE CONTROL

menu

27.

ENTER

 confirms selection or starts playing

28.

    1) starts backward or forward search

2) starts slow forward or backward in Pause mode

29.


stops disc playback or recording

30.

SUBTITLE    

switches between different subtitles

31.

AUDIO  

switches between different audio output

mode

32.

REPEAT   

toggles between different repeat mode

A - B

repeats a selection from point A to point B

33.

RANDOM

   starts playback in random order

34.

MUTE   

mutes or unmutes audio output

35.

V-SYSTEM  


switches between the different video

output modes

1

2
3

4

5

6
7
8

9

10

11

12
13
14
15
16
17
18
19

20

21

22

23

25

26
27

28
29

30
31
32
33

35

34

24

V-SYSTEM

Содержание 1611304

Страница 1: ...1611304 DVD R VIDEO RECORDER USER MANUAL...

Страница 2: ...GB 1 GB SAFETY To ensure proper use of this product please read this owner manual carefully and retain for future reference Should the unit require maintenance con tact an authorized service location...

Страница 3: ...uch as vases shall be placed on the apparatus Disc Tray Keep your fingers well clear of the disc tray as it is closing It may cause serious personal injury Burden Do not place a heavy object on or ste...

Страница 4: ...ROUBLE SHOOTING Problems GB29 Disc You Can Play GB30 IMPORTANT SAFETY INSTRUCTIONS This product incorporates copyright protection technology that is protected by method claims of certain U S Patents a...

Страница 5: ...des They play for approximately 8 HOURS DVD discs have Titles and Chapters There can be several Titles on one disc and each Title can contain several Chapters Titles and Chapters are numbered e g Titl...

Страница 6: ...repeatedly 16 BOOKMARK bookmarks the current position 17 SEARCH Enters the search time 18 TIMER enters the Timer setup menu 19 PROGRAM programs CD VCD playback 20 VOLUME adjusts volume level 21 SOURC...

Страница 7: ...es to TV mode 15 REC start recording 16 Infra Red Receiver Window 17 VFD Display Area 1 Power On Off 2 Disc Tray 3 opens or closes the disc loading tray 4 skips to previous chapter track in DVD mode 5...

Страница 8: ...dicator 4 Channel Chapter indicator 5 Dolby Digital Indicator 6 Dolby Pro Logic II Indicator 7 DTS Indicator 8 Progressive Scan On Indicator 9 Recording Indicator 10 Record Quality Indicator HQ SP EP...

Страница 9: ...S Video Input For connecting video signals from the corresponding S Video out jacks on the auxiliary items e g TV VCR or satellite receiver 7 Composite Video Output For connecting to TVs Most TVs have...

Страница 10: ...GB 9 GB 11 Digital Coaxial Output For connecting an external equipment that has digital audio input jack such as a CD recorder REAR PANEL 1 2 3 4 10 8 6 5 11 7 9...

Страница 11: ...ER TO CH2 4 OR P16 REMARK FOR RF LOOP THROUGH FUNCTION CONNECT UP BOTH ANTENNA CABLE TV ANTENNA CABLE Indoor antenna Indoor antenna Outdoor antenna Outdoor antenna Or TV ANTENNA CABLE Included TV ANTE...

Страница 12: ...urround Rear speaker right surround Rear speaker left surround Rear speaker left surround Front left speaker Front left speaker Front right speaker Front right speaker TV Center speaker Center speaker...

Страница 13: ...ABLE INCLUDED S VIDEO OUT S VIDEO OUT S VIDEO CABLE NOT INCLUDED FOR BETTER PICTURE S VIDEO CABLE NOT INCLUDED FOR BETTER PICTURE Audio Out Audio Out Video Out Video Out R L S VIDEO OUT S VIDEO OUT S...

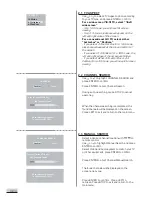
Страница 14: ...rm 1 4 SUBTITLE Use or to highlight SUBTITLE and press ENTER Use or to select the subtitle language you prefer press ENTER again to confirm 2 Video Setup Use the Active Navigation keys to select Video...

Страница 15: ...ENTER to start Channel Search During auto searching press STOP to cancel searching When the channel searching is completed the found channels will be displayed on the screen Press LEFT to exit and re...

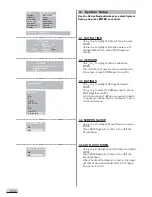
Страница 16: ...e Active Navigation keys to select Audio Setup and press ENTER to confirm 3 1 DRC Use or to highlight DRC and press ENTER Use or to turn DRC on off press ENTER again to confirm This controls the Dynam...

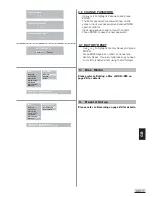
Страница 17: ...R Use or to highlight Screen Saver and press ENTER Press ENTER again to confirm turn on off the Screen Saver 4 5 AUTO SHUTDOWN Use or to highlight Auto Shutdown and press ENTER Press ENTER again to co...

Страница 18: ...This is an initial set and you need to confirm it before start using the DVR player 6 Record Setup Please refer to Recording on page 24 for details Enter new password __ __ __ __ __ x x Enter password...

Страница 19: ...s to select Schedule and press ENTER to confirm Entry Freq Start Length Source Quality 01 __ __ __ __ __ __ __ ______ __ 02 __ __ __ __ __ __ __ ______ __ 03 __ __ __ __ __ __ __ ______ __ 04 __ __ __...

Страница 20: ...resume playback from the stop point Press twice to stop completely press ENTER PLAY or to start playback from the beginning 6 Skipping Press to skip forward or backward a chapter or track Press ENTER...

Страница 21: ...settings Press RETURN to return to the info bar Press DISPLAY again to exit the info bar Note The info bars are not displayed on one screen you must use or to access different fields of info bars For...

Страница 22: ...whole section of disc or track by selecting Disc or track Select Off to return to normal playback Timer Display Mode Select to choose an available timer display mode with or The Timer will display wit...

Страница 23: ...t button use or to switch to the selected track list press ENTER to delete your selection To play CD program use or to highligh Play icon and press ENTER to start playing To clear all seletions you ha...

Страница 24: ...remote control to access angle viewing funtion Press ANGLE the angle info bar is displayed on the screen Press ENTER to confirm Use or to switches among different angles Press ENTER to confirm select...

Страница 25: ...ation keys to select and change the date and time as per your local clock Press ENTER to save the change TV Recording Standard To record TV programs you should do the TV channel searching first In TV...

Страница 26: ...ult Press LEFT to retrieve Press STOP to cancel Recording Make connections illustrated as page 11 13 Insert a recordable DVD RW or DVD R into the disc tray If it s a new disc the system will format it...

Страница 27: ...ghlight the title you desire and press ENTER or PLAY to start playing the title you selected External Signals Timer Record Following the first three steps as above external signals recording Get acces...

Страница 28: ...itle To edit the selected title name Note Press STOP twice to exit the Title Index Menu press TITLE to show the Title Index Menu again Chapter Editing During Title playback press EDIT to display the c...

Страница 29: ...ompatible with the other DVD player you should go on FINALIZE operation Erase Use or to highlight the Erase icon and press ENTER The system will start erasing the disc Show chapter To show the current...

Страница 30: ...6418 NO POWER Check if the on off button on the front of the player is set to on Check if power plug of the mains cord is properly connected Check if there is power at the AC outlet by plugging in ano...

Страница 31: ...her applications on the computer to ensure reliable CD R disc recording JPEG Files CD R and CD RW with JPEG files Certain JPEG files including progressive JPEG files cannot be read by this player MP3...

Страница 32: ...g your Product for commercial or institutional purposes voids this warranty Are There Other Warranties There are no express warranties other than those expressed herein Neither the sales personnel nor...

Отзывы: