background image

TM

Connecting To TalkSwitch

Quick Guide

copyright centrepoint technologies inc. 2002

www.talkswitch.com

TalkSwit

ch

System

Connecting Devices

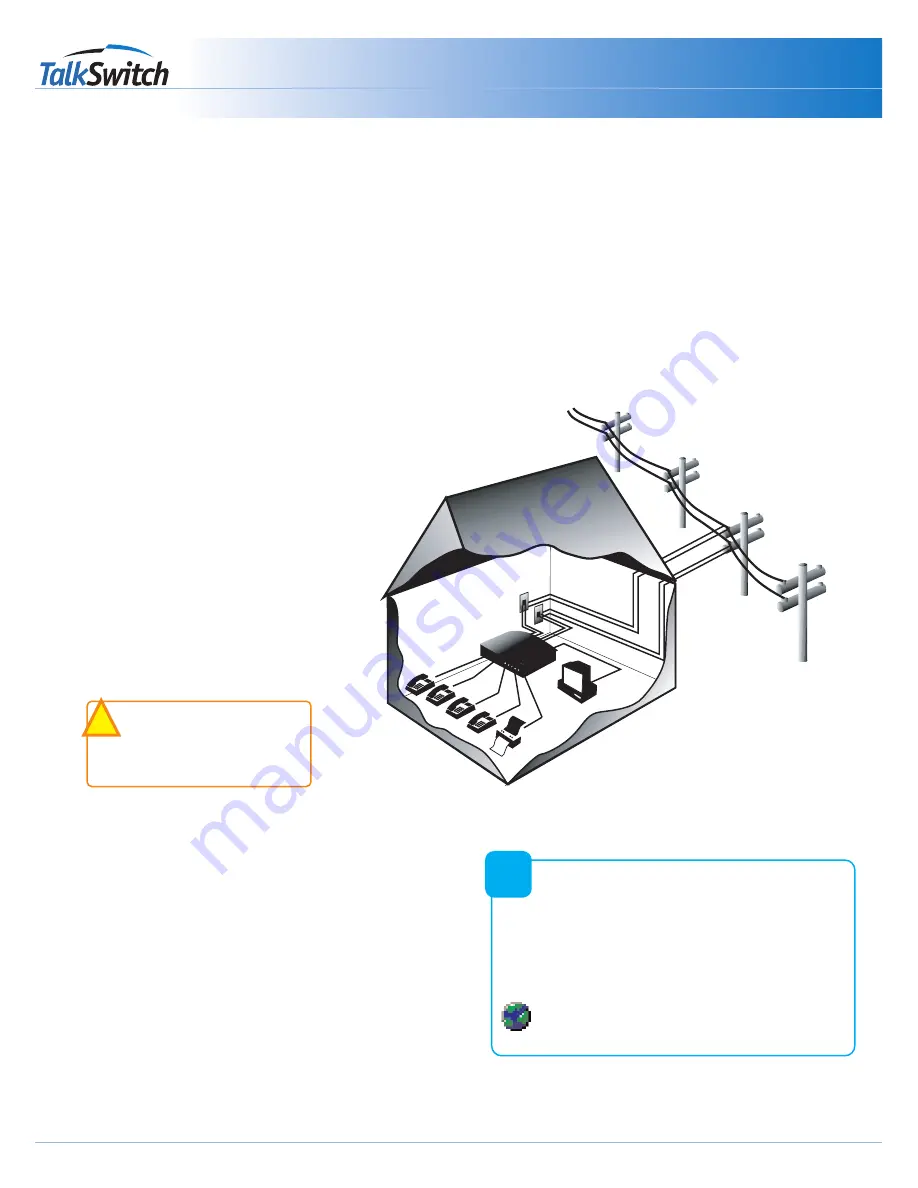
Move the TalkSwitch to a location where it can be attached to incoming telephone lines and your telephone devices.
Connect phone devices as shown in the “Suggested Configuration” above; this corresponds to the TalkSwitch default
settings.
The TalkSwitch does NOT need to remain connected to the computer - only when changing configuration settings.

Here are a few things to consider when placing your TalkSwitch

Location

Check out the location of electrical wall outlets and
telephone jacks in the room.  Place TalkSwitch close
enough to these items using your AC Adapter and
telephone cords.

Incoming Phone Lines

Choose a convenient wall jack for you to attach
to your TalkSwitch.  Then connect your telephone
lines in the following manner:

- Connect the first incoming phone line to L1/L2.
- Connect the second to L2.

TalkSwitch 48-LS users can then connect
remaining lines to L3/L4 and L4.  If you have 2
lines out of 1 phone jack, you can plug it into the
L1/L2, and L3/L4 jacks.

Local Extensions

Plug each internal telephone into
lines E1 through E8 consecutively.
Make sure the fax line has been put
into E8 or E3.

It is a good idea to connect E4

to a phone, as this is the only

extension that will work during a
power failure.

Music on Hold

Connect the 1/8" (3.5mm) phono connector from the
music jack to an audio source such as CD player, radio,
tape player, or computer sound card.

!

!

Need Help Wiring?

Need help wiring your house or small office?

Not sure where all the jacks are, or what colours of
wires you should use?  Need to do some rewiring?

Make the most out of your phone system with our
“Home Wiring” Quick Guide.

On the web?  

Click here

to see the “Home

Wiring” Quick Guide.

?

?

Содержание TalkSwitch 24

Страница 1: ...Panel Connections Connecting Devices Connecting Phones Wiring Phones Single Line Phones Two Line Phones option 1 Two Line Phones option 2 Multi Line Phones Connecting Faxes Choose a Method Dedicated F...

Страница 2: ...48 models only receptionist Suggested Configuration TalkSwitch Back Panel Connections from the TalkSwitch to all your telephone devices and computer you need not add all of the phones The fax machine...

Страница 3: ...to your TalkSwitch Then connect your telephone lines in the following manner Connect the first incoming phone line to L1 L2 Connect the second to L2 TalkSwitch 48 LS users can then connect remaining l...

Страница 4: ...tensions instead the software determines which incoming lines are routed to what local extensions By default all incoming lines ring all local extensions How you change the default software settings w...

Страница 5: ...All functionality including transferring calls forwarding calls and voicemail is handled by the TalkSwitch Even the most basic of phones therefore once connected to the TalkSwitch will inherit the ca...

Страница 6: ...both extensions 111 and 112 An incoming call will ring both phone lines at the same time Instead configure incoming line 1 to ring extension 111 and line 2 to ring extension 112 Wiring Diagram Phone W...

Страница 7: ...ne lines at the same time Instead configure incoming line 1 ring extension 111 and line 2 ring extension 112 Wiring Diagram Phone Wiring TM Connecting Phones Quick Guide copyright centrepoint technolo...

Страница 8: ...112 113 and 114 An incoming call will ring all four phone lines lines 1 through 4 at the same time Instead configure incoming line 1 to ring extension 111 line 2 to ring extension 112 etc Wiring Diag...

Страница 9: ...ch both phones and faxes are on dedicated lines After installing TalkSwitch the fax machine remains on its own dedicated line All incoming telephone lines are shared by the remaining office phones Ded...

Страница 10: ...t Step 5 Click Here 2 Dedicated Fax Line Connect the fax machine directly to the incoming fax line The remaining incoming lines can be connected to TalkSwitch via jacks L1 to L4 The local phone extens...

Страница 11: ...for the incoming fax Activate the Line Enter the Line telephone number This is the number people use to call your office Enter the distinctive ring number on this line This is the number people will...

Страница 12: ...hould correspond to the settings you have made in the software Saving TalkSwitch Settings Step A Step B Incoming Telephone Line with Distinctive Ring Fax Machine Connected to Extension 118 Incoming Te...

Страница 13: ...ty s extension or dial 0 for a receptionist Follow these steps Step A Choose Advanced then Call Handling and then Auto Attendants See Arrows Step D 3 Step C 2 1 Follow these settings as shown Set up a...

Страница 14: ...e configured in succession Select Mode 1 Different Mode Scheduling can be configured later Choose to Play Auto Attendant 1 immediately This will pick up all incoming calls on line 1 and play your reco...

Страница 15: ...C 1 4 1 5 Step D Step E Step F Incoming Telephone Line Fax Machine Connected to Extension 118 Incoming Telephone Line Fax Machine Connected to Extension 113 TalkSwitch 24 fax connections TalkSwitch 4...

Отзывы: