Page 10
For technical questions, please call 1-800-444-3353.
SKU 44506
OPerating instructiOns
read the entire iMPOrtant
saFetY inFOrMatiOn
section at the beginning of this
manual including all text under
subheadings therein before set up
or use of this product.
tool set up
tO PreVent
seriOus injurY
FrOM acciDental
OPeratiOn:
turn the Power switch of the tool
to its “OFF” position and unplug
the tool from its electrical outlet
before performing any
inspection, maintenance, or
cleaning procedures.
tO PreVent seriOus injurY:
DO nOt OPerate With anY
guarD DisableD, DaMageD,
Or reMOVeD.
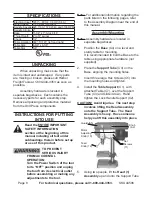
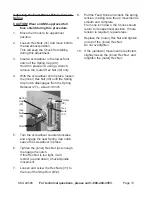
setting the Depth scale to Drill to a
Specified Depth
Make sure the Drill Press is OFF and
1.
Power Cord (33) is unplugged. Secure
the workpiece to the Table.
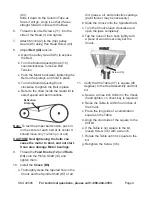
Hex
Nuts
(30)
Spring
Cap
(29)
Notch
Hex
Nuts
(31)
Pointer
(32)
2.
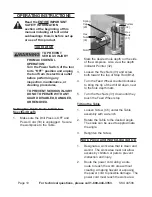
Mark the desired hole depth on the side
of the workpiece. Also view the depth
indicator Pointer (32).
Loosen the Hex Nuts (31) and screw
3.
both toward the top of Stop Rod (B12).
Turn the Feed Wheel counterclockwise
4.
to bring the tip of the drill bit down, next
to the hole depth mark.
Turn the Hex Nuts (31) down until they
5.
touch the Feed Wheel stop.
tilting the table
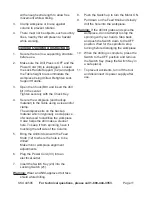
Loosen Screw (C6) under the Table
1.
assembly with a wrench.
Rotate the Table to the desired angle.
2.
The scale can be used to approximate
the angle.
Retighten the Screw.
3.
Work Piece and Work area set up
Designate a work area that is clean and
1.
well-lit. The work area must not allow
access by children or pets to prevent
distraction and injury.
Route the power cord along a safe
2.
route to reach the work area without
creating a tripping hazard or exposing
the power cord to possible damage. The
power cord must reach the work area

