Tool Post Adjustment
Loosen the lever shown in (B) of figure 11,
the adjust the tool post position. Once the
adjustment is made, re-tighten the lever. To
replace the work cutter, loosen the screws
(A) with the allen wrench provided.
Automatic Feeding
Adjust the feeding direction selector to the
direction you desire. Press down the handle
(A) in figure 12, and continue with the
automatic feeding procedure. When
feeding, never try to change the feeding
direction.
Threading
Select the feeding direction selector to the
thread direction desired. Then press down
handle (A) in figure 12 by matching the right
calibrations on the thread dial indicator (B)
and continue with the automatic threading
procedure. When threading, never try to
change the direction.
Operation
1. Use the chuck to hold the workpiece
firmly (figure 13 below). Then, use the rolling
center to fix the other end. If you change the
rolling center to drilling chuck you start your
drilling immediately.
2. Use the chuck to hold the workpiece firmly
and cutter to start lathe’s face cutting (figure
14). The edge of the cutter must be at the
same height as the center.
SKU #33684
Page 9
Содержание 33684
Страница 12: ...SKU 33684 Page 13...
Страница 13: ...SKU 33684 Page 14...
Страница 14: ...SKU 33684 Page 15 Parts Diagram...
Страница 16: ...SKU 33684 Page 16...
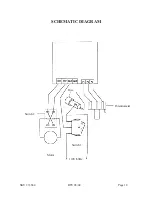
Страница 18: ...SKU 33684 Page 18 Potentiometer Switch2 Motor Switch1 110V 60Hz Fuse SCHEMATIC DIAGRAM REV 08 04...


