Operation
1. Never force the tool or attachment to
do the work of a larger industrial tool. It is
designed to do the job better and more
safely at the rate for which it was intended.
2. Do not carry the tool by its power
cord.
3. Always unplug the cord by the plug.
Never yank the cord out of the wall.
4. Always turn off the machine before
unplugging.
IF THERE IS ANY QUESTION
ABOUT A CONDITION BEING
SAFE OR UNSAFE, DO NOT
OPERATE THE TOOL!
Grounding Instructions and
Voltage Warning
Common household current is 110-120 volts.
As long as your tool is rated from 110-120V
there will be no complications using this tool
with household receptacles. NEVER try to
plug a 110-120V tool into a 220-240V circuit
(or vice-versa) or serious complications and
possible serious injury to the operator can
occur. The plugs have different shapes to
prevent this.
Check to see if your tool has a two or three-
prong plug. If your tool has a two-prong plug,
you may proceed past the next paragraph. If
your tool has a three-prong plug, please continue
reading the following precautions and instruc-
tions.
If the tool or machine has a three-prong plug, the
third (round) prong is the ground. Plug this cord
only into a three-prong receptacle. Do not
attempt to defeat the protection the ground wire
provides by cutting off the round prong. Cutting
off the ground will result in a safety hazard and
void the warranty.
If a three-prong receptacle is not available, you
may use an adapter, but you must then connect
the green ear on the adapter to the outlet.
Unscrew the center screw of the outlet cover
and put the screw through the green ear. Plug
the adapter’s two prongs into the outlet, and
replace the center screw. Now plug the tool or
machine into the adapter.
DO NOT MODIFY THE PLUG IN ANY
WAY. IF YOU HAVE ANY DOUBT, CALL
A QUALIFIED ELECTRICIAN.
Extension Cords
____________________________________________________________________________
If your tool is double insulated and has a two-prong plug, you may use either a two or three-prong
extension cord. If your tool has a grounded, three-prong plug, you must use a three-prong extension
cord with three-prong receptacles. Only use rounded jacket extension cords listed by the Under-
writers Laboratories (UL). If you are using the tool outdoors, use an extension cord rated for
outdoor use (signified by “WA” on the jacket).
The extension cord must have a minimum wire size depending on the amperage of the tool and the
length of the extension cord. The size is determined by its AWG (American Wire Gauge) rating. The
smaller the gauge, the greater the cable’s capacity. The amount of cords used does not matter. Total
length determines the minimum AWG rating. Every cord must meet the AWG rating. Use the chart
below to determine what AWG rating is required for your situation. Cord length is rated in feet.
Harbor Freight Tools can supply UL listed and outdoor rated extension cords in multiple AWG
ratings if needed.
SKU #33684
Page 3
AMP
Total Extension Cord Length In Feet
Rating
25’
50’
75’
100’
125’
150’
175’
200’
0.0 -10.0
18
18
16
16
14
14
12
12
10.1-13.0
16
16
14
14
14
12
12
12
13.1-15.0
14
14
12
12
12
12
12
--
15.1-18.0
14
12
12
12
12
12
--
--
Содержание 33684
Страница 12: ...SKU 33684 Page 13...
Страница 13: ...SKU 33684 Page 14...
Страница 14: ...SKU 33684 Page 15 Parts Diagram...
Страница 16: ...SKU 33684 Page 16...
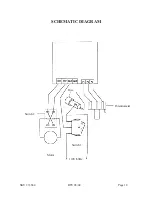
Страница 18: ...SKU 33684 Page 18 Potentiometer Switch2 Motor Switch1 110V 60Hz Fuse SCHEMATIC DIAGRAM REV 08 04...


