CenterVue COMPASS Скачать руководство пользователя страница 13

CenterVue 

COMPASS Operating Manual 

Pag. 13 di 53


7. 

WARNINGS AND PRECAUTIONS 

The following precautions are important for the device safety: 


  Federal laws (US) restrict this device to sale by or  on the order of a physician or a 

properly licensed practitioner. 

  Clinical interpretation of the results is restricted to licensed eye care practitioners. 

  A  device  specific  training  is  required  for  any  operator  to  become  able  to  use  the 

system. 

  Do not open the Device: this could lead to electric shocks or damage to the system. 

  Do not use the Device in the event that the cover or other parts of the device have 

been removed. 

  Only  technicians  authorized  by  CenterVue  may  service  the  Device.  Centervue 

cannot be held responsible for system safety should  the device be opened, repairs 
carried out, third 

parties’ software be installed, or parts be replaced by un authorized 

persons. 

  Do not expose the Device to water: this could lead to fire or electric shock. 

  Stand clear from moving parts during operation. 

  The  Device  is  supplied  with  an  earth  ground  by  means  of  a  protection  conductor 

contained  inside  the  power  supply  cable.  Before  turning  on the  system,  make  sure 
the power supply socket is correctly grounded to avoid the risk of electric shock. 

  The  Device  must  NOT  be  used  in  an  oxygen  rich  environment  or  in  presence  of 

flammable anesthetics. 

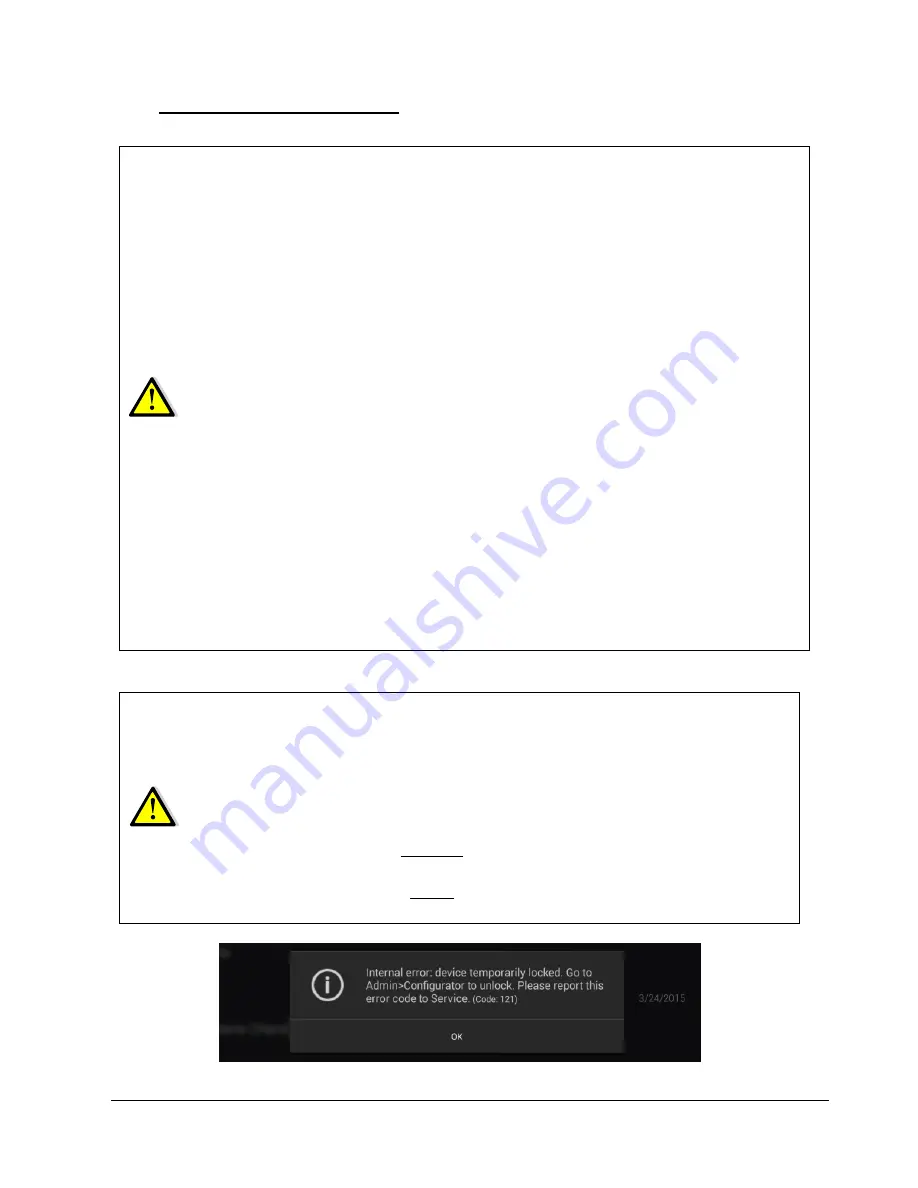
  In case an unexpected hardware condition occurs during use, an error message may 

appear (see for example Fig. 10) and COMPASS may become temporarily locked. It 
is possible to reset this condition by letting the device re-initialize: refer to par. 12.4 
for  the  complete  procedure.  If  the  error  condition  persists,  please  contact  an 
authorized service center. 

 
The following precautions are important to prevent use errors: 


  The Device must be placed in a room which is not exposed to adverse chemical-

physical conditions, such as the presence of sulfur, salt, dust, direct sunlight, lack 
of ventilation, high humidity, sudden temperature drops or peaks. The safety and/or 
effectiveness  of  the  instrument  cannot  be  guaranteed  if  these  conditions  are  not 
fulfilled. 

  Since  the  Device  measures  a  light  sensitivity  at  the  threshold  of  perception,  it 

needs to be operated in a dark environment. 

  The  Device  needs  to  be  operated  under  the  following  environmental  conditions: 

temperature: 10 - 40 C° (50 

– 104 F°); humidity (max): 90% not condensing. 

  The  Device  needs  to  be  stored  under  the  following  environmental  conditions: 

temperature: 0 

– 60 C° (32 - 140 F°); humidity (max): 90% not condensing. 


Fig. 10 

– Example of error message  

Содержание COMPASS

Страница 1: ...CenterVue COMPASS Operating Manual Pag 1 di 53 Operating Manual ...

Страница 2: ...PREPARING THE SUBJECT 12 7 WARNINGS AND PRECAUTIONS 13 8 NOTES FOR THE OPERATOR 14 9 PERFORMING THE TEST 15 9 1 Adding a new patient 15 9 2 Searching for an existing patient 15 9 3 Selecting an existing patient 15 9 4 Root test vs follow up test 17 9 5 Initiating a new root test 17 9 6 Initiating a new follow up test 17 9 7 Choosing test parameters 18 9 8 Before starting 19 9 9 During the test 20 ...

Страница 3: ...GS 40 12 1 Launching the Configurator 40 12 2 Password change 40 12 3 Backup 41 12 4 Restore 42 12 5 Device lock reset procedure 42 12 6 Password change for Remote Viewer 42 12 7 Network configuration 43 12 8 Shared folder configuration 44 13 SYSTEM SHUTDOWN 44 14 TECHNICAL SPECIFICATIONS 45 15 CLEANING 46 16 TROUBLESHOOTING 47 17 ELECTROMAGNETIC COMPATIBILITY 48 18 DISPOSAL 53 ...

Страница 4: ... similarly to SLO systems to capture color as well as red free images of superior quality In addition a high resolution live image of the retina obtained using infrared illumination is available throughout the test COMPASS is intended for use as a diagnostic device to aid in the detection and management of glaucoma The device is indicated for measuring retinal sensitivity for a quantitative assess...

Страница 5: ...TEM 2 1 The device Fig 1 COMPASS Fig 2 Detail of connectors side Fig 3 Patient push button 3 USB ports Ethernet port Main switch 12V power inlet Tablet example Digital joystick not used Forehead rest contacting part Chin rest contacting part Patient Side ...

Страница 6: ...touch display More than one model is supported the tablet power switch volume control and USB port are located on the tablet frame and vary depending on the specific model Patient data and images are not stored on the tablet The tablet must be used only together with COMPASS and in accordance with the instructions provided in this manual Use of the tablet for other purposes as well as any modifica...

Страница 7: ...CenterVue COMPASS Operating Manual Pag 7 di 53 3 LABELS ...

Страница 8: ...ta Manufacturing Date year month of production Electronic and electric devices must be recycled Refer to Instruction Manual CE mark the device complies with the essential requirements of the European Medical Devices Directive 93 42 EC Type B Applied Part Non ionizing radiation ME EQUIPMENT that include RF transmitters Generic Warning Important information ...

Страница 9: ...the supports provided for the tablet and the joystick see par 5 1 below connect the patient push button cable to the connector located underneath the device connect the power supply provided with the unit to the power inlet see Fig 2 place the tablet on its support and connect it using the cable to the left most USB port place the joystick on its support connect it using the cable to any of the fr...

Страница 10: ... device As an example Fig 7 shows the holes to be used for the left side mount depicted in Fig 5 to fix the supports use holes marked 1 and 2 for the tablet and those marked 3 and 4 for the joystick Other configurations can be chosen based on a user s preferences The joystick is not used in the current software version Fig 5 Tablet mounted on the left side of the device Fig 6 Support for the table...

Страница 11: ...pressed for approximately 4 secs wait for the boot process to complete and the Login screen to appear see Fig 8 Fig 8 Login screen From the drop down menu select Doctor type the password2 and click on Login If login is successful the Home screen opens see Fig 9 To modify the password see par 12 2 Fig 9 Home screen 2 To find out the password please contact an authorized Centervue representative ...

Страница 12: ...ined should be patched Before starting the test please check the following subject should sit in a comfortable position with the fore head and chin in firm contact with the rests height of the table and chair should be adjusted so that the subject can comfortably place her his chin on the corresponding rest the subject s head should be vertical not tilted forward backward chin rest should be posit...

Страница 13: ... power supply socket is correctly grounded to avoid the risk of electric shock The Device must NOT be used in an oxygen rich environment or in presence of flammable anesthetics In case an unexpected hardware condition occurs during use an error message may appear see for example Fig 10 and COMPASS may become temporarily locked It is possible to reset this condition by letting the device re initial...

Страница 14: ...a characterized by a roughly circular shape and by outgoing incoming vessels fixation fixating the ability of a subject to stare at a specific point in space and specifically the Device internal fixation target alignment the action of moving the top part of the system so that its optics are aligned with a subject s pupil focusing the compensation by means of internal optics of a subject s spherica...

Страница 15: ...t exam performed 9 1 Adding a new patient To create a record for a new patient click on and the Patient Editing screen will open see Fig 12 Type the last name first name and select the date of birth mandatory fields optionally select the gender and type a unique code of your choice Then click OK to save or Cancel to abort 9 2 Searching for an existing patient To search for an existing patient clic...

Страница 16: ...tient has been selected in any of the above ways the Patient Record screen opens see Fig 13 and provides information on the selected patient whose name is shown at the top left corner of the screen See par 10 for full details on how to review a patient s data Fig 13 Patient Record screen ...

Страница 17: ... in the follow up test with their position in the corresponding root test and ensure high precision of the results Operators shall be fully aware of the difference between root tests and follow up tests With COMPASS any follow up test is associated with its root test any root test is identified by this graphics it is not possible to generate a progression report using only root tests it is only po...

Страница 18: ... screen Fig 14 Test parameters selection screen ZEST vs 4 2 Zippy Estimation by Sequential Testing ZEST is an adaptive Bayesian method for determining sensitivity measures ZEST similarly to SITA algorithms allows to reduce examination time while maintaining accuracy In terms of threshold ZEST estimates are on average 0 9 dB higher than those found with the 4 2 staircase similarly to SITA algorithm...

Страница 19: ...tion target for non foveal stimuli single green circle 9 8 Before starting Following are some hints to maximize the effectiveness of the test check that the lens cap has been removed check that the room is sufficiently dark subject should sit in a comfortable position with the forehead and chin in firm contact with the corresponding rests Subject s head should be vertical and not tilted Chin rest ...

Страница 20: ...re of the BS test 5 Detect fixation Locate center of fixation Subject should look steadily at fixation target once this step has completed the system will stop and wait for confirmation click the forward arrow to proceed with next step 6 Fovea Test Measure sensitivity at the fovea Subject should look at the center of the 4 green dots and press the button when she he sees a white spot if not proper...

Страница 21: ...gnment and auto focusing processes EYE NOT FOUND Please make sure patient head is not tilted eye is open wide EYE TOO FAR LEFT Please make sure patient head is well centered in front rest and not tilted EYE TOO FAR RIGHT Please make sure patient head is well centered in front rest and not tilted EYE TOO LOW Please raise chin rest until alignment process restarts EYE TOO HIGH Please lower chin rest...

Страница 22: ...old values and structure retinal appearance Compensation of eye movements takes place before and during projection of a certain stimulus In absence of this mechanism shifts in eye position occurring at the time of projection of a certain stimulus even in healthy subjects easily produce artifacts in VF results Regular operation of the eye tracking is indicated by a GREEN frame surrounding the retin...

Страница 23: ...t the height of the chin rest 4 Live retinal image with stimuli allows the operator to monitor progress Fovea should stay at the center of the gray cross Seen stimuli are shown as filled dots The stimulus being projected is shown as an empty circle 5 Tracking status circular colored frame see par 9 11 6 Elapsed test time 7 Completed stimuli over total being projected test proceeds slow at the begi...

Страница 24: ...free retinal image with overlaid actual test locations examined eye OD OS date and time the test was performed type root follow up pattern used and number of test locations actually completed incomplete tests will show in yellow threshold algorithm ZEST or 4 2 staircase duration minutes seconds focus index average pupil size during test False Negatives index FN False Positives index FP Blind Spot ...

Страница 25: ... record any data 3 display the tests performed at a specific date 4 display the tests performed within a certain sequence identified by a root test 5 open Exam Review screen see Fig 21 6 start a new root test do not use this button if you wish to start a follow up 7 start a follow up test within the specified sequence of tests 8 go back to patient list screen Fig 20 Patient Record screen 1 2 3 4 5...

Страница 26: ...on to switch ON OFF fundus mode convention default on See information box below at this regard 7 Image tools including blue green red filters used to display individual color channels and gamma correction used to enhance image brightness The green channel provides the red free image The red green and blue filters are only available when reviewing color images These tools do not alter the original ...

Страница 27: ...e start Index shows the number of positive responses obtained over the total number of such BS projections If this index exceeds 25 the number will show in red indicating possibly poor reliability COMPASS provides one additional parameter to be considered when assessing the reliability of a certain test Average pupil size shows the average pupil diameter throughout the test If this index is below ...

Страница 28: ...na and viceversa Therefore the two conventions differ in that they flip the results vertically COLOR CONFOCAL IMAGING SLO systems are superior to conventional fundus cameras in many ways as they exploit a confocal imaging principle which limits the effect of backscattered light from deeper layers and provides enhanced image quality in terms of contrast and resolution Another advantage of SLO syste...

Страница 29: ...er do the same for the second exam then click the button found in the top right corner of the screen this will open the Dual image review screen see Fig 24 The most recent image is always displayed on the left To change the type of image being displayed infrared color or red free in both halves of the screen click the button found in the top right corner this will open the panel shown in Fig 25 Fi...

Страница 30: ...BS A progression report is created using a root test and its follow up tests Only tests that derive from the same root can be included At least two tests shall be included The earliest test included in the report acts as the baseline Either root or follow up tests can act as baseline This screen provides the following functions 1 Include exclude a certain test from the report 2 Show Progression Re...

Страница 31: ...the address bar where sssss is the five digits serial number of the unit and domain is the local network domain name this will open the login screen If you cannot retrieve the network domain name or if the network is using static IPs and not DHCP you can retrieve the device IP as follows launch the Configurator application see par 12 1 click on the NETWORK tab click on the icon of the Wired networ...

Страница 32: ... full name date of birth gender code and a thumbnail view of all exams available for this patient date and time of acquisition eye average pupil size exam type Command is also used to compare the currently displayed image with any other image in the list click on the corresponding Compare button see Dual Image Review screen see Fig 30 4 Displays all exam related information date and time of acquis...

Страница 33: ... 53 Fig 29 Exam Review screen in Remote Viewer Dual Image review screen This screen allows comparison of any pair of images color and infrared left and right eye same or different dates Fig 30 Dual Image Review screen in Remote Viewer 1 2 3 4 6 5 ...

Страница 34: ...non Mobile Printing Canon Easy PhotoPrint PIXMA MAXIFY PrintingSolutions Epson Epson iPrint Seiko Epson Corporation Konica Minolta Konica Minolta Printers Page Scope Mobile Table 1 Printing apps There are two possible network setups for printers depending on whether a wireless Access Point e g Wireless router is available or not Infrastructure Mode In this configuration both the COMPASS tablet and...

Страница 35: ...rojections of uncompensated eye movements exceeding respectively 0 5 and 1 0 in amplitude The numbers between brackets report the corresponding values in simulated absence of retinal tracking for comparison 11 Fixation Area this index reports the area and its semi axis between brackets of the 95th percentile fitting ellipse of the fixation points recorded during the test the higher this index the ...

Страница 36: ...CenterVue COMPASS Operating Manual Pag 36 di 53 Fig 32 COMPASS report for 24 2 test 1 2 3 4 5 6 7 8 9 10 11 12 13 14 ...

Страница 37: ...7 di 53 Fig 33 Stimuli of the 24 2 pattern grouped in clusters6 Fig 34 Symbols used for the grayscale map and related dB intervals 6 Garway Heath et al Mapping the Visual Field to the Optic Disc Ophthalmology Volume 107 Number 10 October 2000 ...

Страница 38: ...NH at baseline 5 Grayscale map Total and Pattern deviation maps and related significance levels at baseline 6 Last follow up parameters date time duration test pattern threshold strategy average pupil size during test BS FP FN foveal threshold MD and PSD 7 Color image of the ONH at last follow up 8 Grayscale map Total and Pattern deviation maps and related significance levels at last follow up 9 D...

Страница 39: ...CenterVue COMPASS Operating Manual Pag 39 di 53 Fig 35 Progression report for 24 2 series 1 2 3 4 5 7 8 6 9 10 11 12 13 ...

Страница 40: ...lick the App icon Start the Configurator by clicking 12 2 Password change Passwords for both the Admin and Doctor users can be changed in the User role tab of the Configurator by clicking the pencil icon see Fig 36 Shutdown and restart the device to make the new passwords effective Do not type special characters in the passwords as this may lead to locking the system Always keep passwords in a saf...

Страница 41: ...tab of the Configurator screen see Fig 37 Connect a pre formatted USB disk to any available USB port the icon on the top right corner turns active when a USB device is detected You might need to temporarily disconnect the external fixation to free up one USB port To perform a backup of the patient data click on the left most Backup button Backup Db Images To perform a backup of the device calibrat...

Страница 42: ...ceive the data Example A backup of COMPASS SN 00001 exists and is named gsd 00001_20150408 1028 backup In order to transfer the content of this backup into COMPASS SN 12345 plug the USB media onto any PC and rename the backup file to gsd 12345_20150408 1028 backup Eject the USB media from the PC and follow the usual restore procedure 12 5 Device lock reset procedure In case COMPASS raises error co...

Страница 43: ...ice must be connected to the local network via Ethernet cable using the port located on the back of the system Then click on the Network tab to configure the network If the network is using static IPs and not DHCP switch OFF the DHCP and type the IP Network Mask Gateway and optionally DNS you may need to contact your system administrator to obtain these details Fig 39 Configurator Network screen ...

Страница 44: ...he Manual option is selected data is exported using the export icon located in the exam review screen If Auto is selected data is exported automatically to the selected shared folder upon acquisition and can also be exported manually Format Choose PDF IMAGES to export both reports pdf and images jpg or PDF to export only the reports Fig 40 Configurator Shared folder configuration remote shared fol...

Страница 45: ...2 Fixation control 25 Hz automated retinal tracking Fundus Imaging Field of view 60 diameter Sensor resolution 5 Mpixel 2592x1944 Light source infrared 825 870 nm and white LED 440 650 nm Imaging modalities color infrared red free Other features Non mydriatic operation minimum pupil size 3 mm Working distance 28 mm Auto focus range 12D to 15D Fixation target programmable internal User interface Ta...

Страница 46: ...and slide the chin rest pad to avoid breaking the retaining peg The front lens should be cleaned by using a small hand pump air blower to blow away dust Only if really needed for instance due to the presence of a fingerprint the objective lens can be cleaned by means of photographic cleaning paper and a suitable lens cleaning fluid The tablet display should be cleaned only with a cloth damped in w...

Страница 47: ...ent Login was made with Admin user and tethering was not enabled Enable tethering or switch to Doc user and login again 5 Bluish artifacts as in this example appear in all newly acquired images Front lens is dirty Clean the front lens see par 15 6 System is not usable with message internal error device temporarily locked Malfunction of the rotating mirror or of the infrared LED board for pupil ill...

Страница 48: ...rantee that interference will not occur in a particular installation If the system does cause harmful interference to other devices which can be determined by turning the system off and on try to eliminate the interference by adopting one or more of the following measures reorient and or relocate the receiving device increase the distance between the devices connect the system to an outlet on a di...

Страница 49: ...e any interference in nearby electronic equipment RF emissions CISPR 11 Class B COMPASS is suitable for use in all establishments including domestic and those directly connected to the public low voltage supply network that supplies buildings used for domestic purposes providing the following warning is heeded Warning This equipment system is intended for use by healthcare professionals only This ...

Страница 50: ... should be that of a typical commercial or hospital environment Surge IEC61000 4 5 1 kV line s to line s 2 kV line s to earth 1 kV line s to line s N A for lines to earth Mains power quality should be that of a typical commercial hospital environment Voltage dips short interruptions and voltage variations on power supply input lines IEC61000 4 11 5 UT 95 dip in UT for 0 5 cycle 40 UT 60 dip in UT ...

Страница 51: ...nce may occur in the vicinity of equipment marked with the following symbol NOTE 1 At 80MHz and 800MHz the higher frequency range applies NOTE 2 These guidelines may not apply in all situations Electromagnetic propagation is affected by absorption and reflections from structures objects and people a Field strengths from fixed transmitters such as base stations for radio cellular cordless telephone...

Страница 52: ...be estimated using the equation applicable to the frequency of the transmitter where P is the maximum power rating of the transmitter in W according to the transmitter manufacturer NOTE 1 At 80MHz and 800MHz the higher frequency range applies NOTE 2 These guidelines may not apply in all situations Electromagnetic propagation is affected by absorption and reflections from structures objects and peo...

Страница 53: ...lable contact the manufacturer of the equipment Users have a fundamental role in contributing to reuse recycling and recovery of WEEE The potentially dangerous substances contained in the WEEE can pollute the environment and produce harmful effects to the human health Below there are a few indications of specific dangers of some substances which may leach in the environment and in the water system...

Отзывы: