background image

Installing Your CEIVA 

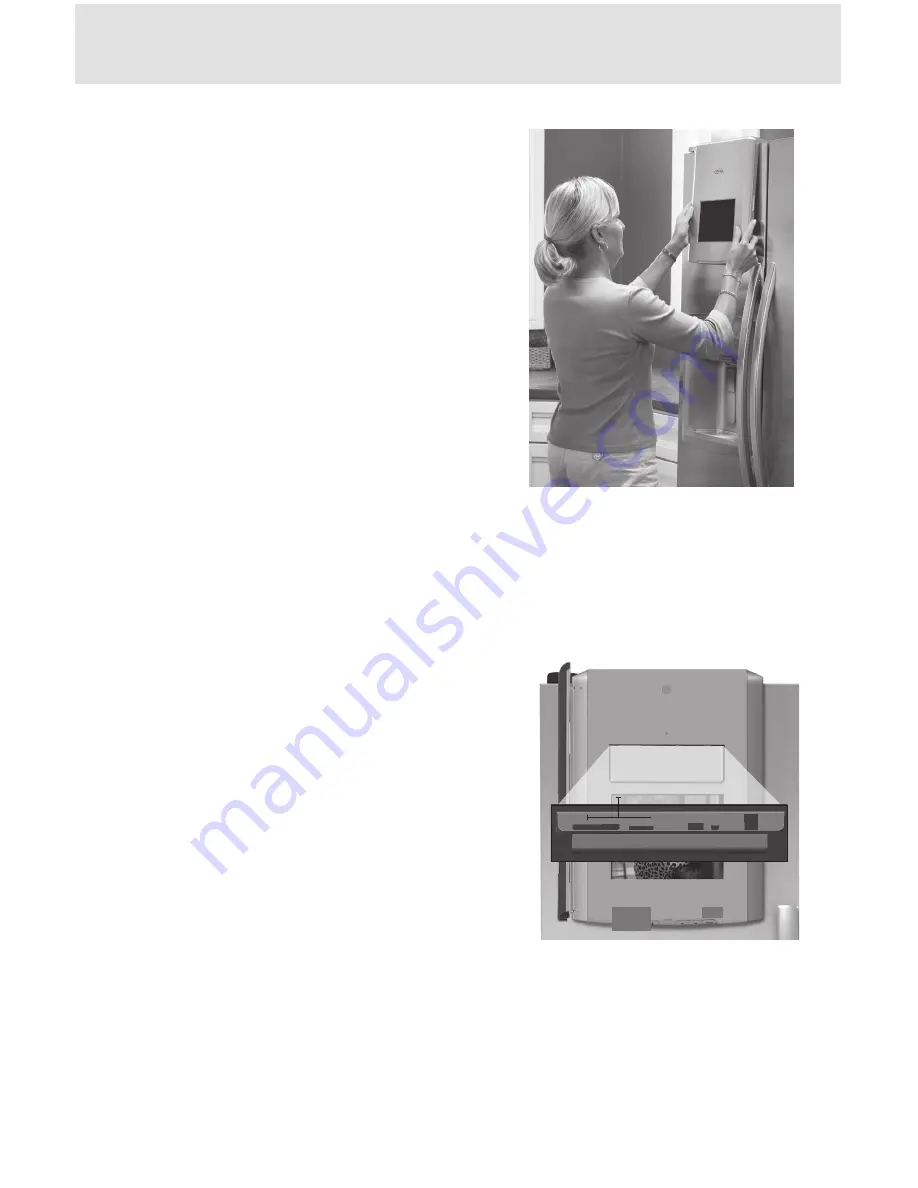
Remove the decorative cover from the 

1. 

refrigerator door.  Please refer to the re-
frigerator manufacturer’s instructions.
Position the CEIVA on the refrigerator 

2. 

freezer door.  The front sides of the freezer 

door and the CEIVA should both be facing 
you.
Raise the CEIVA above the freezer door 

3. 

and align the frame’s electrical connector 

with the electrical accessory port at the 
top of the freezer door.
Gently lower the CEIVA into the accessory 

4. 

port on refrigerator, so that it slides into 

place.  Screw into place with the CEIVA 
provided screws making sure to not over-
tighten.

Setting up Your CEIVA to Display Pictures

Press on the door of the installed CEIVA to release the latch, allowing the

1. 

 frame 

door to open.
Press the Power button on the CEIVA once. 

2. 

NOTE: 

After completing this initial setup, do not 

use the Power button to turn the frame on or off, 

unless a CEIVA Customer Care Team member asks 

you to do so for troubleshooting purposes.  For 

information on how to turn the screen off, during 

routine use, please see page 5.

Insert your memory card into the appro-

3. 

priate slot in the CEIVA*.
Press the Menu button and use on-screen 

4. 

menus to start your slideshow.  For infor-
mation on using your CEIVA menus, see 
page 6.

Other Picture Display Options

With CEIVA, you can manage all your pictures in one place - on your computer. 
Stream your pictures direct to your CEIVA across your wireless network.  You can also 
receive pictures from friends and family with PicturePlan!  Turn the page to find out 
how to get connected!

* Please see the list on page 2 of compatible memory cards.

Installation and Setup

3

Insert Memory 

Cards Here

Содержание WQG081807

Страница 1: ...DIGITAL PHOTO FRAME exclusively for QUICKSTART GUIDE This product is compatible with WHIRLPOOL brand refrigerators that have the centralpark port connection...

Страница 2: ...digit serial number which is visible under the LCD panel when the door of the CEIVA is open Call 1 877 MYCEIVA 1 877 692 3482 to speak with the CEIVA Customer Care Team The team member will first ask...

Страница 3: ...e door to open Press the Power button on the CEIVA once 2 NOTE After completing this initial setup do not use the Power button to turn the frame on or off unless a CEIVA Customer CareTeam member asks...

Страница 4: ...display new photos from friends and family around the world automatically every day In vite anyone you choose to share photos with you for free You can also Send photos directly to your frame from yo...

Страница 5: ...scan for available networks and display them on the following screen On the Select Wireless network screen use the Left and Right Arrow buttons to 8 scroll through available networks If you do not see...

Страница 6: ...l the photos in your slideshow Use the arrow but tons to scroll until you see the photo you are searching for Press and hold either the right button to resume the slideshow How do I turn off my screen...

Страница 7: ...lideshow mode to scan previews for example the slideshow automatically pauses It will automatically resume within a preset amount of time depending on your slideshow settings The default is 30 seconds...

Страница 8: ...eshow isn t running Make sure that you have at least two photos in your CEIVA slideshow Then press the Right button on the CEIVA until you see the message You can let go now to start the slide show or...

Отзывы: