background image

PROFIL100EC

Illuminated Mullion Weatherproof Keypad

EN

  INSTALLATION MANUAL

4

cdvi.se

cdvigroup.com

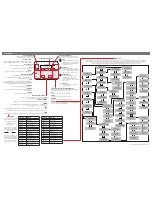
5] WIRING DIAGRAM

D - 693:

 Remote electronics

P3 jumper allows to the 

user to modify its own 

Pin code. To enable this 

feature put the jumper on.  

(see Programming section 

in the instruction manual)

P2 jumper resets the keypad 


to factory default values. Remove 


the power from the keypad then put 

the jumper. (see Programming section  

in the instruction manual)

Fail safe lock

Fail secure lock

Varistor

Input voltage

12 to 24V ac

or 12 to 48V dc

Power supply

According to lock 

specifications 

Relay 

1

Relay 

2

Outputs

Description

V

Input voltage 12V to 24V ac or 12V to 48V dc

V

Input voltage 12V to 24V ac or 12V to 48V dc

R1

N/C contact relay 1

C1

Common relay 1

T1

N/O contact relay 1

R2

N/C contact relay 2

C2

Common relay 2

T2

N/O contact relay 2

P1

Request-to-exit input relay 1

M

Common of inputs

P2

Request-to-exit input relay 2

PX

Request-to-enter input

H

Timer Contact

+

White wire from keypad

-

Brown wire from keypad

E

Green or Blue wire (illumination)

Request-to-Exit inputs

- P1 request-to-exit input  

  activates relay 1.

- P2 request-to-exit input  

  activates relay 2. 

- Latch or toggled output.

H input can be used with

a timer to enable the 

request-to-enter function. 

(Press the button on the 

keypad with the key logo

When the contact is open then 

the request-to-enter is disabled. 

When the contact is closed then 

press the button with the key 

logo to enter.

Содержание Digicode PROFIL100EC

Страница 1: ...The installer s choice cdvi se PROFIL100EC SVENSKA SE ENGLISH EN Vattentätt kodlås med bakgrundsbelysning i delat montage Illuminated Mullion Weatherproof Keypad Remote Electronics ...

Страница 2: ...isual feedback Dimensions L x W x D 165 x 43 x 27mm Power supplies 12V to 24V ac or 12V to 48V dc Consumptions 30 to 100mA 3 MOUNTING KIT 2 NOTES RECOMMENDATIONS Cable The distance between the PROFIL100EC and the remote electronic can not exceed more than 50 meters Make sure that the cable is not near by a high voltage cables ex 230V ac Recommended cable between the PROFIL100EC and the remote elec...

Страница 3: ...en mark with a pen the hole location then drill the 2 mounting holes 5mm drill bit Ø and 35mm hole depth and the hole wiring access Fasten the PROFIL100EC keypad to the back plate by using the supplied M5x8 Diax screw and T20 Diax spanner hardware Insert the 2 plastic anchors in the holes Mount the back plate of the PROFIL100EC with the M4x30 mounting screws Insert the 2 plastic anchors in the hol...

Страница 4: ...ut voltage 12V to 24V ac or 12V to 48V dc V Input voltage 12V to 24V ac or 12V to 48V dc R1 N C contact relay 1 C1 Common relay 1 T1 N O contact relay 1 R2 N C contact relay 2 C2 Common relay 2 T2 N O contact relay 2 P1 Request to exit input relay 1 M Common of inputs P2 Request to exit input relay 2 PX Request to enter input H Timer Contact White wire from keypad Brown wire from keypad E Green or...

Страница 5: ... Press A5 to modify the master code One beep is emitted Enter the new 4 or 5 digits master code One beep is emitted to confirm programming of the new master code 4 Press B to exit from programming mode 2 beeps are emitted to confirm that the keypad is in stand by operating mode 4 beeps indicate a data computing error Default values Without codes Illumination time 10 seconds Relay release time 1 se...

Страница 6: ... User code enter the user location 4 beeps are emitted Press 0 0 0 0 0 in 5 digits length code or 0 0 0 0 in 4 digits length code A beep is emitted to confirm the user code has been deleted Note If the Pin code is already programmed or is identical to the master code then 4 beeps are emitted Press B to exit from the programming mode 2 beeps are emitted to confirm that the keypad is in stand by ope...

Страница 7: ...ts code 1 Enter the master code twice 1 2 3 4 5 default value master code 2 beeps are emitted to confirm entry in programming mode 2 Press A7 to program a sub master code for the user individual Pin code modification One beep is emitted Enter the new 2 digits sub master code One beep is emitted to confirm programming of the sub master code 3 Press B to exit from the programming mode 2 beeps are em...

Страница 8: ...ength 4 or 5 digits 5 Default Master code Change master code 12345 Défaut PROFIL100EC Illuminated Mullion Weatherproof Keypad EN INSTALLATION MANUAL 2 x beeps 1 x beep 1 x beep OK 4 beeps ERROR A0 1 x beep 1 x beep OK 4 beeps ERROR A1 1 x beep 1 x pip OK 4 pip ERROR A2 1 x beep 1 x beep OK 4 beeps ERROR A4 1 x beep 1 x beep OK 4 beeps ERROR A5 8 cdvi se cdvigroup com 6 Chart ...

Страница 9: ...er codes 4 or 5 digit code 4 beeps User location used 1 beep User location free PROFIL100EC Illuminated Mullion Weatherproof Keypad EN INSTALLATION MANUAL 1 x beep AA 2 x beeps OK A6 1 x beep 1 x beep OK 4 beeps ERROR A7 1 x beep 1 x beep OK 4 beeps ERROR A8 1 x beep OK 00 99 Press B to exit from programming 1 x beep OK 4 beeps ERROR 1 x beep 9 cdvi se cdvigroup com ...

Страница 10: ...05 06 07 08 09 10 11 12 13 14 15 16 17 18 19 20 21 22 23 24 25 26 27 28 29 30 31 32 33 Relay 1 1 output From user location 00 to 59 Relay 2 2 output From user location 60 to 99 NOTE User location Code Name 34 35 36 37 38 39 40 41 42 43 44 45 46 47 48 49 50 51 52 53 54 55 56 57 58 59 60 61 62 63 64 65 66 67 User location Code Name 68 69 70 71 72 73 74 75 76 77 78 79 80 81 82 83 84 85 86 87 88 89 90...

Страница 11: ...inal costumer To obtain full details of this warranty and to register the product to commence the Limited Lifetime Warranty complete the enclosed registration card and return it either by e mail or post to the relevant CDVI address or completion of the on line registration at www cdvigroup com Repair or replacement of the defective product is the exclusive remedy CDVI shall not be liable for any i...

Страница 12: ...1 2 2 2 INFORMATION OCH REKOMMENDATIONER Kablage för PROFIL100EC Avståndet mellan kodlåset och styrenheten bör inte överstiga 50 meter Se till att kablarna inte dras nära högspänningsledningar ex 230 V AC Rekommenderad kabel mellan kodlås och styrenhet En fyrledare 4 trådar SYT1 0 8 mm Rekommenderad installation För att säkra systemet från strömspikar glöm inte att montera varistorn parallellt med...

Страница 13: ...äggen och markera hålens placering med en penna Borra sedan två monteringshål och hål för kabeln Ø 5 mm borr och minst 35 mm djupt Stäng knappsatsen till PROFIL100EC med M4x10 Diax skruv och T20 nyckel Sätt dit skruvens täcklock Sätt två plastpluggar i de borrade hålen Placera kodlåsets bakstycke mot väggen och skruva fast med de bifogade monteringsskruvarna M4x30 Sätt två plastpluggar i de bor ra...

Страница 14: ... programmerbara Timeringång H kan användas för att aktivera öppnaknappen med nyckelsymbol När kretsen är öppen så är nyckel knappen avstängd och omvänt när kretsen är sluten så fungerar nyckel knappen som en öppnaknapp Plint Beskrivning V Inspänning 12 24 V AC eller 12 48 V DC V Inspänning 12 24 V AC eller 12 48 V DC R1 N C kontakt Omvänd funktion relä 1 C1 Gemensam relä 1 T1 N O kontakt Rättvänd ...

Страница 15: ...n är programmerad 3 Knappa sedan direkt in A5 för att ändra masterkoden En pipsignal hörs Knappa in en ny 4 eller 5 siffrig masterkod fyra tecken om ni valt 4 siffrig kod och fem tecken om ni valt 5 siffrig kod under A4 ovan En pipsignal bekräftar att den nya masterkoden är pro grammerad 4 Tryck B för att lämna programmeringsläget Två pipsignaler bekräftar att knappsatsen är i standby läge och red...

Страница 16: ...ftar att användarkoden är raderad 5 Tryck B för att lämna programmeringsläget Två pipsignaler bekräftar att knappsatsen är i standby läge redo att användas OBS Om användarkoden redan är programmerad eller är densamma som masterkoden hörs fyra pipsignaler Koderna 00000 och 0000 är reserverade för borttagning av koder och kan därför inte användas som användarkoder E Programmera tider Avsnittet beskr...

Страница 17: ...default värde 1 2 3 4 5 Två pipsignaler bekräftar att man är i programmeringsläget 2 Knappa in A7 för att programmera en undermasterkod som ger användaren möjlighet att ändra sin egen användarkod En pipsignal hörs Knappa in en ny 2 siffrig undermasterkod En pipsignal bekräftar att undermasterkoden är programmerad 3 Tryck B för att lämna programmeringsläget Två pipsignaler bekräftar att knappsatsen...

Страница 18: ...konstant 01 standard Kodlängd 4 eller 5 siffror 5 standard Masterkod Ändra masterkod 12345 standard 18 cdvi se cdvigroup com PROFIL100EC Vattentätt kodlås med bakgrundsbelysning SV INSTALLATION MANUAL 6 PROGRAMMERING 2 x pip 1 x pip 1 x pip OK 4 pip FEL A0 1 x pip 1 x pip OK 4 pip FEL A1 1 x pip 1 x pip OK 4 pip FEL A2 1 x pip 1 x pip OK 4 pip FEL A4 1 x pip 1 x pip OK 4 pip FEL A5 ...

Страница 19: ...andard Undermaster kod 2 Programmera användarkoder 4 eller 5 siffror 4 pip Upptagen användarplats 1 pip Ledig plats 19 cdvi se cdvigroup com PROFIL100EC Vattentätt kodlås med bakgrundsbelysning SV INSTALLATION MANUAL Tryck B för att avsluta programmeringen 1 x pip 1 x pip OK 4 pip FEL AA 1 x pip 2 x pip OK A6 1 x pip 1 x pip OK 4 pip FEL A7 1 x pip 1 x pip OK 4 pip FEL A8 1 x pip OK 00 99 ...

Страница 20: ...08 09 10 11 12 13 14 15 16 17 18 19 20 21 22 23 24 25 26 27 28 29 30 31 32 33 Reläutgång 1 Plats 00 till plats 59 Reläutgång 2 Plats 60 till plats 99 PM Plats Kod Namn 34 35 36 37 38 39 40 41 42 43 44 45 46 47 48 49 50 51 52 53 54 55 56 57 58 59 60 61 62 63 64 65 66 67 Plats Kod Namn 68 69 70 71 72 73 74 75 76 77 78 79 80 81 82 83 84 85 86 87 88 89 90 91 92 93 94 95 96 97 98 99 ...

Страница 21: ...ig information om denna garanti och att registrera produkten för att påbörja begränsad livstids garanti fyll i det bifogade registreringsbeviset och återsänd detta antingen via post eller e mail till närmaste CDVI kontor eller registrera online på www cdvigroup com Reparation eller utbyte av den defekta produkten är de två alternativ som finns CDVI ansvarar inte för oförutsedda skador eller följds...

Страница 22: ...22 www cdvi se www cdvigroup com 22 ANTECKNINGAR PROFIL100EC Vattentätt kodlås med bakgrundsbelysning SV INSTALLATION MANUAL ...

Страница 23: ...23 www cdvi se www cdvigroup com 23 ANTECKNINGAR PROFIL100EC Vattentätt kodlås med bakgrundsbelysning SV INSTALLATION MANUAL ...

Страница 24: ... Phone 886 0 42471 2188 Fax 886 0 42471 2131 CDVI SUISSE Phone 41 0 21 882 18 41 Fax 41 0 21 882 18 42 CDVI CHINA Phone 86 0 10 62414516 Fax 86 0 10 62414519 CDVI IBÉRICA SPAIN PORTUGAL Phone 34 0 935 390 966 Fax 34 0 935 390 970 CDVI ITALIA Phone 39 0331 97 38 08 Fax 39 0331 97 39 70 CDVI MAROC Phone 212 0 5 22 48 09 40 Fax 212 0 5 22 48 34 69 CDVI SWEDEN SWEDEN DENMARK NORWAY FINLAND Phone 46 0 ...

Отзывы: