background image

Please note:  You should ensure that there are no dishes in the upper basket when running a lower basket 
half-load programme, and none in the lower basket when running an upper basket half-load programme.

If you have selected any extra function (3 in 1, prewash, half-load) for a programme, this function will 
automatically be selected the next time the dishwasher is used. To cancel the selection of any extra function, 
press the specific extra function button (5, 6 or 7) until the indicator light for that function goes out.

Starting a programme

• 

Press the Power button (the end of programme light will be switched on)

• 

Press the Programme Selection button until the required programme is shown on the display.

• 

If required, set the delay timer by pressing the Delay Timer button

• 

Once a programme is selected, the end of programme light will switch off.

• 

When you close the dishwasher door, the programme will start automatically.

Please note: The dishwasher stores the most recently used programme in its memory.  To change the 
programme, simply press the Programme Selection button.

At the end of a programme

If possible, do not open the dishwasher door once the programme has started.
At the end of a programme, the dishwasher will beep five times, and the end of Programme Indicator light will switch on.

Changing a programme

It is possible to change the programme if necessary once the programme has started.

• 

First open the door slightly to reduce the risk of water spillage.

• 

Press the programme selection button until the required programme is shown on the display.

• 

Then close the door.  The dishwasher will begin the new programme from the point at which the old programme stopped.

Cancelling a programme

It is possible to cancel the programme once is has started.

• 

First open the door slightly to reduce the risk of water spillage.

• 

Press and hold in the Programme Selection button for three seconds until the end of programme indicator flashes and  


a “1” shows on the display.

• 

Then close the door.  The dishwasher will run a drain cycle which will take approximately 30 seconds.  Once this is    


complete, the dishwasher will beep five times and the end of programme light will switch on. 

Switching the dishwasher off

• 

Once the dishwasher beeps five times and the end of programme light switches on, the dishwasher can be switched off  


by pressing the Power button.  

• 

Then turn off the water tap and remove the plug from the power socket.

Please note:  the dishwasher will automatically continue on the programme it has started if the door is 
opened or in the event of a power cut.

4

Содержание WC370

Страница 1: ...rtment The Group Ltd Harby Road Langar Nottinghamshire NG13 9HY T 01949 862 012 F 01949 862 003 E service cda eu W www cda eu Passionate about style WC370 Integrated Dishwasher Manual for Installation Use and Maintenance ...

Страница 2: ...voids possible negative consequences for the environment and health It also enables the constituent materials to be recovered saving both energy and resources As a reminder of the need to dispose of household appliances separately the product is marked with a crossed out wheeled dustbin mportant he CDA Group Ltd cannot be held responsible for injuries or losses caused by incorrect use or installat...

Страница 3: ...ter consumption remove all dirt residues from the dishes prior to loading the dishwasher Only run the dishwasher when fully loaded Place hollow items bowls glasses and pans face down in the basket Do not put dishes or cutlery with tobacco ash wax lubricating grease or paint residues in the dishwasher Before First Use Set the water softener level as required by the water hardness in the area Add 2k...

Страница 4: ...ton after selecting the programme before you close the door Prewash button 6 The dishwasher is equipped with a prewash function that automatically adds a prewash to the selected programme The prewash function improves the wash performance of the programme but also can change the temperature and duration of the programme To use this function press the button after selecting the programme before you...

Страница 5: ...e end of a programme the dishwasher will beep five times and the end of Programme Indicator light will switch on Changing a programme It is possible to change the programme if necessary once the programme has started First open the door slightly to reduce the risk of water spillage Press the programme selection button until the required programme is shown on the display Then close the door The dis...

Страница 6: ...ks Please note You should only use detergents designed specifically for use in dishwashers If using dishwasher tablets always use the detergent compartment do not put them in the main body of the dishwasher or in the cutlery basket The solubility of dishwasher tablets can vary depending on the temperature and duration of the programme As a result it is recommended that powder detergents should be ...

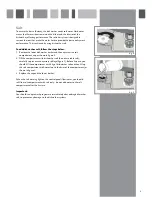
Страница 7: ...et and then unscrew the salt compartment cap as shown in figure 1 2 Fill the compartment with dishwasher salt do not use table salt carefully to prevent unnecessary spillage figure 3 Before first use you should fill the compartment with 2kg of dishwasher salt and then fill up the salt compartment with water up to the brim of the compartment as shown in figure 3 3 Replace the cap and the lower bask...

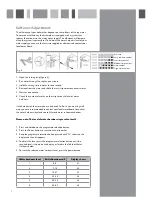
Страница 8: ...atively contact your local water board 1 Open the testing strip 2 Run water through the tap for one minute 3 Hold the testing strip in water for one second 4 Shake the testing strip after taking it out of the water 5 Wait for one minute 6 Check the number of marks on the strip to see the level of water hardness If the hardness of the water you use is above 60 dE or if you are using well water you ...

Страница 9: ... rinse aid when the rinse aid indicator light on the control panel is illuminated Rinse Aid To fill the rinse aid compartment 1 Open the rinse aid compartment by turning and removing the cap as shown in figure 4 2 Fill the rinse aid compartment until the rinse aid indicator goes dark as shown in figure 5 where a indicates the compartment is empty and b indicates the compartment is full 3 Replace t...

Страница 10: ...sket adjustment mechanism ma or down 21 Top basket height adjustment while it is full Basket height adjustment mechanism on the top basket of your machine is designed to let you adjust the height of your top basket upwards or downwards without removing it from your machine when it is full and create large spaces at the top or bottom area of your machine as needed Basket of your machine is set to u...

Страница 11: ...id dosage adjustment 4 Programme test Economy 50 C in accordance with EN 50242 international norms Standard loading and Test Data Capacity Upper and lower baskets 12 place settings The upper basket should be adjusted to high position Cups should be placed on to the dish rack pins Detergent Rinse aid 5 25 cm3 in accordance with EN50242 DIN 44990 IEC 436 international norms Rinse aid dosage adjustme...

Страница 12: ...ed with a sensor that automatically adjusts the washing time temperature and amount of water required Prewash 60O wash The values and times provided above have been obtained under laboratory conditions according to relevant standards Actual results obtained can vary depending on the conditions of the dishwasher s use and environment mains supply voltage water pressure water input temperature and e...

Страница 13: ...ll and remove the metal plastic filter 3 Then pull the coarse filter out of the micro filter 2 Rinse it with lots of water under the tap Refit the metal plastic filter Insert the coarse filter into the micro filter in a way that the marks will correspond to one another Attach micro filter into the metal plastic filter and turn to the direction of arrow and it is locked when the arrow on micro filt...

Страница 14: ...Restart the dishwasher and cancel the programme If the error continues contact CDA service F3 Continual fill error Close the tap and contact CDA service F4 Inadequate water supply Make sure the water inlet tap is fully open Close the water tap separate the water inlet hose from the tap and clean the filter Restart your machine contact CDA service if the error resumes F5 Faulty heater sensor Contac...

Страница 15: ...iate wash programme selected Spray arm is blocked Filters clogged or incorrectly fitted Water drain pump is blocked White stains on the dishes Insufficient detergent added Rinse aid setting is too low Insufficient dishwasher salt added Water softener setting is too low Salt compartment cap may not be completely closed The dishes are not completely dry at the end of a programme A programme without ...

Страница 16: ... should be used As the colours of the wires in the mains lead of this appliance may not correspond with the coloured markings identifying the terminals in your plug proceed as follows The wire which is coloured GREEN and YELLOW must be connected to the terminal which is marked with letter E or by the Earth symbol or coloured GREEN and YELLOW The wire which is coloured BLUE must be connected to the...

Страница 17: ...y The water supply tap should be located in an adjacent cupboard so that it can be accessed after installation Ensure the appliance is level by adjusting the feet as necessary The dishwasher is equipped with an adjustable rear foot that can be raised or lowered by means of an adjustment screw located in the centre of the kick plate Only use the water inlet supplied with the appliance If the water ...

Страница 18: ... should be followed as normal However the fitting template needs to be located lower down the fascia door this is shown below The amount of offset Y depends on the height of the fascia door and can be calculated as X 723mm For example if you have a 731mm tall fascia door and are fitting a door to your dishwasher then Y 731 723 8mm Fitting template Y offset X Door height Ensure that the hinge tensi...

Страница 19: ...Notes 18 ...

Страница 20: ...Group Ltd Harby Road Langar Nottinghamshire NG13 9HY T 01949 862 012 F 01949 862 003 E service cda eu W www cda eu Passionate about style To contact our Customer Care Department or for Service please contact us on the details below ...

Страница 21: ......

Отзывы: