LRC-M1 and LRC-L1 Remote Control
User Manual
25
9M02-7634-A001-EN
Version 3
7. RF Channel Change
If your system is configured to use one of the standard license exempt frequency bands, you will have the option
of selecting a new frequency; this may be required in order to ensure interference-free operation under some
circumstances. Changing the RF channel can become necessary due to interference or if a RF channel is already
in use by another system. The RF channel can be changed either by reprogramming the TransKey (external
programming) or by using the RF channel selection feature of the OCU unit as described below.
Note:
The features described in this section are available with standard OCUs furnished with a key switch and
horn push-button. Should these control elements not be available, these features may not function in
part or entirely.
7.1
Working Principle
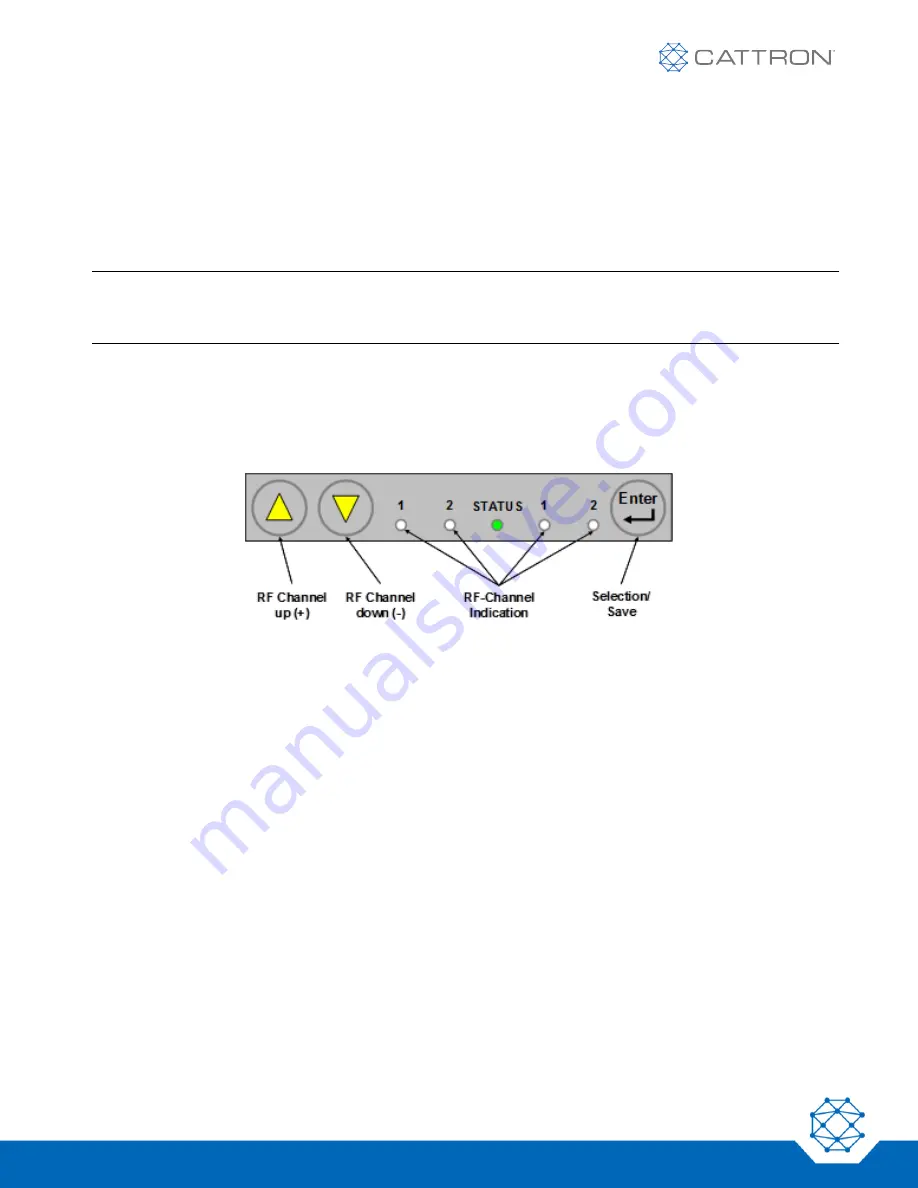
The operating RF channel of the OCU can be changed using the push buttons in the LED/push button panel. For
this, first bring the OCU into Programming Mode as below. The respective RF channels are displayed by the four
LEDs located to the left and right of the STATUS LED. Each RF channel is assigned a specific color code, shown
in the 'RF Channel Tables'.
Figure 16: LED / Pushbutton Panel
7.2
Activating the Programming Mode
Before the RF channel can change, the OCU must be brought into Programming Mode.
1. With the OCU turned off, hold the Horn push-button down and turn the unit on by turning the key
switch.
2. Hold the Horn push-button for approximately 5 seconds until the Status LED changes from
permanent red to fast blinking red.
3. Release the Horn push-button within 3 seconds.
4. The OCU is now in Programming Mode. The currently selected RF channel is indicated via the four
LEDs on the panel.


