57
The following section provides specific information on how you can
use the camera after connecting to various types of devices. In each
case, the camera terminal you should connect to is indicated in the
title as
VIDEO
and
DIGITAL
.
Important!
• Make sure that the power of all devices is turned off before connect-
ing them.
• You should also check the owner’s manuals of the device you are
connecting to the camera for precautions and other information.
Television
VIDEO
• See page 35 of this manual for details about connecting to a televi-
sion and displaying images from camera memory on a TV screen.
Video Tape Deck
VIDEO
You can use the video tape deck to record images from the camera.
To record camera images on video tape
1. Use the special video cable that comes with the camera to connect
to the VIDEO IN terminal of the video tape deck.
2. Set up the video tape deck to record images input through its
VIDEO IN terminal.
• Consult the owner’s guide that comes with the tape deck for details
about how to set up for recording.
3. Enter the camera Playback Mode and start the video deck record
operation.
• It is probably best to use auto play when recording camera images
to video tape, because it changes pages automatically at a preset
speed.
Using the Camera with a Connected Device
Connecting to Other Devices
58
• Page numbers (page 28) are also recorded on the video tape if they
are turned on. Be sure to turn off display of page numbers if you do
not want them in the taped images.
• If the low battery indicator (page 30) is displayed while you are re-
cording to video tape, it will also be recorded with the image. If this
happens, either replace batteries or use the AC adaptor.
Video Printer
VIDEO
You can use Video Printer to print copies of images in camera
memory.
To print camera images on a Video Printer
1. Use the special video cable that comes with the camera to connect
to the VIDEO IN terminal of the video printer.
2. Set up the video printer to print images input through its VIDEO IN
terminal.
• Consult the owner’s guide that comes with the video printer for de-
tails about how to set up for printing.
3. Enter the camera Playback Mode and display the image you want
to print.
4. Start the video printer’s print operation.
• Page numbers (page 28) are also included on the print if they are
turned on. Be sure to turn off display of page numbers if you do not
want them in the print.
• If the low battery indicator (page 30) is displayed while you are print-
ing, it will also be printed with the image. If this happens, either
replace batteries or use the AC adaptor.
59
Connecting to another CASIO Digital Camera
DIGITAL
You can connect the camera to another CASIO digital camera and
exchange image data between them. Connect the DIGITAL terminals
of the two cameras using the optionally available SB-62 connecting
cable.
To connect the two cameras
1. Turn both cameras off.
2. Connect the two cameras by plugging the optional SB-62 connec-
tion cable into their DIGITAL terminals.
3. Turn both cameras on.
• You will not be able to send image data to a camera whose memory
is already full (contains 96 images).
To send data from this camera to another camera
1. Set the function switches of both cameras to PLAY.
2. Use the [+] and [–] buttons of this camera to find the image you
want to send.
• You cannot send images between two cameras while either of their
function switches is set to REC.
• You cannot send images while using the multi-page display or
zoom function.
3. Press the shutter button of this camera.
Using the Camera with a Connected Device
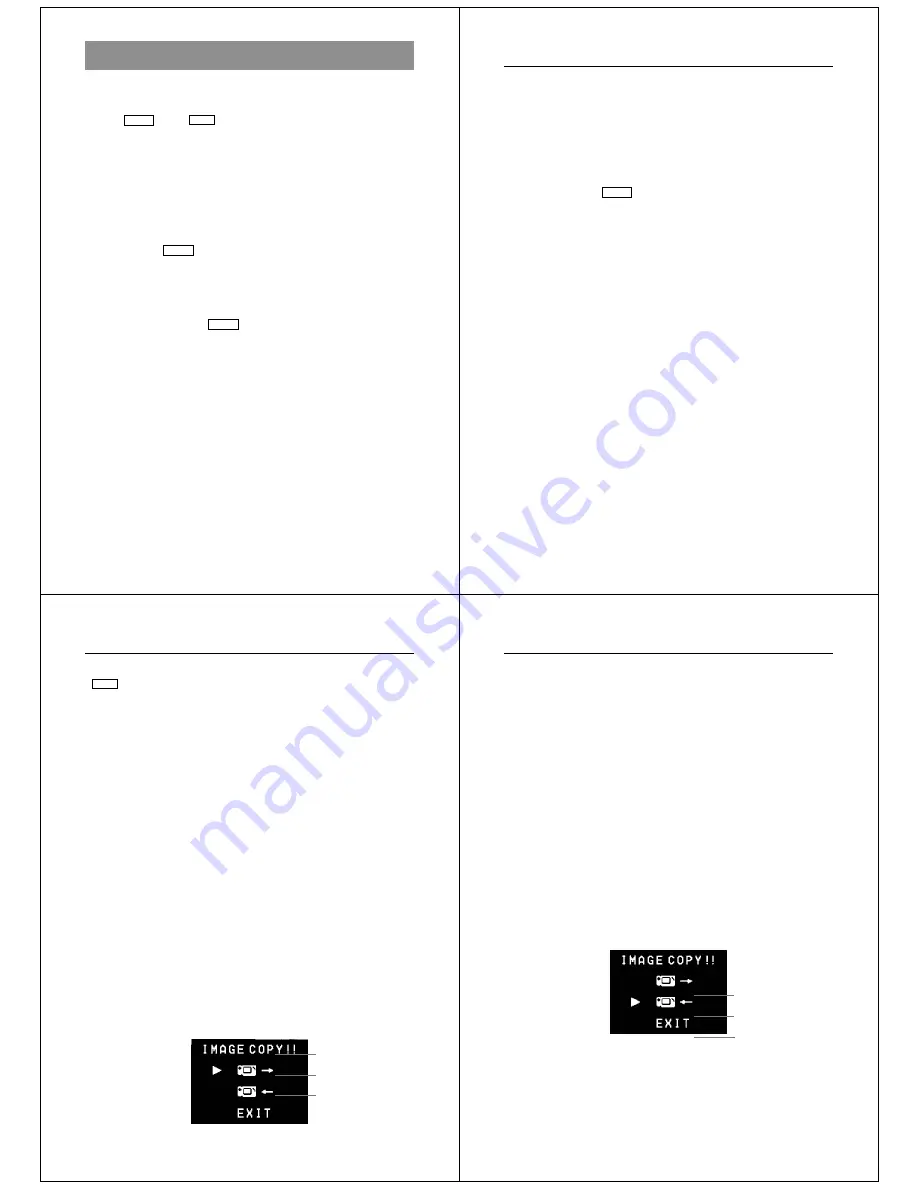
Send icon
Receive icon
Return to previous
display
Connecting to Other Devices
60
4. Use the [+] and [–] buttons to move the pointer to the send icon.
5. After you make the setting you want, press the shutter button
again.
• Pressing the shutter button sends the selected image to the other
camera.
• You can send only one image at a time. To send more images,
repeat steps 2 through 5.
To receive data to this camera from another camera
1. Set the function switches of both cameras to PLAY.
2. Use the [+] and [–] buttons of other camera to find the image you
want to receive.
• You cannot receive images between two cameras while either of
their function switches is set to REC.
• You cannot receive multi-page display or zoomed images.
• If you try to receive a multi-page display or zoomed images, other
camera’s monitor automatically changes to normal display of page 1.
3. Press the shutter button of this camera.
Send icon
Receive icon
Return to previous
display


