— 13 —
●
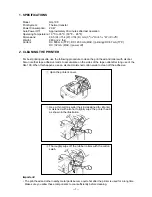
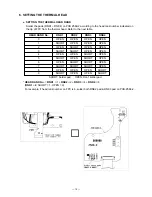
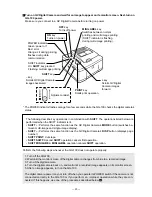
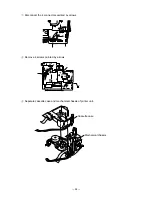
SETTING THE THERMAL HEAD POSITION
1
Remove the printer unit referring to 9. DIS-
ASSEMBLY.
2
Remove 2 screws, then remove scissors
sub ass'y.
(Refer to the right figure)
3
Adjust the clearance of C part of in the
head holder ass'y to 1.35 mm by turning
the head shaft Z568 using screw driver (-)
and clearance gauge.
(Refer to the right figure)
4
Print half-tone pattern.
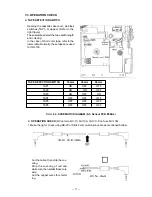
(Refer to 7-3. OPERATION CHECK)
5
If abnormal picture (blurred and striped
picture) appears, try to turn the head shaft
Z568 again.
Turning this shaft clockwise, the thermal
head moves to the left and printed picture
tends to be blurred.
Turning this shaft counterclockwise, the
thermal head moves to the left and printed
picture tends to be striped.
6
If the picture is normal, apply the nejilock
to this shaft to fix it.
(Refer to the lower figure)
Содержание QG-100
Страница 1: ...JULY 1996 without price QG 100 ZX 568 ...
Страница 4: ... 2 3 BLOCK DIAGRAM ...
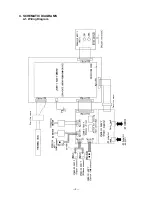
Страница 5: ... 3 4 SCHEMATIC DIAGRAMS 4 1 Wiring Diagram ...
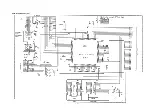
Страница 6: ... 4 4 2 Main PCB Z568 1 1 2 ...
Страница 7: ... 5 4 3 Main PCB Z568 1 2 2 ...
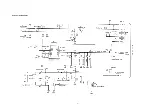
Страница 8: ... 6 4 4 Power PCB Z568 S1 ...
Страница 32: ... 30 11 EXPLODED VIEW DISASSEMBLY VIEW 11 1 EXPLODED VIEW Z568 1 ASS Y COMPONENTS ...
Страница 34: ... 32 11 2 DISASSEMBLY VIEW PRINTER UNIT 1 2 ...
Страница 35: ... 33 DISASSEMBLY VIEW PRINTER UNIT 2 2 ...
Страница 37: ... 35 11 3 DISASSEMBLY VIEW CHASSIS UNIT 1 2 ...
Страница 38: ... 36 DISASSEMBLY VIEW CHASSIS UNIT 2 2 ...
Страница 40: ... 38 11 4 DISASSEMBLY VIEW CHASSIS ASS Y 1 2 ...
Страница 41: ... 39 DISASSEMBLY VIEW CHASSIS ASS Y 2 2 ...
Страница 43: ... 41 11 5 DISASSEMBLY VIEW HEAD HOLDER ASS Y 1 2 ...
Страница 44: ... 42 DISASSEMBLY VIEW HEAD HOLDER ASS Y 2 2 ...
Страница 46: ... 44 11 6 DISASSEMBLY VIEW PLATEN ASS Y ...
Страница 48: ... 46 11 7 DISASSEMBLY VIEW CASSEETTE CASE ASS Y ...
Страница 50: ... 48 11 8 DISASSEMBLY ASS Y MOTOR CHASSIS ASS Y ...
Страница 51: ......
Страница 52: ...MA0900461A ...


