E-8
Playing with Different Tones
3
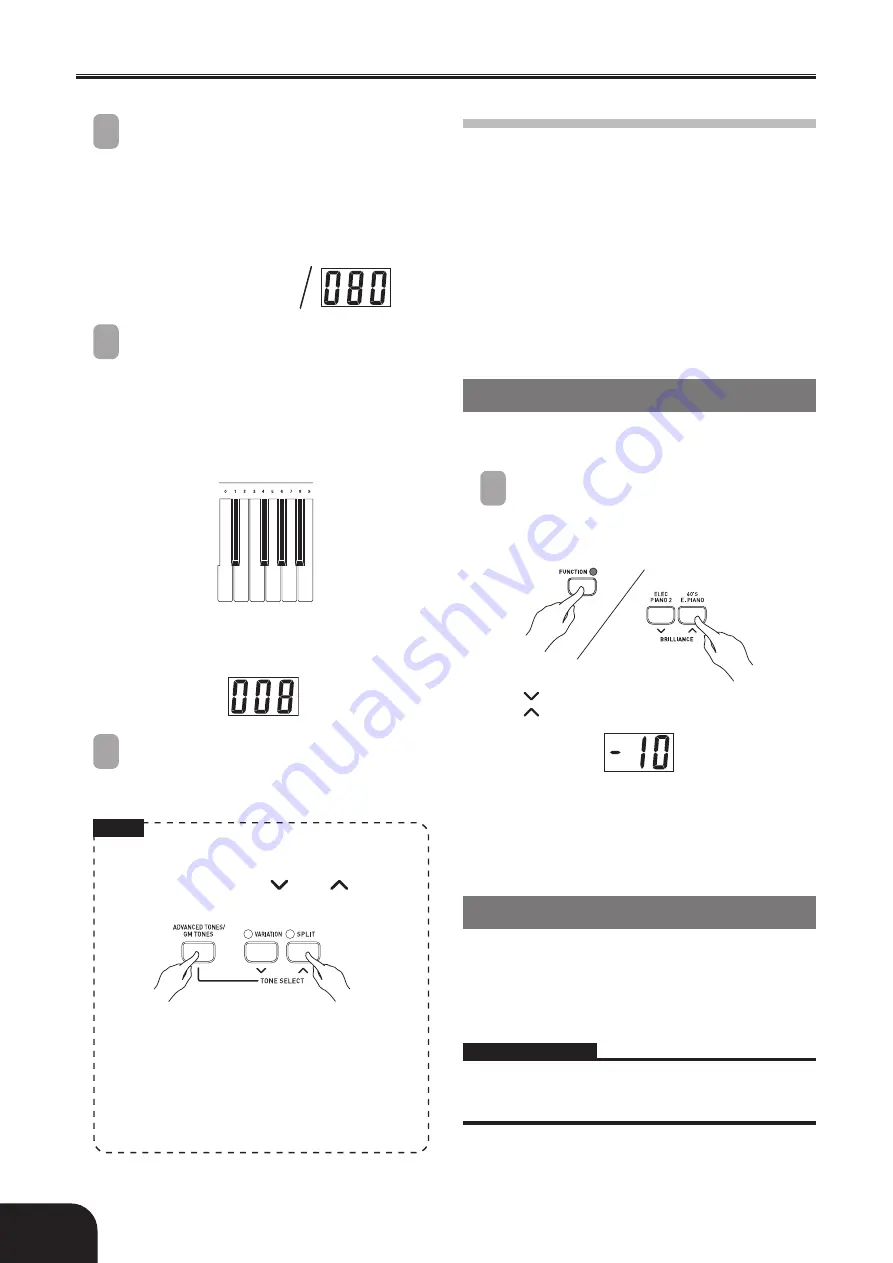
While holding down the
FUNCTION
button, press the
ADVANCED TONES/GM
TONES
button. Remember to keep the
FUNCTION
button depressed.
• This causes the tone number of the tone that is
currently assigned to the ADVANCED TONES/
GM TONES button to appear on the display.
Example
: 080 (GM VIOLIN)
4
While holding down the
FUNCTION
button, use the keyboard keys shown below
to input the tone number of the tone you
want to assign to the
ADVANCED TONES/
GM TONES
button.
Example
: 008 (MARIMBA)
5
After inputting the tone number you want,
release the
FUNCTION
button to exit the
GM tone setting screen.
NOTE
• You can also select a tone by holding down the
ADVANCED TONES/GM TONES button as you
use the TONE SELECT [
] and [
] buttons to
scroll through tone numbers on the display.
• The tone that you assign to the ADVANCED
TONES/GM TONES button is retained until you
turn off the keyboard.
• If a drum set is assigned to the ADVANCED
TONES/GM TONES button, keyboard keys sound
drum sounds when you press them. See page A-3
for information about the drum sounds that are
assigned to each of the keyboard keys.
• This displays the number of the assigned tone.
Selecting the ADVANCED TONES/GM
TONES Button Variation Tone
To assign a variation tone to the ADVANCED TONES/
GM TONES button, perform the steps under
“Selecting an Advanced tone, GM Tone, or Drum Set”
on page E-7. After step 1, however, press the
VARIATION button so the indicator lamp above it is
lit.
• After you assign a tone as the variation tone, you
can select it by pressing the ADVANCED TONES/
GM TONES button.
Adjusting the Brilliance of a Tone
You can adjust the clarity and sharpness of a tone to
suit your music and personal preferences.
1
Holding down the
FUNCTION
button,
press the
BRILLIANCE
buttons to adjust the
brilliance of a tone to the level that you
want.
[
] : produces a more mellow sound
[
] : produces a brighter sound
• To return the brilliance setting to its initial
default, hold down the FUNCTION button and
press both of the BRILLIANCE buttons at the
same time.
Layering Two Tones
Use the following procedure to layer to two tones, so
they sound at the same time.
Of the two TONE buttons you press to layer two tones,
the one on the left is the main tone, while the one on
the right is the layered tone.
PREPARATION
• If you plan to use a variation tone, perform the procedure
on page E-7 to select the variation tone for the applicable
TONE button(s) before starting this procedure.
407A-E-010A


