background image

E-29

Part 13 Memory

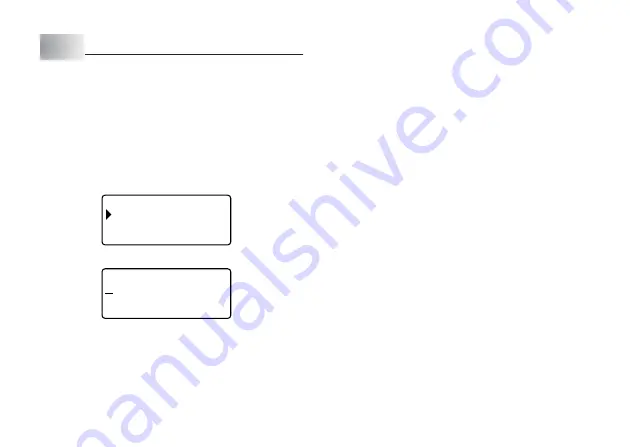
You can save data you create in printer memory. Stored data can be recalled
when you want to use it for printing, or you can edit it to create new data.
The following two types of data can be stored in printer memory.

Text data (10 items)

Layout printing, Numbering, and Bar code data (10 items each)

Text Data

To save text data

1. Input the text you want to save.
2. Press MEMORY.

E

M MOR Y

– –

S OR E

T

R C A L L

E

D

L

E

E T E

3. Use 

z

 and 

x

 to select STORE and then press SET.

M ?

E

A

0

5

/

N

a b

4. Input up to five characters for the label name, and then press SET.
5. In response to the confirmation message that appears, press SET to save

the text or ESC to abort.

To recall text data from memory

1. While the input screen is on the display, press MEMORY.

Note that text recalled from memory will replace any text currently on the
display.

2. Use 

z

 and 

x

 to select RECALL and then press SET.

3. Use 

z

 and 

x

 to select the label name you want to recall, and then press

SET.

4. In response to the confirmation message that appears, press SET to recall

the text or ESC to abort.

Note that recalling data from memory replaces anything that is currently on
the input display. Memory text cannot be appended.

To delete saved text data

1. While the input screen is on the display, press MEMORY.
2. Use 

z

 and 

x

 to select DELETE and then press SET.

3. Use 

z

 and 

x

 to select the label name you want to delete, and then press

SET.

4. In response to the confirmation message that appears, press SET to delete

the text or ESC to abort.

If there is more text in printer memory, the next label name will appear after
the text you selected is deleted. You can repeat the above procedure to delete
other text, if you want.

To exit the delete operation, press ESC.

Содержание KL-820 - Label Printer

Страница 1: ...KL 820 E RJA519067 001V01 User s Guide...

Страница 2: ...he symbol shown here indicates you should not try to take the unit apart indicates something you should do Read This First CASIO COMPUTER CO LTD shall not be held liable for any loss or claims by you...

Страница 3: ...to heat or dispose of them by incineration Never mix old batteries with new ones Never mix batteries of different types Do not charge the batteries Make sure the positive and negative ends of the batt...

Страница 4: ...the plastic bags in which the product comes packed over your head Doing so creates the risk of suffocation Particular care is required in households where young children are present Warning Do not aff...

Страница 5: ...n cause them to leak resulting in damage to nearby objects or to explode creating the risk of fire and personal injury Always make sure you observe the following precautions Use only batteries that ar...

Страница 6: ...to the user to keep backup records of important data Keep this manual on hand for future reference Operating Precautions Observe the following precautions to ensure that the printer provides you with...

Страница 7: ...Numbering Formats E 40 Built in Logos E 41 Specifications E 43 Contents Safety Precautions E 1 Operating Precautions E 5 Part 1 Getting Acquainted E 7 General Guide E 7 Label Printer Menus E 7 Part 2...

Страница 8: ...en you press SET to execute a menu item the Label Printer either moves on to the next menu or it executes the selected function and returns to the text input screen that you started from Part 1 Gettin...

Страница 9: ...o use the Label Printer for a long time Warning Never use recharged batteries with the unit Do not expose batteries to direct heat do not short circuit them and do not try to take them apart Keep batt...

Страница 10: ...0 0 cm 4 4 a b AC Adaptor Note the following important precautions when using an optional AC adaptor to power your Label Printer Use only a genuine CASIO AD A95100 AC adaptor with the same voltage rat...

Страница 11: ...ette cover and then lift up to open the cover Never touch the print head or other metal objects near the head These items become very hot and touching them creates the risk of burn injury Resetting th...

Страница 12: ...ut 3cm Important Once tape is pulled out there is no way to get it back into the cartridge Never use excessive force when pulling on the tape Doing so can cause the ink ribbon to break creating the ri...

Страница 13: ...corners of the keys The keyboard automatically unshifts and the shift indicator disappears as soon as you input a character appears when you press the CODE key While this indicator is on the display...

Страница 14: ...r input at high speed until you release it To input alpha numeric characters 1 Turn power on 2 Input the first line of characters To input the upper case letters you can use either SHIFT or CAPS With...

Страница 15: ...rs formed using the CODE key CAPS on Example To input 1 Press CODE 2 Press 1 3 Press A Special Symbols You can also access a menu of special symbols by pressing SYMBOL There are a total of 86 differen...

Страница 16: ...mark input Block mark Block marks appear on the display only They are not printed on the tape The block mark is located here Nothing is printed at block mark locations Using Text Blocks In the exampl...

Страница 17: ...text on the display use either the BS key or DEL key to delete the characters to be changed ABC 2 Input the new characters XYZ Part 4 Deleting and Inserting Characters This section describes everythin...

Страница 18: ...you have just input or you can specify a default font that is used automatically whenever you create a new label The current font setting is indicated by the pointer along the left side of the display...

Страница 19: ...al mm Character Size There are two methods you can use to set the character size AUTO and MANUAL With AUTO character size is set automatically in accordance with the tape size you are using and the nu...

Страница 20: ...izontal 1 2 3 4 5 6 1 1 1 1 2 1 3 1 4 1 5 1 6 2 1 1 1 2 1 3 1 4 1 5 1 6 3 1 1 1 2 1 3 1 4 1 5 1 6 4 1 1 1 2 1 3 1 4 1 5 1 6 Vertical Horizontal 1 2 3 4 5 6 1 1 1 1 2 1 3 1 4 1 5 1 6 2 2 1 2 2 2 3 2 4...

Страница 21: ...putting the text Text Effects There are three text effects that you can assign shading underlining and boxed text The following shows examples of each Shading Underlining Boxed Text Text effect change...

Страница 22: ...not make multiple specifications for specific characters Only one character style can be in effect at a time You cannot combine character styles Style Indicator Sample Normal None Bold Outline Shadow...

Страница 23: ...After you print a tape you can peel off its paper backing and stick the tape onto the object you want Note that the tape will not stick on coarse wet oily or soiled surfaces Also you should not try t...

Страница 24: ...z and x x x x x to select the option you want AUTO Automatically adjusts tape length in accordance with the number of characters FIX Maintains a fixed tape length in the range of 0cm 0 to 99 9cm 39 5...

Страница 25: ...is not applied when printing with a frame The frame function cannot be used when there are a block mark input If you want to use the frame function delete the block mark Part 9 Layout Printing Using L...

Страница 26: ...and then press SET to start printing For information about saving tape label data see page E 29 Part 10 Creating and Printing a Sequentially NumberedTape Label This label printer gives you a choice o...

Страница 27: ...lect No 1 9 Use z and x to select PRINT and then press SET 10 Use the number keys to specify the number of labels to be printed Here we want to print one set of labels numbered 15 16 and 17 so we will...

Страница 28: ...W and then press SET R A B C E OD E N 1 3 A E N A 8 4 Use z and x to select the type of bar code you want to print and then press SET A A T D 2 1 0 a b 5 Input 12 number of digits when you are using E...

Страница 29: ...page E 41 L G O O S e c i a l a l e p On S B s e t S l e l e r 4 Use z and x to select the logo you want to use and then press SET Here we will select Special 5 Use z and x to select the size you wan...

Страница 30: ...at text recalled from memory will replace any text currently on the display 2 Use z and x to select RECALL and then press SET 3 Use z and x to select the label name you want to recall and then press S...

Страница 31: ...T A L YOUT N W E R CA L L E D L E E T E 3 Use z and x to select RECALL and then press SET This will display a list of label names E R CA L L CAS I O F L E I 4 Use z and x to select the label name you...

Страница 32: ...tape label printing that can be performed by the printer Important If there is label data from your last label layout session is still in memory performing a demo print will delete it If you think you...

Страница 33: ...Replace the tape cartridge and close the cover Roller Printer head Cleaning the Printer Exterior Wipe the exterior of the printer with a cloth moistened with plain water Wring all excess liquid from t...

Страница 34: ...dge and reload it correctly Clean the printer head and roller E 31 E 10 E 32 Tape comes out when PRINT is pressed but nothing is printed on it Possible Causes Action Page Only blank spaces were input...

Страница 35: ...Causes The number carriage returns you input causes the label to exceed the maximum number of lines for the tape you are using You are attempting to recall text from memory when there is none stored Y...

Страница 36: ...rks B in a single sentence Turn off the printer and replace the tape cartridge with one that is 12mm or wider Message LOAD A TAPE CARTRIDGE 18mm OR WIDER CLEARS TAPE LENGTH SETTING SET ESC INPUT A VAL...

Страница 37: ...the AC adaptor the last time power was turned on or while the message PLEASE WAIT was displayed so the printer did not power down normally You are trying to use the frame function while a block mark w...

Страница 38: ...E 37 Alpha Characters Symbols...

Страница 39: ...E 38 Frames...

Страница 40: ...16 14 14 24 24 24 23 35 35 15 12 12 30 30 30 Type Input Item Maximum Number TAPE Width mm Format 24 18 12 9 6 Type Input Item Maximum Number TAPE Width mm Format 24 18 12 9 6 mini DV MD FD MO TITLE TI...

Страница 41: ...COMMENT2 TITLE COMMENT1 COMMENT2 TITLE TITLE COMMENT TITLE COMMENT1 COMMENT2 TITLE COMMENT1 COMMENT2 19 19 19 22 14 14 19 19 19 30 30 30 21 13 13 30 30 30 NUMBER COMMENT NUMBER NUMBER COMMENT COMMENT...

Страница 42: ...E 41 Built in Logos PRICE Labels SIGN Labels...

Страница 43: ...E 42 WORK Labels ATTENTION...

Страница 44: ...cter Styles Normal bold outline shadow raised Character sizes 1 1 1 2 1 3 1 4 1 5 1 6 2 1 2 2 2 3 2 4 2 5 2 6 3 1 3 2 3 3 3 4 3 5 3 6 4 1 4 2 4 3 4 4 4 5 4 6 Number of lines 1 6mm and 9mm tapes 1 or 2...

Страница 45: ...CASIO COMPUTER CO LTD 6 2 Hon machi 1 chome Shibuya ku Tokyo 151 8543 Japan MO0806 A Printed in China Imprim en Chine...

Отзывы: