background image

89

Printing

Printing

There are a variety of different ways to print images stored on a computer. This 
section shows one standard printing example.

.

Printing on a Windows Computer

1.

Use the procedure under “Viewing and Storing Images on a Computer” 
(page 92) 
to store the image you want to print, and then display the 
image on your computer screen.

2.

Click “Print” and then “Print”.

3.

Configure the desired print settings and then click “Print”.

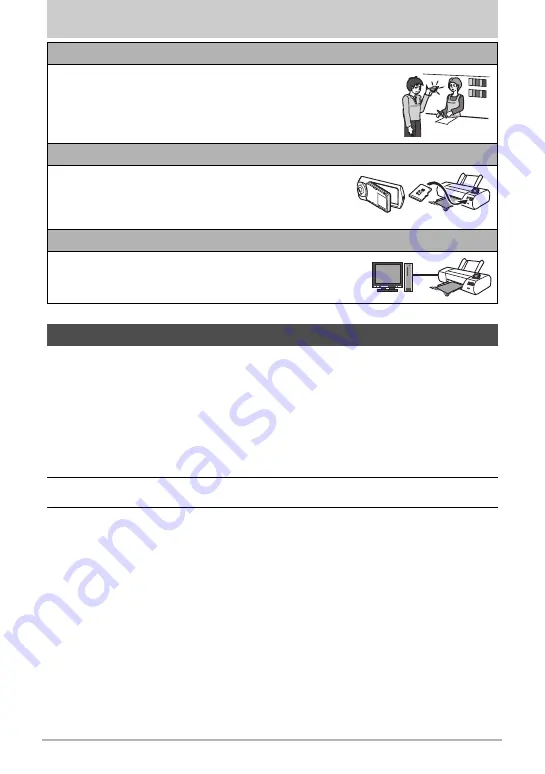
Professional Print Service

You can take a memory card that contains the images you want 
to print to a professional print service and have them printed.

Printing on a Home Printer

You can use a printer equipped with a memory card slot 
to print images directly from a memory card. For details, 
see the user documentation that comes with your 
printer.

Printing with a Computer

After transferring the images to your computer, use 
commercially available software to print.

Printing with a Computer

Содержание EX-TR50

Страница 1: ...ASIO product Before using it be sure to read the precautions contained in this User s Guide Keep the User s Guide in a safe place for future reference For the most up to date information about this pr...

Страница 2: ...r camera check to make sure that all accessories shown below are included If anything is missing contact your original retailer Accessories Rechargeable lithium ion battery NP 150 USB AC adaptor AD C5...

Страница 3: ...eld liable for any damages lost profits or claims by third parties arising out of the use of EXILIM Remote CASIO COMPUTER CO LTD shall not be held liable for any damages or lost profits caused by loss...

Страница 4: ...he Camera 24 Preparing a Memory Card 26 Supported Memory Cards 26 To load a memory card 27 To format initialize a new memory card 28 Turning Power On and Off 29 To Shoot a Snapshot 30 Selecting an Aut...

Страница 5: ...White Balance 60 Specifying ISO Sensitivity ISO 61 Selecting a Focus Mode Focus 62 Turning on Image Review Review 63 Viewing Snapshots and Movies 64 Viewing Snapshots 64 Viewing a Movie 64 Editing a M...

Страница 6: ...ngs you can do using a computer 91 Using the Camera with a Windows Computer 91 Viewing and Storing Images on a Computer 92 Playing Movies 94 Using the Camera with a Macintosh 95 Connecting the Camera...

Страница 7: ...ting the Camera to Factory Defaults Reset 107 Appendix 108 Safety Precautions 108 Precautions During Use 115 Power Supply 120 Charging 120 Battery Precautions 121 Using the Camera in another Country 1...

Страница 8: ...ens 6Microphone pages 16 49 7 HDMI HDMI output micro page 68 8 USB port pages 19 22 92 96 9 p Power page 29 bkBack lamp pages 20 23 29 31 blStrap hole page 8 bmMonitor screen pages 9 9 16 100 bnSpeake...

Страница 9: ...emory capacity Movie recording time pages 48 131 5 Movie stop icon pages 32 48 bp br bs 1 cm cl ck bt 2 bq 9 7 8 6 5 4 bk 3 bm bl bn bo 1PLAY mode icon page 29 2 Show Icons icon 3LED light page 57 4Wh...

Страница 10: ...bq bp bo bn 5 4 2 1 3 6 7 8 9 bk bl bm 1Protect indicator page 76 2 Show Icons icon 3Folder name file name page 98 4Snapshot image size page 58 5Battery level indicator page 24 6Date time pages 24 10...

Страница 11: ...een is a touch panel that can be used to perform operations Simple self portrait shooting The monitor screen can be rotated so it faces in the same direction as the camera s lens making self shooting...

Страница 12: ...Shot Toy Camera Soft Focus Light Tone Pop Sepia Monochrome Miniature Fisheye Paint Draw figures write text or stamp information into a recorded snapshot Wireless LAN Connection Turns your smartphone...

Страница 13: ...he lens and flash window free of dirt and dust and wipe gently with a soft dry cloth The camera s frame can be rotated 90 degrees towards the lens side and 225 degrees towards the opposite side 1 With...

Страница 14: ...ion you can rotate it 180 degrees clockwise and 90 degrees counterclockwise The monitor screen panel can also be rotated when the frame is closed 1 Hold the camera as shown in the illustration 2 Firml...

Страница 15: ...screen facing the opposite direction of the lens Open the frame 90 degrees and hold the frame You can also shoot with the camera upside down if you like Tabletop Shooting Self portrait Shooting Point...

Страница 16: ...you are operating the camera Never swing the camera around by its strap IMPORTANT Take care to ensure that your finger is not blocking or is not too close to the LED light Fingers can cause unwanted s...

Страница 17: ...een image Squeeze Holding your thumb and forefinger against the screen as you bring them together Use squeeze to reduce the size of the screen image IMPORTANT Never use a pointed or hard object to per...

Страница 18: ...While depressing the OPEN button slide the cover in the direction of arrow 2 in the nearby illustration 3 Load the battery With the CASIO logo on the battery upwards load the battery into the camera a...

Страница 19: ...open the frame USB AC adaptor USB connection to a computer To charge with the USB AC adaptor The adaptor lets you charge the battery while it is loaded in the camera While the camera is turned off co...

Страница 20: ...ly about 60 minutes In either case disconnect the USB cable from the camera and then reconnect it to resume charging Pressing p Power while the USB AC adaptor is connected to the camera will turn on t...

Страница 21: ...nication or malfunction Note that even while the connector is fully inserted you still will be able to see the metal part of the connector as shown in the illustration Make sure that the u mark side o...

Страница 22: ...isconnect and then reconnect the USB cable to restart charging To complete charging faster use of the included USB AC adaptor is recommended If the battery has not been used for a very long time charg...

Страница 23: ...ons may make it impossible to charge via the USB cable A battery that is still warm immediately after normal use may not charge fully Give the battery time to cool before charging it A battery dischar...

Страница 24: ...104 See page 134 for information about battery life and number of shots The first time you turn on the camera a screen appears for configuring the display language date and time settings Failure to se...

Страница 25: ...our and 24 hour format touch the 12 24 hour switch icon 6 When the date and time settings are the way you want touch OK 7 Touch Auto or Premium Auto Pro to select the default auto recording mode you w...

Страница 26: ...bove are supported memory card types as of June 2014 This camera supports use of microSD memory cards of the following types and capacities microSD memory cards up to 2GB microSDHC memory cards from 2...

Страница 27: ...u hear it click into place 4 Close the cover Positioning the cover about two millimeters from the lens unit keep it parallel with the camera as you slide it in the direction of arrow 1 and then arrow...

Страница 28: ...other files on it will delete its contents Normally you do not need to format a memory card again However if storing to a card has slowed down or if you notice any other abnormality re format the car...

Страница 29: ...ill turn off power automatically if you do not perform any operation for about five minutes Turning Power On and Off To enter the PLAY mode In the REC mode touch PLAY If PLAY is not displayed on the s...

Страница 30: ...isplay orientation Recording mode 4 Touch Auto or Premium Auto Pro to select the auto recording mode you want To Shoot a Snapshot Selecting an Auto Recording Mode Setting REC Screen Icon Display Descr...

Страница 31: ...camera will beep the back lamp will light green and the focus frame will turn green To shoot a snapshot When you half press the shutter button the camera automatically adjusts exposure and focuses on...

Страница 32: ...ays red and the back lamp is flashing green it means that the image is not in focus because the subject is too close etc Re point the camera at the subject and try to focus again Shooting with Auto Fo...

Страница 33: ...h standard Auto instead In some cases Premium Auto Pro may not be able to interpret the shooting environment correctly If this happens shoot with standard Auto If is displayed the camera will shoot a...

Страница 34: ...images that cannot be displayed for some reason If memory becomes full you can delete snapshots and movies you no longer need in order to free up storage and record more images IMPORTANT Remember tha...

Страница 35: ...ox of the selected file s image 6 After you are finished selecting files touch Delete 7 Touch Delete This deletes the files you selected To cancel the delete operation touch Cancel in step 6 NOTE You...

Страница 36: ...O sensitivity is set to a high value This can cause the camera to take relatively longer to be ready to shoot again after you press the shutter button Do not perform any operation while the image reco...

Страница 37: ...u want to change 1 Press p Power to turn on the camera and enter the REC mode If the camera is in the PLAY mode touch REC to enter the REC mode 1Menu page 55 2Recording mode page 38 3Remote capture pa...

Страница 38: ...remium Auto Pro recording delivers higher image quality than standard Auto recording mode page 30 Posing Shot Posing Shot lets you shoot five successive snapshots as the camera provides voice guidance...

Страница 39: ...ice guidance use the Posing Vol setting under Sounds page 101 To interrupt an ongoing Posing Shot operation press the shutter button or touch the monitor screen Note that preview images are not displa...

Страница 40: ...tal Ball Creates a mysterious effect by placing the image in a bubble floating in midair Sparkling Shot Softens the overall image and adds points of light for a sparkle effect Toy Camera Dark edges an...

Страница 41: ...Shooting with this REC mode makes the shooting range narrower than normal The desired effect may not be attained if the camera or subject moves during shooting Depending on shooting conditions and im...

Страница 42: ...levels as desired 6 Touch OK 7 Press the shutter button to shoot This will shoot and store three versions of the same image with various Skin Tone settings based on the setting you selected in step 5...

Страница 43: ...ion Shutter BEST SHOT Make up BKT Following BEST SHOT scene Motion Shutter Triple Shot HS Night Scene Portrait 1 Select Premium Auto Pro Posing Shot or Motion Shutter for the recording mode pages 38 5...

Страница 44: ...direction as the lens page 13 2 On your camera enter the REC mode and then touch Show Icons 3 Touch the icon This enter the Mirror Mode Mirror Mode Functions Brightness adjustment and horizontal scree...

Страница 45: ...mmended Zoom operations are disabled during high speed movie recording Perform the zoom operation before you touch Movie to start recording is displayed on the monitor screen while digital zoom is bei...

Страница 46: ...e screen is facing in the same direction as the lens page 13 2 Select Auto or Premium Auto Pro for the recording mode page 30 3 Drag Self timer downwards to specify the self timer countdown duration T...

Страница 47: ...em whose setting you want to change 5 To close the menu screen touch MENU or press the shutter button To record a movie Movie Quality REC Screen Icon Display Frame Rate Image Size Pixels Description F...

Страница 48: ...to stop recording Each movie can be up to 29 minutes long Movie recording stops automatically after 29 minutes of recording Movie recording also will stop automatically if memory becomes full before...

Страница 49: ...ain types of memory cards can slow down processing speed Whenever possible use an Ultra High Speed Type memory card Note however that not all operations can be guaranteed even if an Ultra High Speed T...

Страница 50: ...BEST SHOT scenes the message Busy Please wait will appear on the monitor screen after you press the shutter button The camera is in the process of recording an image until the message appears Keep the...

Страница 51: ...in the pre record buffer will be deleted 3 Press the shutter button all the way down to record This will record three images one of the action before the shutter button is fully pressed plus two real...

Страница 52: ...hand or perform some other movement in the area of the start self timer icon you positioned in step 3 When the camera detects subject movement within the icon it will automatically start a self timer...

Страница 53: ...l record a burst of images and merge them in a way that minimizes image blur due to low light conditions 1 Select HS Night Scene scene page 50 2 When you are ready to shoot press the shutter button NO...

Страница 54: ...ts remain as still as possible as the camera shoots the series of images Movement of the camera while it is placed on a surface may cause erroneous judgment that it is hand held If surroundings are ex...

Страница 55: ...Configure the setting of the item in accordance with the screen contents To cancel and exit the menu touch MENU or press the shutter button NOTE Depending on the recording mode some of the items on t...

Страница 56: ...cted as the recording mode the camera will automatically determine the optimum focus point s and focus automatically Procedure Enter the REC Mode MENU Self timer With the Self timer pressing the shutt...

Страница 57: ...anyone to look directly into the light You should compose the image so the main subject is in the center of the image when using the LED light Since the camera is equipped with a wide angle lens the c...

Страница 58: ...e mail when viewing the image on a computer etc The size of an image indicates how many pixels it contains and is expressed as horizontal pixelsxvertical pixels Note that larger images have more pixe...

Страница 59: ...o cancel exposure compensation change the EV value to 0 0 2 Touch OK This applies the exposure compensation value The exposure compensation value you set remains in effect until you change it or turn...

Страница 60: ...s select the white balance setting that matches your shooting conditions Daylight Overcast etc 2 Touch OK Adjusting White Balance White Balance Setting Description Auto WB Configures the camera to adj...

Страница 61: ...longer for the camera to finish recording an image after it is shot You will not be able to perform any operation while image recording is in progress Specifying ISO Sensitivity ISO Setting Descripti...

Страница 62: ...tton to start recording Selecting a Focus Mode Focus Settings REC Screen Icon Display Type of Shot Focus Mode Approximate Focus Range 1 Snapshot Movies Snapshot Movies AF Auto Focus None General recor...

Страница 63: ...us frame does not appear on the display when the Touch Shutter is enabled On Procedure Enter the REC Mode MENU Review While Review is turned on the camera will display an image immediately after it is...

Страница 64: ...uch PLAY to enter the PLAY mode 2 Drag left or right across the screen image to scroll through the movies until the one you want is displayed 3 Touch Movie to start playback Viewing Snapshots Viewing...

Страница 65: ...t reverse operation To return to normal playback speed touch 6 Stop playback During playback touch Volume adjustment During playback touch n and then drag the volume bar to the desired level Volume ca...

Страница 66: ...n you edit a movie only the result is saved The original movie is not retained An editing operation cannot be undone NOTE A movie that is shorter than five seconds cannot be edited Editing of movies r...

Страница 67: ...tion you want to use touch an image and then touch OK Send an image to a smartphone Delete an image Protect an image Snapshots can be zoomed on the monitor screen up to 8X The actual available zoom fa...

Страница 68: ...a commercially available HDMI cable to connect the camera to a TV Make sure that the camera is turned off before plugging in or unplugging the cable Check the user documentation that comes with the TV...

Страница 69: ...connector on the other end Proper image and or audio output and other operations may not be possible with some devices Connecting the camera to the HDMI connector of another device can damage both the...

Страница 70: ...NU or press the shutter button Menu Operations in This Manual Menu operations are represented in this manual as shown below Touch the indicated icons and items and perform operations as they are indic...

Страница 71: ...s one Promotion movies are HD movie quality with an aspect ratio of 16 9 This means that the upper and lower parts of a snapshot will be trimmed off when it is converted to a promotion movie Selecting...

Страница 72: ...l be located at the final position your finger is in when you remove it from the screen Before removing your finger you can drag the stamp to the location you want 4 Touch OK 5 Touch Yes This will sav...

Страница 73: ...ocedure Enter the PLAY Mode Display snapshot MENU Cut out subject You can draw an outline around a subject person or object and extract it from the snapshot You can then insert the extracted subject i...

Страница 74: ...K This will display the cut out subject To scroll back one screen touch the icon on the monitor screen 4 After confirming that the part of the image to be extracted is the way you want touch OK This s...

Страница 75: ...t ratio of 4 3 1 Drag left or right to scroll through images Select image you want to use as the background and then touch OK 2 Drag left or right to scroll though subjects Select the subject you want...

Страница 76: ...lso protect images using the image menu page 67 Protecting a File Against Deletion Protect All Files On Protects all files All Files Off Unprotects all files Select Protects and unprotects specific fi...

Страница 77: ...has been protected or zoomed cannot be rotated Procedure Enter the PLAY Mode MENU Resize You can reduce the size of a snapshot and save the result as a separate snapshot The original snapshot is also...

Страница 78: ...K 3 Drag the image until the part you want to keep is displayed To enlarge the image touch the screen with your thumb and forefinger and then spread them apart To reduce the size of the image touch th...

Страница 79: ...Remotely control and shoot with the camera using a smartphone 83 Send Last Shot Send a snapshot that was just recorded with the camera to a smartphone After sending an image to a smartphone you can t...

Страница 80: ...ing a movie received on an Android terminal Note that movies are not displayed by Gallery Movies are stored in a folder named EXILIM Remote A separate movie player is required to playback movies whose...

Страница 81: ...guarantees are made concerning the ability to operate the EXILIM Remote app on any particular smartphone or tablet IMPORTANT Information about operating system versions supported by EXILIM Remote can...

Страница 82: ...y a screen for input of an SSID and password 3 For the smartphone Wi Fi setting input the camera SSID and password When the message Start up the phone app appears on the camera s monitor screen it mea...

Страница 83: ...onitor screen will go blank and its back lamp will light green If the message Connect your phone to the access point below remains on the camera s monitor screen change the smartphone s Wi Fi settings...

Страница 84: ...on Services IMPORTANT Enabling location based services causes the recording date location information and other personally identifiable information to be included in the snapshot data Take care when s...

Страница 85: ...e If the message Connect your phone to the access point below remains on the camera s monitor screen change the smartphone s Wi Fi settings so your camera is selected for connection page 82 5 After im...

Страница 86: ...onnection between your camera and the smartphone and send the files to the smartphone If the message Connect your phone to the access point below remains on the camera s monitor screen change the smar...

Страница 87: ...or another photo browser app Procedure MENU Setup Resize before send This feature can be use to resize snapshots before they are sent to a smartphone using Send Last Shot Remote Capture or Send to ph...

Страница 88: ...Fi settings so your camera is selected for connection page 82 After about 60 seconds the camera s monitor screen will go blank Touching the monitor screen will cause its image to reappear 5 On the sma...

Страница 89: ...then Print 3 Configure the desired print settings and then click Print Professional Print Service You can take a memory card that contains the images you want to print to a professional print service...

Страница 90: ...onnecting the Camera to Your Computer and Saving Files page 95 to store the image you want to print and then display the image on your Macintosh screen 2 Click File and then Print 3 Configure print se...

Страница 91: ...ovies pages 94 97 To edit movies use commercially available software as required Windows users should refer to Using the Camera with a Windows Computer on page 91 Macintosh users should refer to Using...

Страница 92: ...you turn on the camera check to make sure that the color of its back lamp changes from red to green or amber page 23 Note that in this case the monitor screen will remain blank The first time you con...

Страница 93: ...users On the Documents menus click Home and then Paste Windows 7 Windows Vista users On the Documents menu click Organize or Edit and then Paste This will paste the DCIM folder and all the image file...

Страница 94: ...d system environments Configuring one of these environments does not guarantee proper operation Certain settings and other installed software may interfere with proper playback of movies Movie Playbac...

Страница 95: ...do this Operating System Version Required Software See page Save images to your Macintosh and view them there manually OS X Installation not required 95 Save images to your Macintosh automatically Ma...

Страница 96: ...sing The first time you connect the camera to your Macintosh with the USB cable an error message may appear on your computer If this happens disconnect and then reconnect the USB cable 3 Double click...

Страница 97: ...for Movie Playback The minimum system requirements described below are necessary to play back movies recorded with this camera on a computer The above are recommended system environments Configuring o...

Страница 98: ...how file names are displayed on the camera s monitor screen see page 10 The total number of folders and files allowed depends on the image size and quality and capacity of the memory card being used f...

Страница 99: ...g an image recorded on another camera it may take a long time for the image to appear on this camera s monitor screen Built in Memory and Memory Card Data Handling Precautions Whenever copying memory...

Страница 100: ...urrently displayed image are displayed in red when the current image s Auto Exposure AE is not correct For information about menu operations see page 55 Adjusting Monitor Screen Brightness Screen Auto...

Страница 101: ...king the Screen Screen Lock Resizing Snapshots before Sending Them to a Smartphone Resize before send Configuring Camera Sound Settings Sounds Startup Toggles the operation tone between on and off Hal...

Страница 102: ...into a snapshot it cannot be edited or deleted Example July 10 2016 1 25 p m Even if you do not stamp the date and or time with Timestamp you can do so later using some printing application Stamping...

Страница 103: ...ring the summer months 3 Drag upwards and downwards to display the area of the destination city and then touch the area 4 Drag upwards and downwards until you find the city you want and then touch to...

Страница 104: ...e the wrong city is selected for your Home City the times and dates of all of the World Time cities page 103 will be wrong To switch between 12 hour and 24 hour format touch the 12 24 hour switch icon...

Страница 105: ...60i but not 1080 50i Because of this the required output method may be 576p when outputting to a digital TV in a PAL reception area that does not support 1080i 60i If you are in a PAL reception area a...

Страница 106: ...e smartphone iPhone Tap the right arrow of the field where the SSID of the camera is displayed in the Wi Fi settings to delete network settings After deleting select the camera SSID again and input th...

Страница 107: ...built in memory or a memory card will delete all protected images stored there Check the battery level before starting a format operation and make sure it is not too low Formatting may not be performe...

Страница 108: ...mbol are specifically prohibited The example at left indicates that disassembly is prohibited The black dot 0 means that the indicated action must be performed Indications within this symbol are actio...

Страница 109: ...ter sticker from the battery Should you ever notice leakage strange odor heat generation discoloration deformation or any other abnormal condition while using charging or storing a battery immediately...

Страница 110: ...k of serious accident LED Light Never use the LED light while it is pointed in the direction of a person operating a motor vehicle Doing so can interfere with the driver s vision and create the risk o...

Страница 111: ...e going out be sure to unplug the USB AC adapter from the power outlet and put in a place away from objects used by animals and pets An animal or pet chewing on the power cord can cause it short leadi...

Страница 112: ...s camera stop using the wireless functions Remote Capture image transfer wireless image viewing etc of this camera or turn off the camera Use of wireless functions creates the risk of radio interferen...

Страница 113: ...d normally within the specified charging time stop charging anyway and contact your local CASIO authorized service center Continued charging creates the risk of battery overheating fire and explosion...

Страница 114: ...ion Should monitor screen liquid ever get into your mouth immediately rinse your mouth out and contact your physician Should monitor screen liquid ever get into your eyes or onto your skin immediately...

Страница 115: ...nvironment Operating Temperature Requirements 0 to 40 C 32 to 104 F Operating Humidity 10 to 85 non condensation Do not place the camera in any of the following locations In an area exposed to direct...

Страница 116: ...tive terminals with tape etc Do not peel the covering off of the battery Do not try to take the battery apart Discarding or Transferring Ownership of a Memory Card or the Camera The format and delete...

Страница 117: ...rising out of unintended use Magnetism electrostatic charge and radio interference Do not use this product near a microwave oven or any other area where magnetism electrostatic charge or radio interfe...

Страница 118: ...that violates copyright laws Note that trademark and registered trademark are not used within the text of this manual microSDXC Logo is a trademark of SD 3C LLC Microsoft Windows Windows Vista Windows...

Страница 119: ...erials are furnished to do so subject to the following conditions The above copyright notice and this permission notice shall be included in all copies or substantial portions of the Materials THE MAT...

Страница 120: ...t automatically even if the battery is not fully charged If the battery has not been used for a very long time charging may terminate automatically after only about 60 minutes 1 Using a battery that h...

Страница 121: ...ou are not using it A battery left in the camera can discharge and go dead which will require some time to charge when you need to use the camera Store batteries in a cool dry place 20 C 68 F or lower...

Страница 122: ...a memory card is recommended Electrostatic charge electrical noise and other phenomena can cause data to become corrupted or even lost Make sure that you always back up important data on other media...

Страница 123: ...TANT Some menu items may not be available depending on the recording mode being use REC Menu Default setting depends on country or geographic region PLAY Menu Reset Initial Default Settings Touch Shut...

Страница 124: ...reen Lock Off Resize before send 3M Sounds Startup On Half Shutter On Shutter On Operation On Operation Vol 3 Playback Vol 3 Posing Vol 3 Timestamp Off World Time Adjust Date Style Language HDMI Auto...

Страница 125: ...in Power will not turn off Nothing happens when a button is pressed Remove the battery from the camera and then reload them Charging The back lamp does not light red and the battery won t charge 1 Unp...

Страница 126: ...o illuminate the subject 2 Shooting with a snapshot with a high ISO sensitivity setting can increase digital noise in the image If digital noise becomes a problem try changing the ISO sensitivity sett...

Страница 127: ...use While Premium Auto Pro is in use only the menu items whose settings can be configured will be displayed on the menus Playback The color of the playback image is different from what appears on the...

Страница 128: ...k all connections 2 If the camera is not turned on turn it on 3 Your computer may not be able to recognize the camera if you connect via a USB hub Always connect directly to the computer s USB port La...

Страница 129: ...d wait until it cools down before trying to use it again Battery is low Battery power is low Card ERROR There is something wrong with the memory card Turn off the camera remove the memory card and the...

Страница 130: ...e are no files There are no files in built in memory or on the memory card This card is not formatted The memory card loaded in the camera is not formatted Format the memory card page 107 This functio...

Страница 131: ...h a different capacity calculate the number of images as a percentage of 16GB The time it takes to play back a high speed movie will be different from the time it takes to record it If you record a hi...

Страница 132: ...to 21 mm in 35 mm format Zoom Up to 4 0X when SR zoom and Digital zoom are used in combination Up to 7 8X when SR Zoom HD Zoom and Digital zoom are used in combination 3M size Focusing Contrast Detec...

Страница 133: ...nt Movies Auto LED Light Auto On Off Wireless data transfer Standard IEEE 802 11b g n Operation frequency range 1 to 11ch Encryption WPA2 Monitor Screen 3 0 inch TFT color LCD Super Clear LCD 921 600...

Страница 134: ...ttery life will be attained under actual operating conditions Frequency of Auto Focus and High Speed CS usage configured settings the amount of time the camera is left turned on and ambient temperatur...

Страница 135: ...to 104 F Dimensions 34 2 W x 39 8 H x 6 9 D mm 1 35 W x 1 57 H x 0 27 D excluding projections Weight Approximately 20 g 0 7 oz Input Power 100 to 240 V AC 50 60 Hz 90 mA Output Power 5 0 V DC 650 mA...

Страница 136: ...2014 CASIO COMPUTER CO LTD 6 2 Hon machi 1 chome Shibuya ku Tokyo 151 8543 Japan MA1408 A M29...

Отзывы: