FIXINGS:
PARTS:
x
2
Part
No.
J6
Be sure to fit the parts in the
same order as the diagrams
shown.
!
Make sure the bolts are fully
tightened with the allen key.
!
FIXINGS:
PARTS:
x
4
Part
No.
J6
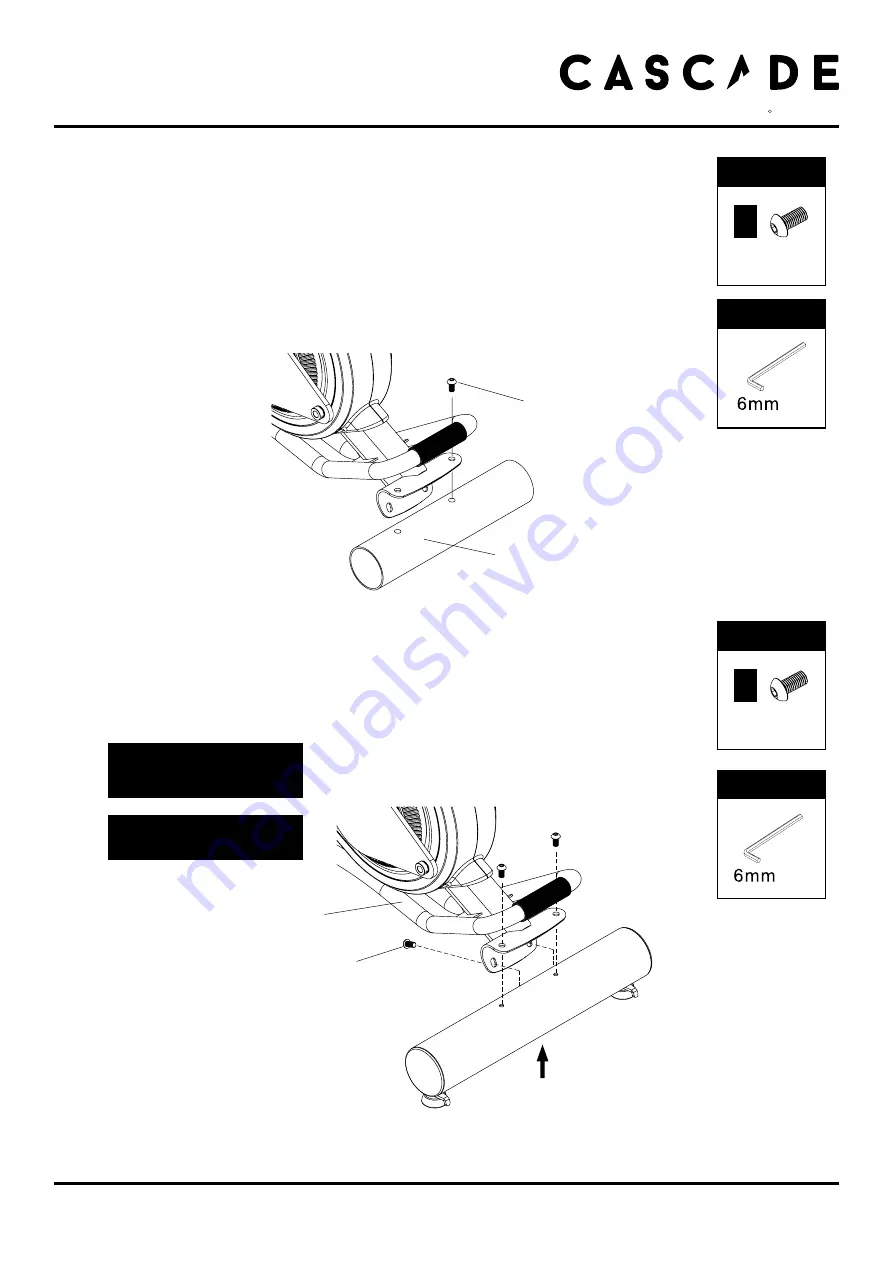
2. Attach the Rear Stabilizer
2-1. Remove the cardboard tube from the rear end stabilizer bracket
Loosen the two
•
M10 x 20mm Allen Head Bolt (J6)
from the cardboard tube and
remove the cardboard tube.
The cardboard tube is used for packaging protection purposes, which won’t be
•
used again during the assembly.
2-2. Attach the Rear Stabilizer
Attach the
•
Rear Stabilizer (C)
to the
Main Frame (A)
with four
M10 x 20mm Allen Head Bolt (J6)
and tighten these bolts with
the 6mm Allen Key..
FIXINGS:
TOOLS:
FIXINGS:
TOOLS:
7
cardboard tube
J6
J6
A
cascadehealthandfitness.com
H E A L T H & F I T N E S S
R
Содержание AIR UNLIMITED 402007
Страница 20: ...Exploded Diagram 20 cascadehealthandfitness com...
Страница 22: ...22 Cascade Health and Fitness Warranty cascadehealthandfitness com...
Страница 23: ......
Страница 24: ...H E A L T H F I T N E S S R...


