background image


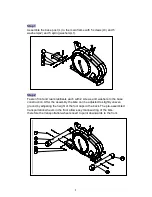
Stap 1


Assemble the base post (L) to the main frame with 5 screws(L3) and 5 
washers(L2) and 5 spring washers(L1). 


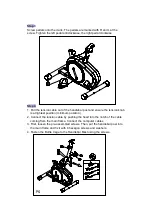
Stap 2                                                                                                                                                                 


Fasten front and rear stabilizers each with 2 screws and washers to the base 
construction. After the assembly the bike can be adjusted to slightly uneven 
ground by adjusting the height of the foot caps in the back. The pre-assembled 
transportation wheels in the front allow easy manoeuvring of the bike: 
therefore the transportation-wheels need to point downwards to the front. 


STEP1


STEP2


Содержание Benefit B420

Страница 1: ...1 Benefit B420 Bike 91101...

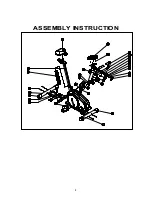
Страница 2: ...2 ASSEMBLY INSTRUCTION...

Страница 3: ...each with 2 screws and washers to the base construction After the assembly the bike can be adjusted to slightly uneven ground by adjusting the height of the foot caps in the back The pre assembled tra...

Страница 4: ...nd ensure the tension knob is at lightest position minimum position 2 Connect the tension cable by pushing the head into the notch of the cable coming from the main frame Connect the computer cables 3...

Страница 5: ...re that the knob is always tightened Step 6 1 Place handlebar on the handlebar base and position the metal cover on the top of handlebar 2 Next assemble all together with screw spring washer flat wash...

Страница 6: ...Mount the computer to the hold of the handlebar pole with the enclosed screws and connect the computer cables 2 Plug the delivered hand pulse wire for measuring the pulse rate in the socket at the com...

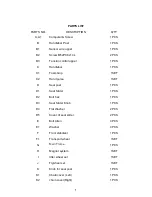
Страница 7: ...ip 1SET C2 Hand pulse 1SET D Seat post 1PCS D1 Seat Slider 1PCS D2 Bolt hex 1PCS D3 Seat Slider Knob 1PCS D4 Flat Washer 2PCS D5 Cover of seat slider 2PCS E Bolt Allen 4PCS E1 Washer 4PCS F Front stab...

Страница 8: ...pring Washer 5PCS L3 Bolt Allen 5PCS M Rear stabilizer 1PCS M1 End cap 1SET N Pulley wheel 1PCS N2 Crank 1PCS O Seat 1pcs O1 Bellow for seat post 1PCS O2 Bottle cage 1PCS O3 Pedal 1SET P T knob 1PCS P...

Страница 9: ...9...

Страница 10: ...10 EXPLODED VIEW ASSEMBLY DRAWIN...

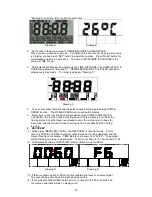
Страница 11: ...TIME Accumulates workout time from 00 00 up to 99 59 The user may preset target time pressing SET button Each increasement is 1 minute SPEED Displays current training speed Maximum speed is 99 9 KM H...

Страница 12: ...n has been preset the target TIME or DISTANCE or CALORIES the function will be counting down from the preset to zero while the training starts Once the target is achieved to zero the monitor start to...

Страница 13: ...training for 4 minutes the main screen will be off and display the room temperature automatically 2 If the computer displays abnormally please re install batteries and try again 3 Battery Spec 1 5V U...

Страница 14: ...14...

Отзывы: