FILE NAME ( SM_ZEPHAIR FLOOR FAN ) RAS 4-13-04
761 Corporate Center Dr. • Pomona, CA 91746 • (909) 689-1477 • (800) 498-8482
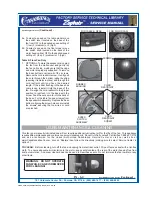
male pin connector is on the neck of the base, note that one side has a locking tooth.
8. Assure that the latch and locking tooth are matched up and plug the wire from the pipe into the fan base.
Move the collar away from the end and slide the pipe onto the fan base, but do not tighten the collar yet.
9. With one hand hold the handle of the motor cage and with the other hold the neck of the base and tilt the fan
up to a standing position.
10. Align the tab from the base to the notch in the pipe. Thread and tighten the collar for the base of the fan,
tighten completely.
11. Set the floor fan up where the cord will not be in a traffic area or tripped on. Also make sure the oscillation
movement of the cage is not impeded in any way.
Assembly instructions
.
(Continued) -
Step 8
Step 9
Step 10
NOTCH
TAB
4. To control the vertical direction of airflow, grip the handle on top of
the fan tightly and loosen the wing nut on the side of the fan housing
neck. Adjust to the desired angle and tighten the wing nut.
5. To make the fan oscillate, push down on the oscillating knob located
on the top of the fan housing, near the handle. To stop the fan from
oscillating, pull up on the oscillating knob.
1. Place the fan on a safe, flat surface where it cannot fall or be pulled
by the cord.
2. Plug the fan into a grounded outlet.
3. To set the horizontal direction of airflow, hold the fan housing neck
in one hand, make sure the oscillating knob is in the up position and
then turn the cage left or right.
OPERATING INSTRUCTIONS
Operationg Instructions
.
(Continued) -
IX - 6.3


