138
▶
Selecting one of following sale modes, user may select an one-stop setting
for Clerk, Operation, Print, and Prepack mode.
MODE
Clerk Mode
Operation
Mode
Mode
Prepack
Mode
1. REG: Ticket & Floating
Floating Clerk
Regist
Ticket
OFF
2. REG: Label
No Clerk
Regist
Label
OFF
3. REG: Prepack
No Clerk
Regist
Label
ON
4. REG: Label & Floating
Floating Clerk
Regist
Label
OFF
5. Manager
-
Manager
-
OFF
6. Repack
-
Repack
-
OFF
7. Self Service & Label
-
-
Label
OFF
Usually user has to set each option you wish to for clerk, operation, print or prepack
mode. However, user may select simply one-stop sales mode for 7 different
modes-Clerk, Operation, Print, and Prepack mode. User may also set options
for Clerk/Operation mode in MENU 1820 and Print/Prepack mode in MENU 1731.
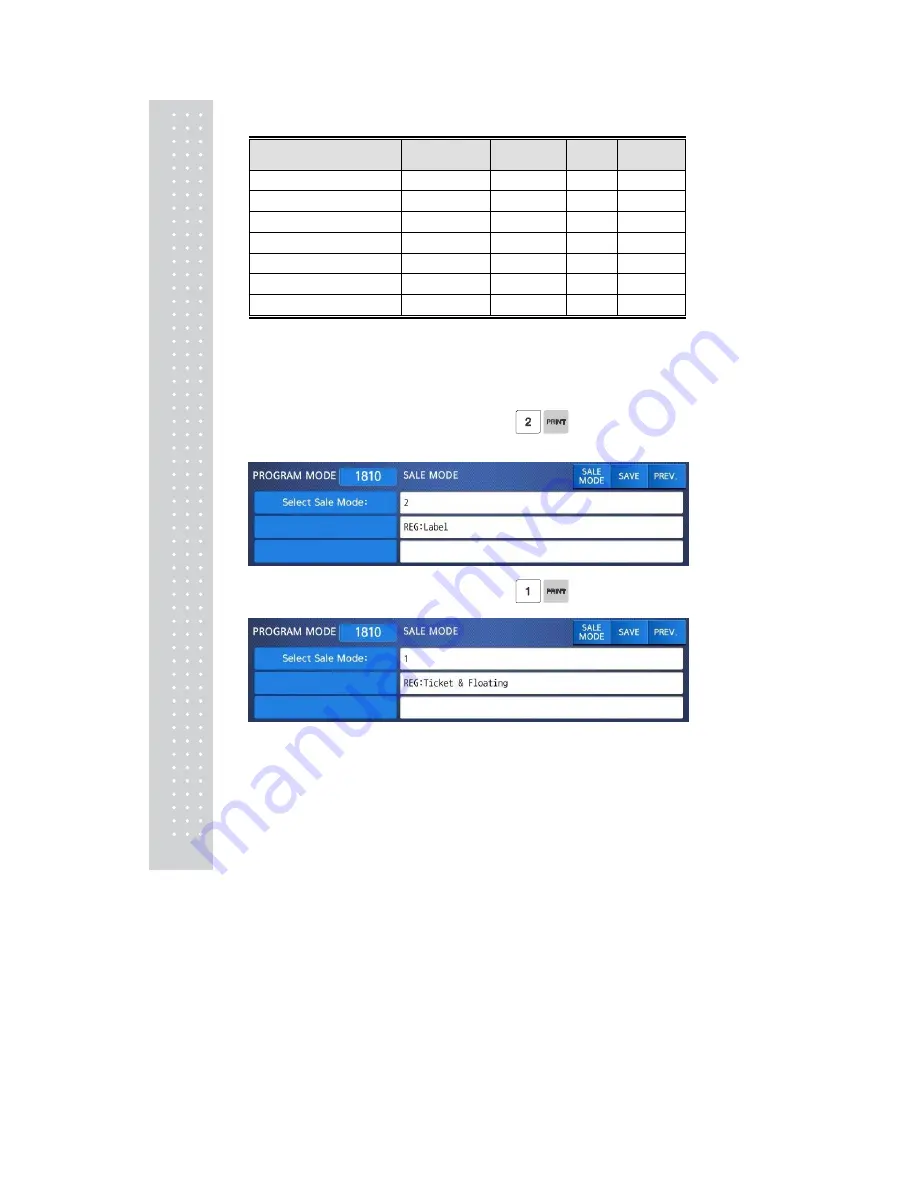
1. Select a sale mode
EX) Sale mode = 2.REG: Label
2. Select “Floating & Ticket” mode
EX) Sale mode = 1.REG: Ticket & Floating
Содержание CL7200 series
Страница 1: ...2 ...
Страница 8: ...9 1 GENERAL 1 1 PRECAUTIONS ...
Страница 13: ...14 1 4 NAMEAND FUNCTIONS OVERALLVIEW ...
Страница 14: ...15 DISPLAY Frontdisplayfortheoperator Frontdisplayfortheoperatorwithfunctionkey ...
Страница 15: ...16 Backdisplayforcustomers ...
Страница 24: ...25 1274 Tare Key ...
Страница 40: ...41 ...
Страница 45: ...46 ...
Страница 50: ...51 ...
Страница 78: ...79 ...
Страница 121: ...122 ...
Страница 145: ...146 Setting Configuration Permission ...
Страница 152: ...153 ...
Страница 159: ...160 5 ClearAll Clear all reports of period 1 and 2 ...
Страница 161: ...162 Sample Scale Report ...
Страница 163: ...164 Sample PLU Report ...
Страница 165: ...166 Sample Miscellaneous Report ...
Страница 172: ...173 Sample Clerk Report ...
Страница 178: ...179 3 3 2 Weighed Tare Entry Place the empty container on the platter making sure that the weight is stable EX 0 15 kg ...
Страница 179: ...180 Press TARE key ...
Страница 183: ...184 Press PRINT key to print label ...
Страница 185: ...186 Press PRINT key to print label ...
Страница 197: ...198 Press the PRINT key Markdown STRIKE THROUGH is printed on label as figure ...
Страница 200: ...201 Note You can set four markdown information in menu 1720 of program mode See chapter 2 13 3 ...
Страница 202: ...203 Call up a PLU and place item on the platter Press ADD key PLU is cleared automatically ...
Страница 211: ...212 If price is not same void list screen is shown on the display automatically ...
Страница 213: ...214 Enter 6 00 Press PRINT key then you can select payment type again Select Payment type 0 cash and press PRINT key ...
Страница 224: ...225 Note To use Fixed Price Key you have to set this key in menu 1880 of program mode See chapter 2 14 8 ...
Страница 226: ...227 Note To use DISCOUNT key you have to set this key in menu 1880 of program mode See chapter 2 14 8 ...
Страница 228: ...229 APPENDIX 1 Label Format There are fixed label format and user label format Fixed Label Format ...
Страница 229: ...230 1 1 Label Format Sample 1 2 3 4 5 6 ...
Страница 230: ...231 7 8 9 10 11 12 13 14 ...
Страница 231: ...232 15 16 17 18 19 20 ...
Страница 232: ...233 21 22 23 24 ...
Страница 233: ...234 25 26 27 28 29 30 ...
Страница 234: ...235 31 32 33 34 35 36 37 38 ...
Страница 235: ...236 39 40 41 42 43 44 45 ...
Страница 236: ...237 1 2 Label Format s field Sample 1 Label sample 1 2 Label sample 2 ...
Страница 238: ...239 3 Window Character Set Information ...
Страница 239: ...240 MEMO ...
Страница 240: ...241 MEMO ...
Страница 241: ...242 MEMO ...
Страница 242: ...243 MEMO ...
Страница 243: ...244 MEMO ...
Страница 244: ...245 MEMO ...
Страница 245: ...246 MEMO ...
Страница 246: ...247 MEMO ...
Страница 247: ...248 ...
Страница 248: ...249 뒷표지 ...


