background image

NORMAL OPERATION (CONT) 

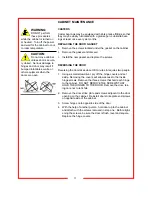
CAUTION: 
HOT SURFACE 


Inner surfaces of the unit 
will be very hot during and 
after operation.  
  
Avoid touching the cabinet 
when loading or removing      
product. 

LOW TEMPERATURE ALARM 
 

The cabinet is equipped with a low temperature alarm feature.  When 
the alarm is active, the temperature display will indicate “

LO

” and then 

TEMP

” and the audible alarm will sound.   To silence the alarm, 

press the “

alarm off” 

button. If the actual temperature is still below the 

low temperature alarm set point after 5 minutes, the alarm will sound 
again.   
 
This alarm can be triggered by the door being left open, loading of 
product that is much colder than the temperature set point in the cabi-
net or due to a malfunction of the heating system. 
 
To change the low temperature alarm set point, press and hold the 

alarm off” 

button while adjusting the temperature set point knob to 

the new desired value.  

Due to food safety concerns, the low tem-

perature alarm should never be set below 140 degrees F.

  After 3 

seconds, the controller will accept the new set point. The new value 
will be stored in the controller memory until the next time the value is 
changed.  
 
The audible alarm for low cabinet temperature can be turned off.   
The factory default is 

ON

.   To enter into the adjustment mode, push 

in and hold the “

alarm off” 

button until the alarm sounds.  The display 

will read either (

ON or OFF

).   To change the status, push the temper-

ature knob, which will function as a toggle switch to select between 

ON 

or 

OFF

.  After 10 seconds, the controller will accept the desired 

audible alarm function (either 

ON 

or 

OFF

).  If 

OFF 

is selected, the 

temperature display will still indicate “

LO

”  and “

TEMP

” if the low temp 

alarm is tripped.   

 
Factory default setpoints: 

   - temperature: 160ºF 
   - low temp alarm: 140ºF 
 

Operating ranges: 

   - temp alarm: 80ºF-180ºF 
   - air temp: 90ºF-200ºF 

Содержание HL8 Series

Страница 1: ...NS 3 UNPACKING INSPECTION FREIGHT DAMAGE 4 INSTALLATION STARTUP 5 CONTROL PANEL LAYOUT 6 NORMAL OPERATION 7 8 FOOD HOLDING GUIDE 9 REGULAR CLEANING PROCEDURES 10 CABINET MAINTENANCE 11 WIRING DIAGRAM...

Страница 2: ...rounded outlet 3 Use this appliance only for its intended purpose as described in the manual a This equipment is specifically designed to hold pre cooked food at temperature b This equipment is intend...

Страница 3: ...HL8 8 Cabinets with Adjustable Universal Slides for 12 x20 Pans 18 x 26 Trays and Gastronorm Pans APPROVALS NSF ANSI 4 Features Benefits Precision engineered heat ducts with blower for even heat throu...

Страница 4: ...REIGHT DAMAGE CLAIM PROCEDURE NOTE For your protection please note that equipment in this shipment was carefully inspected and packaged by skilled personnel before leaving the factory Upon acceptance...

Страница 5: ...trical codes Failure could result in personal injury and proper ty damage Damage to unit due to being connected to the wrong voltage or phase is NOT covered by warranty START UP 1 Prior to use thoroug...

Страница 6: ...m Press for 10 seconds to enter Alarm Toggle menu Temperature scale indicator F or C Turn knob clockwise to increase temperature set point turn counterclockwise to reduce tempera ture setpoint Press t...

Страница 7: ...p After 3 seconds if setting is adjusted the newly adjusted value will be stored in the controller s memory If the cabinet power is interrupted the last value set will be the new value restored upon p...

Страница 8: ...ff button while adjusting the temperature set point knob to the new desired value Due to food safety concerns the low tem perature alarm should never be set below 140 degrees F After 3 seconds the con...

Страница 9: ...astries 165 F 74 C 30 Pizza uncovered 180 F 82 C 15 Pizza boxed 180 F 82 C 60 Poppers Deep Fried uncovered 190 F 88 C 25 Poultry Whole bone in 175 F 79 C 60 Poultry Cut up bone in 175 F 79 C 60 Ribs 1...

Страница 10: ...in direction of grain of stainless steel Do not use on vinyl trim Stubborn Daily Any chloride free Apply with damp sponge or cloth Rub in spots and as or direction of grain of stainless steel Rinse st...

Страница 11: ...T REMOVE THE SCREWS THAT HOLD THE HINGES TO THE DOOR Remove the door tak ing care not to let it fall 2 Remove the door strike plate and screws adjacent to the door opening on the cabinet Reinstall doo...

Страница 12: ...ROBE 20 AMP FUSE MAX OPTIONAL FOR UNITS WITH 30 AMP PLUG OR GREATER EX CANADA BLK BLK WHT HTR1 AIR A B F1 CAP OFF YELLOW RED BLK BLK ORANGE WHT WHT YEL RED TFMR1 120VAC COM 24VAC BLK WHT BLUE YELLOW C...

Страница 13: ...mit trip defective Call service technician Takes too long to get to temperature Improper voltage Call service technician to verify incoming voltage matches cabinet specifications Unit is hot but low o...

Страница 14: ...CARTER HOFFMANN to be defective CARTER HOFFMANN neither makes nor assumes and does not authorize any other person to make or assume any obligation or liability in connection with its products other th...

Отзывы: