background image

Mounting and wiring 


i-Vu® Link 


CARRIER CORPORATION ©2019   

Installation Guide 


All rights reserved 


To mount the i-Vu® Link 


WARNING 


When you handle the i-Vu® Link: 

•    Do not contaminate the printed circuit board with fingerprints, moisture, or any foreign material. 

•    Do not touch components or leads.  

•    Handle the board by its edges. 

•    Isolate from high voltage or electrostatic discharge.  

•    Ensure that you are properly grounded.  
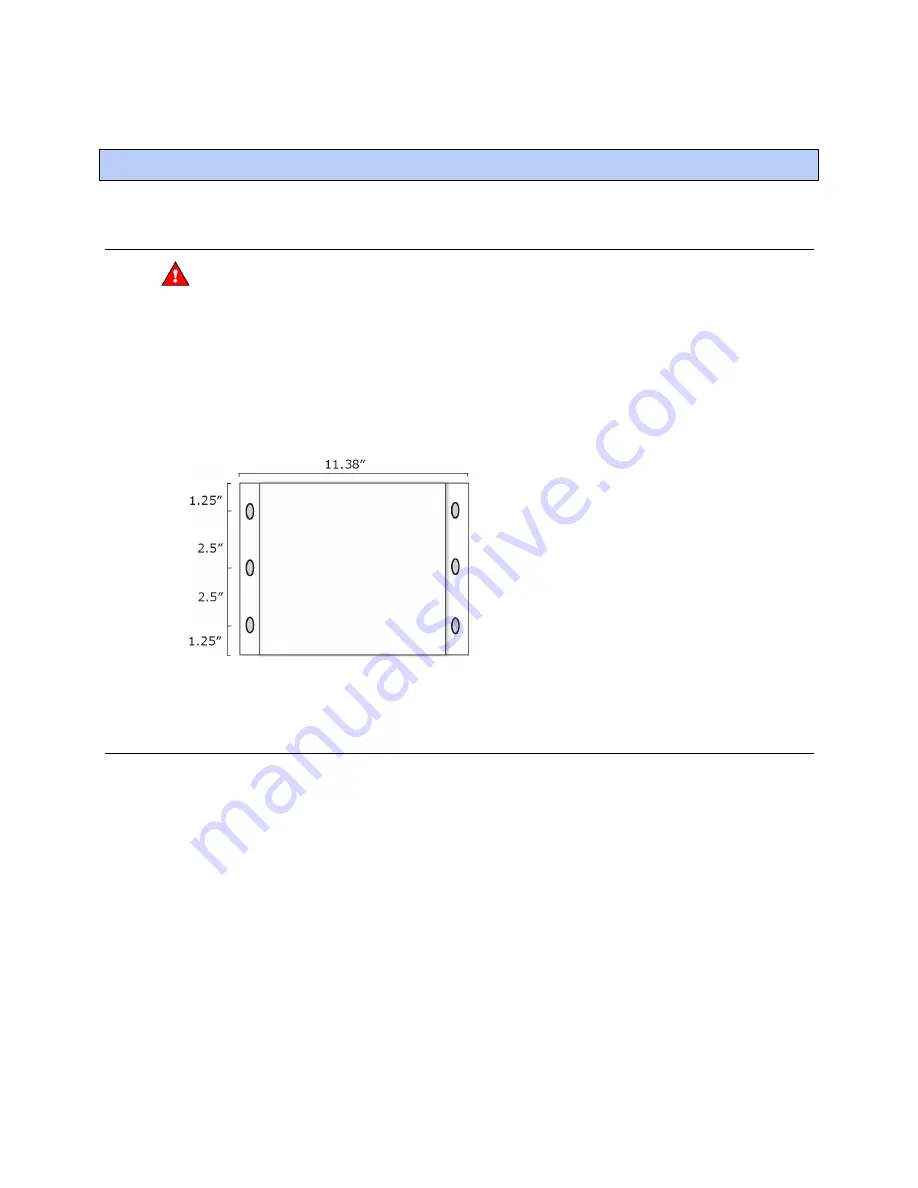
Screw the i-Vu® Link into an enclosed panel using the mounting slots on the cover plate. Leave about 2 in. (5 cm) 

on each side of the controller for wiring.  


To wire for power 

Make sure the i-Vu® Link’s power switch is in the 

OFF

 position to prevent it from powering up before you can 

verify the correct voltage. 

Remove power from the power supply. 

Pull the screw terminal connector from the router's power terminals labeled 

24 Vac/Vdc

 and 

Ground

Connect the transformer wires to the screw terminal connector. 

Apply power to the power supply. 

Measure the voltage at the i-Vu® Link’s power input terminals to verify that the voltage is within the operating 

range of 21.6 – 26.4 Vac or 23.4 - 28.6 Vdc.  

Insert the screw terminal connector into the i-Vu® Link's power terminals. 

Turn 

on

 the i-Vu® Link's power. 

Verify that the Run LED (a dot in the lower right corner of the 

Module Status

 LED) begins blinking. The 

Module 

Status

 LED will display

 8 

for about 5 seconds and then reverts to 

0, 

until controllers have been found and 

downloaded. There is a chase pattern when the router is running with no errors. 

Mounting and wiring 

Содержание I-Vu Link

Страница 1: ...V Vu u L Li in nk k I In ns st ta al ll la at ti io on n G Gu ui id de e CARRIER CORPORATION 2019 A member of the United Technologies Corporation family Stock symbol UTX Catalog No 11 808 394 01 1 24...

Страница 2: ...ur local Carrier office Important changes are listed in Document revision history at the end of this document CARRIER CORPORATION 2019 All rights reserved throughout the world i Vu is a registered tra...

Страница 3: ...e i Vu Link 4 To wire for power 4 To wire CCN devices on Port S1 5 To wire a third party device 5 Configuring IP for the i Vu Link 7 Troubleshooting 8 Formatting the i Vu Link 8 LED s 8 To replace the...

Страница 4: ......

Страница 5: ...Works protocols are standard The i Vu Link has one EIA 485 port for connecting to the CCN bus and one jumper configurable EIA 232 EIA 485 port for connecting to a third party network It also has one 1...

Страница 6: ...Motorola Power PC microprocessor with cache memory Fast Ethernet controller high performance 32 bit communication co processor Memory 16 MB non volatile battery backed RAM with 12 MB available for us...

Страница 7: ...ernet port communication and low battery status Seven segment status display for running error and power status Environmental operating range 20 to 140 F 29 to 60 C 10 90 relative humidity non condens...

Страница 8: ...wering up before you can verify the correct voltage 2 Remove power from the power supply 3 Pull the screw terminal connector from the router s power terminals labeled 24 Vac Vdc and Ground 4 Connect t...

Страница 9: ...erminal To this CCN device terminal Signal Ground Pin 5 G Net Pin 2 Net Pin 1 NOTE The CCN Shield should be tied taped back or daisy chained if the i Vu Link is not at one end of the bus To wire a thi...

Страница 10: ...an EIA 485 network with a resistor whose value equals the network s characteristic impedance Some third party manufacturers provide a built in resistor that you enable or disable with a jumper Make su...

Страница 11: ...t Gateway enter the IP Gateway s IP address provided by the LAN administrator typically a router on the Ethernet LAN CCN ENET Configuration Device Type Select Gateway if the converter connects the pri...

Страница 12: ...and Element number to 0 1 which must be reverted using the Network Service Tool 5 In the i Vu CCN Plus Pro interface select the i Vu Link in the navigation tree go to the Downloads page and Download...

Страница 13: ...ing The number 8 should display only during the short formatting period If this number displays continuously or flashes intermittently with another number try the following options Turn the i Vu Link...

Страница 14: ...data when the power returns A low battery is indicated by the Battery low LED or a low battery alarm in the i Vu CCN Plus Pro application You can purchase replacement batteries from any retailer that...

Страница 15: ...terference to radio communications Operation of this equipment in a residential area is likely to cause harmful interference in which case the user will be required to correct the interference at his...

Страница 16: ...rs are not listed Date Topic Change description Code 1 24 19 Specifications Added surge CAUTION to Protection specification X TS AK E CC 10 26 18 Specifications Reworded Protection specification and a...

Страница 17: ......

Страница 18: ...CARRIER CORPORATION 2019 A member of the United Technologies Corporation family Stock symbol UTX Catalog No 11 808 394 01 1 24 2019...

Отзывы: