12
Carolina Cooker®
844-478-4334
Model M116672
January 2021
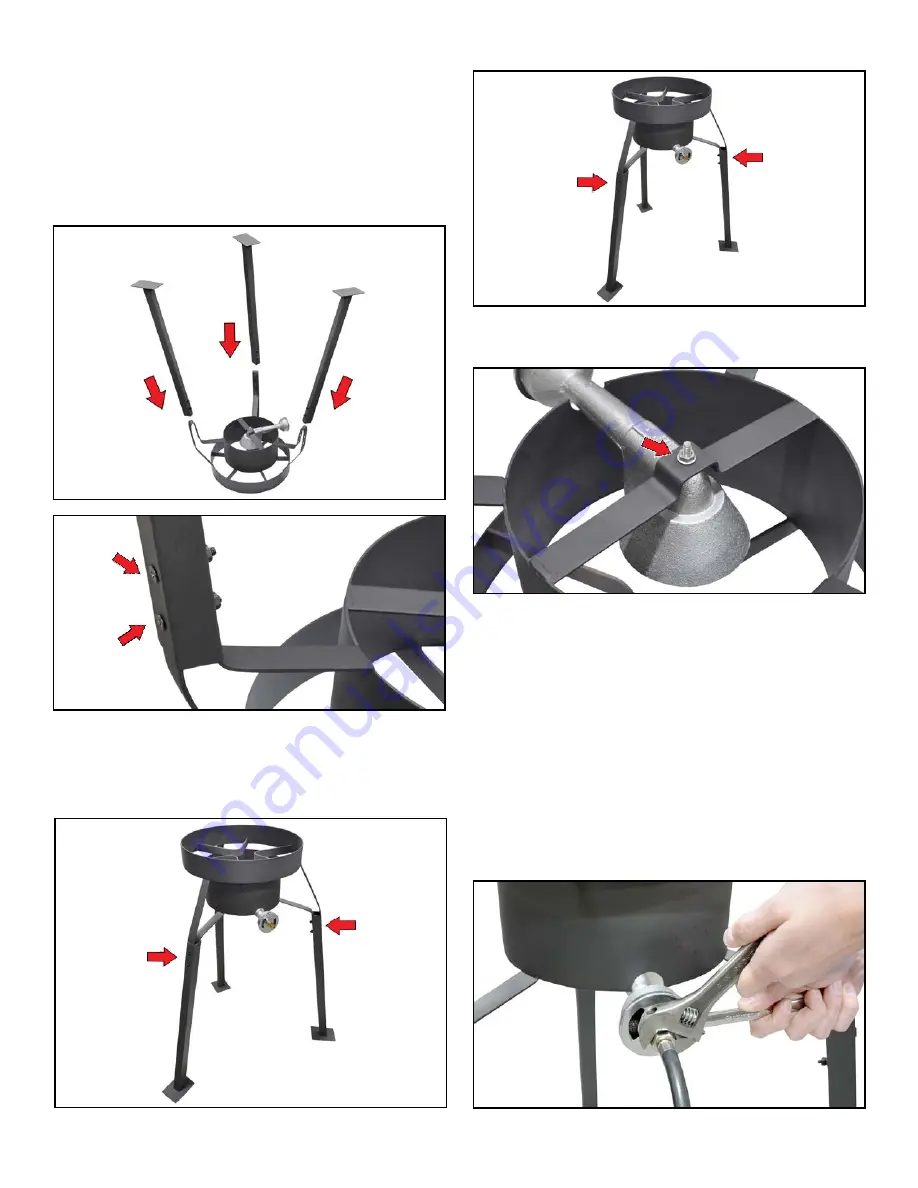
3. Upright discada burner stand and adjust detachable
legs and position them further into correct stable
position.
4. Tighten all six bolts securely.
5. Verify that the burner head is fastened securely to
the base with the bolt and nut.
Note:
The burner comes bolted to the frame but could
have loosened during shipping.
6. Connect the regulator hose assembly to the burner
assembly. The brass fitting orifice should be
tightened securely, but not so tight that it binds the
air shutter The air shutter should turn by hand, but
hold its position when released from spring.
Note:
To prevent damage to fittings or burner assembly
when tightening connection, hold the brass fitting with
one wrench while tightening the regulator hose
assembly fitting with the other wrench. Do not tighten
the connection using a single wrench.
5.3 Assembly
1. Place the burner assembly frame upside down on a
level surface.
2. Slide the detachable legs in correct orientation on
the burner assembly frame. Secure each leg using
two M6 bolts, washers, lock washers and nuts on
each leg. Do not fully tighten the bolts.


