background image

3

ADHESIVES & GLUING TECHNIQUES

CA adhesives are specially formulated to firmly glue the

plywood, hardwood, and balsa used in your model and to

withstand the vibration and stresses of high performance

flight.  However, there are times, such as when you are

installing the stabilizer and fin on the fuselage and want

more set-up time for careful alignment and positioning,

then you should use epoxy. Occasionally, you also will

want to use thin CA, which "wicks" into the surrounding

areas. Aliphatic resin glue or similar water-based glues can

also be used, but they will add to the assembly time

because they dry so much more slowly than CA glue.

Remember,  when ever using any CA, you must be careful

to read instructions thoroughly, as you will have only sec-

onds for positioning of parts.  Be sure to trial fit parts

together before gluing.  Also, never use watery THIN type

CA glue for gluing plywood and hardwood parts.  Thin CA's

do not adequately bond these areas.

CAUTION

Some people may experience an allergic reaction when

exposed to fumes from CA glue or epoxy.  As with paints,

thinners, and solvents, it is always important to use glues

only where there is adequate ventilation to carry fumes

away.  A fan is recommended.  Also, special care must be

taken when using CA, as it will bond skin as well as other

surfaces.   Before using any CA, carefully read all label pre-

cautions. When using CA, protective eye-wear and care in

keeping the glue away from the face is highly recommend-

ed.  If CA does happen to get into the eye, hold lid open

and flush with water only.  Seek immediate medical atten-

tion.

CONSTRUCTION TIPS

IMPORTANT: ALWAYS READ A FEW STEPS AHEAD.

This will alert you to coming instructions and will help you

plan accordingly.

COVERING

The 

Hot Stik ARF

is covered in a premium polyester film

chosen by many of the world's top flyers for its beauty,

toughness, and ease of application and repair.  It is not

uncommon for ARF's to develop a few wrinkles in transit.

If this is true of your model, the situation is easily correct-

ed. Before you begin putting the pieces together, run

around the edge of the seams first then over the surface

of each section with an iron (either specially designed for

airplane use or the more cumbersome household iron).

Apply the heat (set at about 350° F), following along with

a soft cloth and pressing down on the covering as you go

around.  This will more firmly set the covering adhesive

into the wood and keep your aircraft covering tight and

smooth in the future. Once you have ironed the seams

stay away from them with the heat or the covering  will

slide when you try to shrink the middle. If this happens the

wrinkles will not come out of the covering.

ITEMS NEEDED TO COMPLETE THIS AIRCRAFT

1 24” FUEL LINE

1  ENGINE .40 TO .50

1 RADIO GUIDANCE SYSTEM 

3

12” 

AILERON SERVO EXTENSION WIRES

2    Y-CONNECTORS

1 CA  ACCELERATOR

1 2 OZ. BOTTLE CA  MEDIUM GLUE

1 1/2 OZ. BOTTLE CA THIN GLUE

1 30 MINUET EPOXY 

1 1/2” FOAM RUBBER 

1

2” to 3” SPINNER

OR ROUNDED PROP NUT

OPTIONAL:

1

PILOT FIGURE 

6 SERVO ARM EXTENSIONS

NOTE: The Hot Stik ARF covering closely 
matches Oracover

#890

Fluorescent red

#893

Fluorescent Lime

#891

Safety Yellow

#881

Silver

#874

Black

#930

1” Black & White Checkered

Содержание Hot Stik ARF

Страница 1: ... use only those radio fre quencies specified for Model Aircraft LIMITED WARRANTY Carl Goldberg Products has inspected and certified the components of this aircraft The company urges the buyer to perform his own inspection prior to assembly and to immediately request a replacement of any parts he believes to be defective for their intended use The company warrants replacement of any such components...

Страница 2: ...te servo mounting trays wing hold down blocks Firewall etc Also during the course of shipping from the manufacturer to our facility in the United States it is not uncommon for the aircraft to experience several changes in climate This may cause the iron on covering to develop wrinkles This is not a fault of the manu facturer Please take a few minutes with your heating iron and heat gun to iron dow...

Страница 3: ...get into the eye hold lid open and flush with water only Seek immediate medical atten tion CONSTRUCTION TIPS IMPORTANT ALWAYS READ A FEW STEPS AHEAD This will alert you to coming instructions and will help you plan accordingly COVERING The Hot Stik ARF is covered in a premium polyester film chosen by many of the world s top flyers for its beauty toughness and ease of application and repair It is n...

Страница 4: ... COLLECT THE FOLLOWING ITEMS 1 ALUMINUM LANDING GEAR 2 5 32 AXES 2 AXLE NUTS 2 WHEEL COLLARS 2 6 32 X 1 BOLTS 2 2 1 2 WHEELS 2 FLAT WASHERS Fuselage Assembly 2 Locate the holes in the bottom of the fuselage just ahead of the wing opening Remove cov ering with an x acto knife or soldering iron 3 Mount the wheel on the axle using the 5 32 wheel collar ...

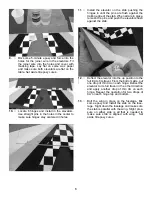
Страница 5: ...azor blade remove the covering inside the line you marked Cut about 1 16 inside the line so bare wood will not show after gluing in place Be careful to cut just the covering and not the wood as cut ting into the wood will weaken the stab 8 Locate the two elevator halves and the eleva tor joiner wire The elevators should be installed before installing the fin slot for elevator wire 5 Measure the st...

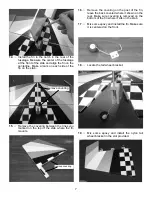
Страница 6: ...e of the stab When all are in place remove the pins and push the elevators flush against the stab 12 Deflect the elevator into the up position to the full limit of its travel From the bottom side put one drop of thin CA on each hinge Deflect the elevator to its full travel in the other direction and apply another drop of thin CA on each hinge Repeat the operation for two drops of CA on each hinge ...

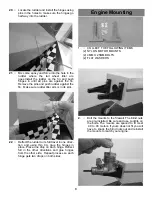
Страница 7: ...where it sits on the stab remove covering 17 Mix some epoxy and install the fin Make sure it is centered on the front 14 Install the fin in the notch in the rear of the fuselage Measure the center of the fuselage at the front of the stab and align the fin on the centerline Make a mark on each side of the fin on the stab remove covering 18 Locate the tail wheel bracket 19 Mix some epoxy and install...

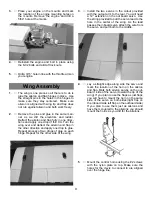
Страница 8: ...COLLECT THE FOLLOWING ITEMS 2 NYLON MOTOR MOUNTS 2 4MM X 25MM BOLTS 2 FLAT WASHERS 2 Bolt the mounts to the firewall The blind nuts are pre installed Be sure and use Locktite on the bolts The mounts are spaced to fit most 40 to 46 motors If yours does not fit you will have to knock the blind nuts out and reinstall the mounts to match your engine 22 Deflect the rudder to its full travel in one dire...

Страница 9: ...e Repeat process of two drops of glue on each hinge Repeat for the other side of the wing 3 Install the two servos in the cutout provided with the output arm to the rear You will need a 12 extension on the out board servo Use the string provided to pull the servo lead to the hole in the center of the wing As the lead passes the inboard servo attach the wire from the servo and pull both to the midd...

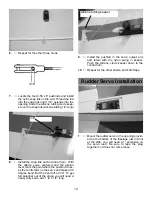
Страница 10: ...control arm on the servo and make a 90 degree bend But the bend off at 3 8 To get full potential out of the plane you will need a heavy duty servo arm 1 to 1 1 4 long 3 8 9 Install the pushrod in the servo output arm and retain with the nylon swing in keeper Push the silicone clevis keeper down to the control horn 10 Repeat for the other aileron and both flaps silicone tubing keeper Rudder Servo I...

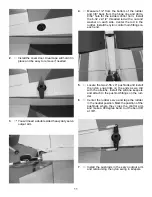
Страница 11: ...ide Center the rod in the rudder Install the nylon control horn fittings on each end 7 Install the pushrods in the servo output arm and retain using the nylon swing in keepers 5 Locate the two 2 56 x 9 pushrods and install the nylon snap links on the ends as we did with the ailerons Install the silicone keepers and attach to the pushrod fittings on the rud der 6 Center the rudder servo and tape th...

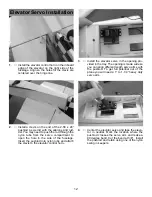
Страница 12: ...le in the side of the fuselage Insert the pushrod into nylon tube and attach the clevis to the elevator control horn 3 Install the elevator servo in the opening pro vided in the tray The opening is made wide so you can align different length servo arms with the pushrod To get full potential out of the plane you will need a 1 to 1 1 4 heavy duty servo arm 4 Center the elevator servo and tape the el...

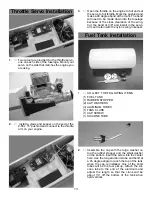
Страница 13: ...f the wing Cut the bend at 3 8 and install in the servo arm and retain with the nylon swing in keeper Fuel Tank Installation 1 COLLECT THE FOLLOWING ITEMS 1 FUEL TANK 1 RUBBER STOPPER 2 CAP WASHERS 3 ALUMINUM TUBES 1 TANK CLUNK 1 CAP SCREW 1 SILICONE TUBE 2 Assemble the cap with the large washer on top the rubber stopper and the small washer on the bottom Insert the screw into the center hole Use ...

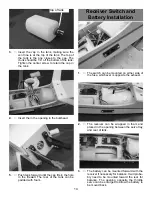
Страница 14: ...e hole in the firewall The rear of the tank can be padded with foam Receiver Switch and Battery Installation 1 The switch can be mounted on either side of the fuse whichever is opposite the exhaust 2 The receiver can be wrapped in foam and placed in the opening between the servo tray and rear of tank 3 The battery can be mounted forward with the receiver if necessary for balance It will proba bly ...

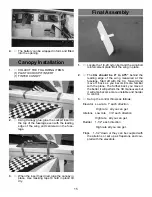
Страница 15: ...arder to control 3 Set up the control throws as follows Elevator Low rate 1 each direction High rate all you can get Ailerons Low rate 3 4 each direction High rate all you can get Rudder 1 1 2 each direction High rate all you can get Flaps 1 1 2 down or they can be coupled with the ailerons or set up as flaperons and cou pled with the elevators Canopy Installation 1 COLLECT THE FOLLOWING ITEMS 1 P...

Отзывы: