If using our large 115mm wheels you will need to sand away a curve in the lip at the front and
back edges of the wheel well for clearance (photo P1). Now complete the final assembly of the
oleos, wheels and brakes to the retract units, grinding small flats as needed for the set-screws
and ‘Loctiting’ all important bolts and set-screws. Set the alignment of the wheels using a large
90 degree square from the trailing edge of the wing, which is exactly at 90° to the fuselage
centreline. Set the main wheels with a very little ‘toe-in’ (front edge of the wheel angles
inwards towards the centreline of the fuselage), 1 - 2 mm only, for best ground handling.
Route the air tubes from each retract (and wheel brake) forward, through the large holes in the
balsa spar box, to exit in front of the wing tube at the wing root, for connection later using the
Robart ‘Quick-connectors’ included in the optional landing gear set (photo P48).
Nose Gear
Install the nose retract, oleo and wheel in exactly the same way as the main retracts, but with
normal M4 x 16mm bolts (not countersunk), into the M4 T-nuts supplied. Depending on which
type of retract units you are using make sure that the steering arms clear the back nosegear
mount bulkhead, or sand it away a little for clearance.
Depending on the type of retract unit used, you will almost certainly need to install the retract
towards the back of the ‘U’ shape in the mounting plate, so that the steering arms do not touch
the plywood bulkhead (photo P2). Steering uses a pair of pull-pull wires to the servo which is
mounted in the installed milled plywood mount at the back of the wheel opening. Make up a
couple of small hooks (paperclips) with rubber bands on the sides of the fuselage to hold the
slack steering cables out of the way of the wheel and oleo leg when it is retracted (P52).
Experience has shown that a trailing link type of nosegear leg/oleo gives superb ground han-
dling and steering with the Lightning, and our new C-ARF units come with complete with a
beautifully engineered sprung and damped leg of this style, as shown.
C-ARF/Behotec-Intairco Landing Gear:
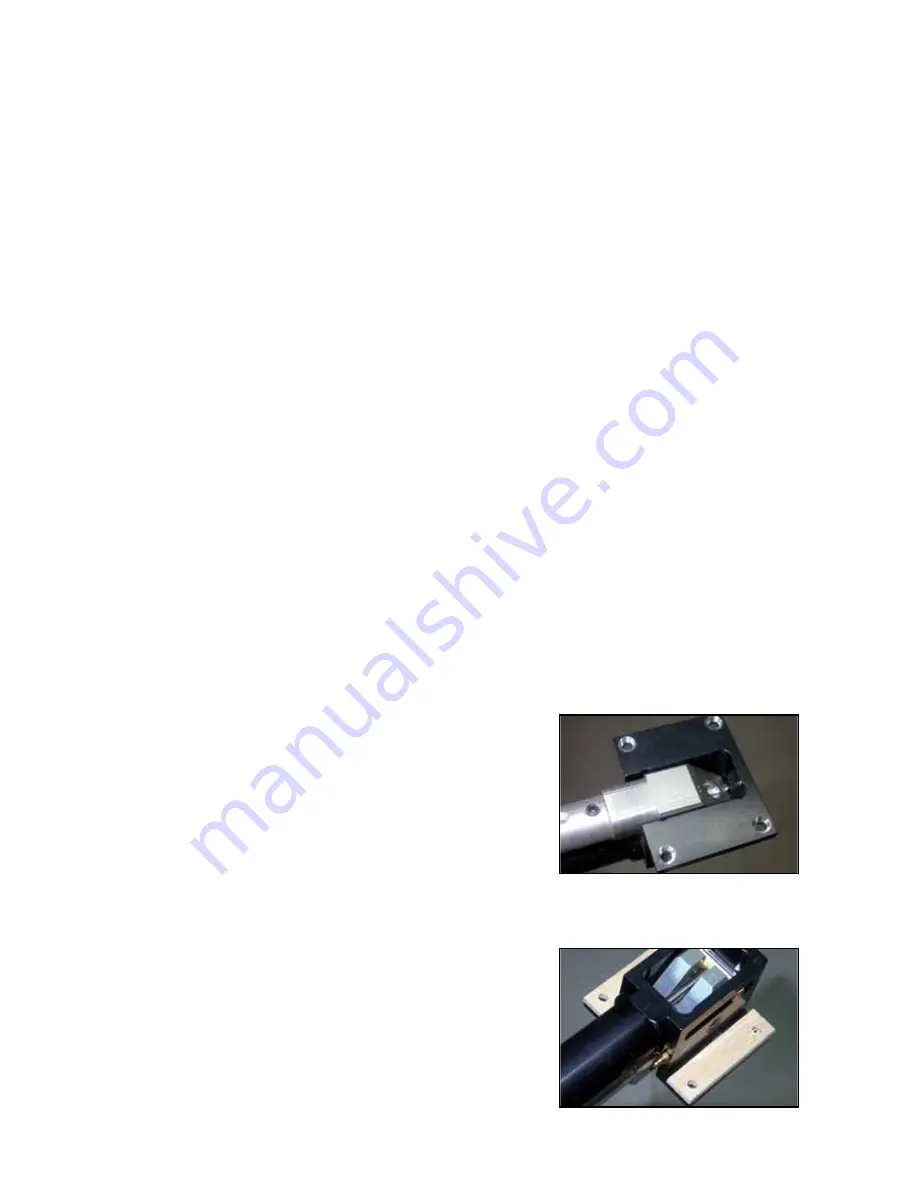
If using our C-ARF retracts (Behotec C-50) you will need to countersink the mounting holes in
the main retract units only, and use 3mm plywood strips
(cut from the 12mm wide ply strips supplied) under the
mounting flanges to raise them off the carbon mounts a lit-
tle for the maximum wheel clearance in the wheel well.
The nosewheel is a 75mm (3”) diameter with twin ballbear-
ings, which fits on the 6mm ground steel shaft between the
forks of the trailing-link nose oleo. Press the axle in care-
fully, using a little grease, making sure you don’t push the
bearing out of the other side of the wheel. There are 2 dif-
ferent length short aluminium tubes supplied to centre the
nosewheel on the ground steel axle - make sure to fit them
the right way round for perfect centreing. Replacement
tyres are available for this wheel.
The nosegear retract unit should be installed about 6 -
7mm from the back of the plywood mount, using the M4 x
16mm bolts and T-nuts provided. The steering arms are
screwed into the threaded holes on the oleo leg, onto small
‘flats’ that you must grind in the correct position - and final-
ly Loctited into position.
10
(above) Countersink the main
retract mounting holes only.
(below) 3mm ply packing strips.
Содержание Ultra Lightning
Страница 1: ...C A R FMo d e l s U l t r aL i g h t n i n g I n s t r u c t i o nMa n u a l...
Страница 36: ...35 above Fuselage hardware bag above Wing hardware bag above Kit Contents...
Страница 37: ...36 above Stabiliser hardware bag above Wood and Phenolic parts bag above Vertical Fin hardware bag...


