background image

CARF-Models Extra 330SC (3.1m)


www.carf-models.com


11


small  drop  of  slow  CA  each  (ZAP-O  or  Plasti-ZAP 
recommended). 


Note: 

Do  NOT  use  any  CA  accelerator/kicker  -  you  will 

immediately ‘fog’ the clear canopy! 


Temporarily  tape  the  front  and  sides  of  the  clear  canopy  to 
the inside the frame, in as many positions as possible. Mount 
the canopy frame to the fuselage (use all 4 bolts), and tape 
the  back  and  front  of  the  canopy  frame  tightly  to  the 
fuselage,  closing  any  small  gaps  that  may  be  there.  Then 
make visual check from the front and back to make sure sure 
that  the  canopy  is  straight.  Using  the  duct-tape  handles  to 
pull  the  canopy  outwards  firmly  against  the  frame,  working 
from  the  back  towards  the  front,  glue  the  edges  of  the 
canopy in place in 2 or 3 more places each side, with just a 
single  very  small  drop  of  CA  at  each  position,  all  the  time 
checking that the edge of the canopy is tight up against the 
frame at the front. It really helps to have 4 hands for this job, 
so get another person to help you !


Now that the canopy is fixed in position and cannot twist or 
warp anymore, you can carefully glue the rest of the canopy 
firmly in place. You can either complete the gluing from the 
outside  (with  the  frame  still  mounted  on  the  fuselage), 
allowing the odorless CA glue to wick into the joint between 
the  frame  and  the  clear  plastic  or,  if  you  prefer,  you  can 
carefully  remove  the  canopy  frame  from  the  fuselage,  and 
use a 30 minute or 24hr epoxy and micro-balloon mixture for 
gluing all the edges to the frame on the inside surface. 


We  highly  recommend  that  you  glue  all  around  the  inside 
edges  of  the  clear  canopy  with  the  epoxy  &  micro-balloon 
mixture to be sure that the clear canopy cannot come off in 
flight. If you wish you can tint the inside of the canopy using 
one of the aerosol spray paints used for painting the inside of 
polycarbonate car bodies (eg: the Tamiya or Lexanit ranges). 
Use many very light coats to get even coverage.


Horizontal Stabs 


The  stabs  are  100%  finished  at  the  factory,  and  only  need 
the  servos  and  linkages


installing.  Insert  the  20mm 

aluminium  tube  spar  in  the  fuselage  sleeve,  and  slide  on 
both  stabs


to  check  the  fit  between  the  root  ribs  and  the 

fuselage.


The  elevators  are  hinged  to  each  stab  using  the  4mm  Ø 
brass  tubes  provided.  Make  sure


there  is  no  burr  on  either 

end  of  the  tubes,  and  chamfer  the  ends  slightly  with  fine 
sandpaper to


make it easier to get them through the holes in 

the  phenolic  hinge  plates.  Be  careful  inserting  them,  and  if 
they are a bit stiff, then use a little grease on the tubes. Don’t 

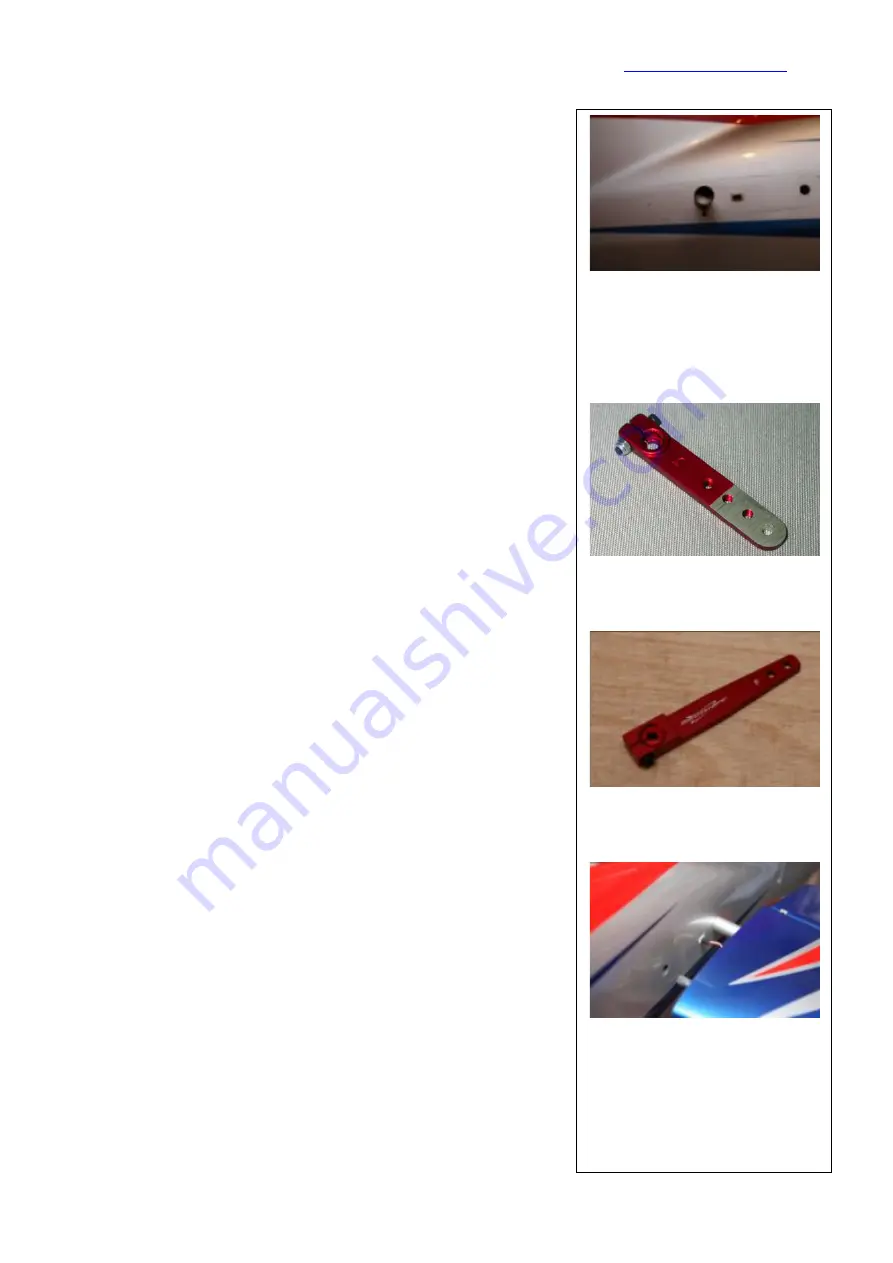
Rear stab spar tube has M3 T-
nuts installed at the factory for 
the securing bolts. 


We recommend to use full-
metal servo arms such as the 
ones of SWB (above) or 
Secraft (below) 


A plug at the fuselage connects 
the elevator servos to the RC-
System 

Содержание Extra 330sc

Страница 1: ...re obliged to deny all liability for loss damage or costs which are incurred due to the incompetent or incorrect application and operation of our products or which are connected with such operation in...

Страница 2: ...ies or even add weight in the aircraft to move the CG to the recommended position please do so and don t try to save weight or hassle A tail heavy plane in a first flight can be an enormous danger for...

Страница 3: ...technology All parts are painted in the moulds either single colour or designer colour schemes A new production method called TAVS Total Area Vacuum Sandwich enables us to present this aircraft with i...

Страница 4: ...firewall are pre installed and provide plenty of strength for any engines up to 220cc on the market today See the Engine Installation section for details of engine and setting thrust angles The engine...

Страница 5: ...ape Denaturised alcohol or similar for cleaning joints before gluing Adhesives Not all types of glues are suited to working with composite parts Here is a selection of what we normally use and what we...

Страница 6: ...ommended Ignition switch and battery for motor 4 cell 1400 2400 mA or LiPo with voltage regulation recommended Powerbox Competition and dual power switches for Rx batteries Fuel tank 1500 ml with gaso...

Страница 7: ...f clear car wax first but of course you must be sure to remove this 100 properly before adding any additional decals or markings If you prefer you can cover the majority of the fuselage with the bubbl...

Страница 8: ...gh the hole a maximum of 1mm The spikes still engage in the plywood and the gap between the T nut and the plywood is filled with epoxy and microballoons mixture later Glue the 2 U shaped milled plywoo...

Страница 9: ...rt available from C ARF and is mounted with two M4x20 mm allen bolts under the fuselage screwed into two M4 T nuts in the factory installed plywood reinforcement You don t need to make the tailwheel s...

Страница 10: ...sure a perfect fit of the canopy inside Lay the canopy on top of the frame and mark the rough shape with a felt pen or wax crayon Cut the outer border of the clear canopy with sharp scissors about 12m...

Страница 11: ...between the frame and the clear plastic or if you prefer you can carefully remove the canopy frame from the fuselage and use a 30 minute or 24hr epoxy and micro balloon mixture for gluing all the edge...

Страница 12: ...t to add a drop of Loctite to the bolt that secures the arms to the servos Make sure that your servo arm slots allow enough space for maximum throw Otherwise extend them using a cutter The linkages be...

Страница 13: ...l joints Install the servos into the rudder tray using the 2 9mm x 13mm screws supplied with the servo output shafts towards the tail of the plane We recommend to use full metal servo arms SWB or Secr...

Страница 14: ...ower for all manouvers Note that a too small holding torque of your servos can cause fluttering The first job is to install the outer Servo For that purpose cut a servo hatch in the bottom of the wing...

Страница 15: ...es For that purpose you can use the plywood reinforcement plate supplied in the kit Now you need four screws with two nuts on each to adjust right and upthrust Assemble it as shown on the photos refer...

Страница 16: ...lons mixture and to install the engine by using the M6x100 screws and T nuts supplied in the kit It s a must to bolt the engine to the backplate of the motor dome in the fuselage in order to achieve t...

Страница 17: ...embled with thin CA and then glued firmly with 30 minute epoxy and milled fibre mix If you use a high power servo with full metal gear it ll be ok to install it at the dome But make sure that there is...

Страница 18: ...onsider that during the RC installation Lay the cables carefully so that there is no chance for any cable to contact the hot pipes That will kill the isolation and may end in the damage of a servo or...

Страница 19: ...you will almost certainly need to make a simple 3mm thick balsa baffle plate inside the cowling to make sure that enough cooling air is directed through the engine cylinder fins instead of just going...

Страница 20: ...r mounts provided in the kit must be glued in place Assemble the mounts as shown at the photo right and install a M4 T nut in each one in order to screw the mounts to the tank base Then adapt the moun...

Страница 21: ...uld cost you your plane We use the normal 3 tube plumbing system one from the clunk to feed the motor one out of the bottom of the plane vent overflow and one at the top for filling close for flight I...

Страница 22: ...the Extra using the DA200 and the internal canister set up shown should find that with all 3 batteries positioned as shown at the end of the canopy the C of G will be spot on with no lead needed At o...

Страница 23: ...isted cable leads of the exact length required and Multiplex 6 pin connectors so you can use 1 pin for each wire We glue the female connectors into small plywood plates in the sides of the fuselage fo...

Страница 24: ...ling wing and stab mounts carefully again Are all extension leads cables and fuel tubes securely fixed to the side of the fuselage and cannot come loose when subjected to high G forces during flight A...

Страница 25: ...ate switch On high rate the elevator should really be at maximum up to 50 degrees both sides We added only 15 exponential to the high rate setting in order to provide enough sensitivity during 3D mane...

Страница 26: ...ow this needs some practice to make it perfect every time 3D capabilities are out of this world The huge control surfaces combined with the lightweight airframe and the huge power reserve let our Extr...

Отзывы: