Carestream DENTAL CS 8100 Access Скачать руководство пользователя страница 45

Cephalometric Modality User guide for CS 8100 Family and CS 8100 3D Family_SM987_Ed04

41

Launching the X-ray

To launch the X-ray, follow these steps:

1

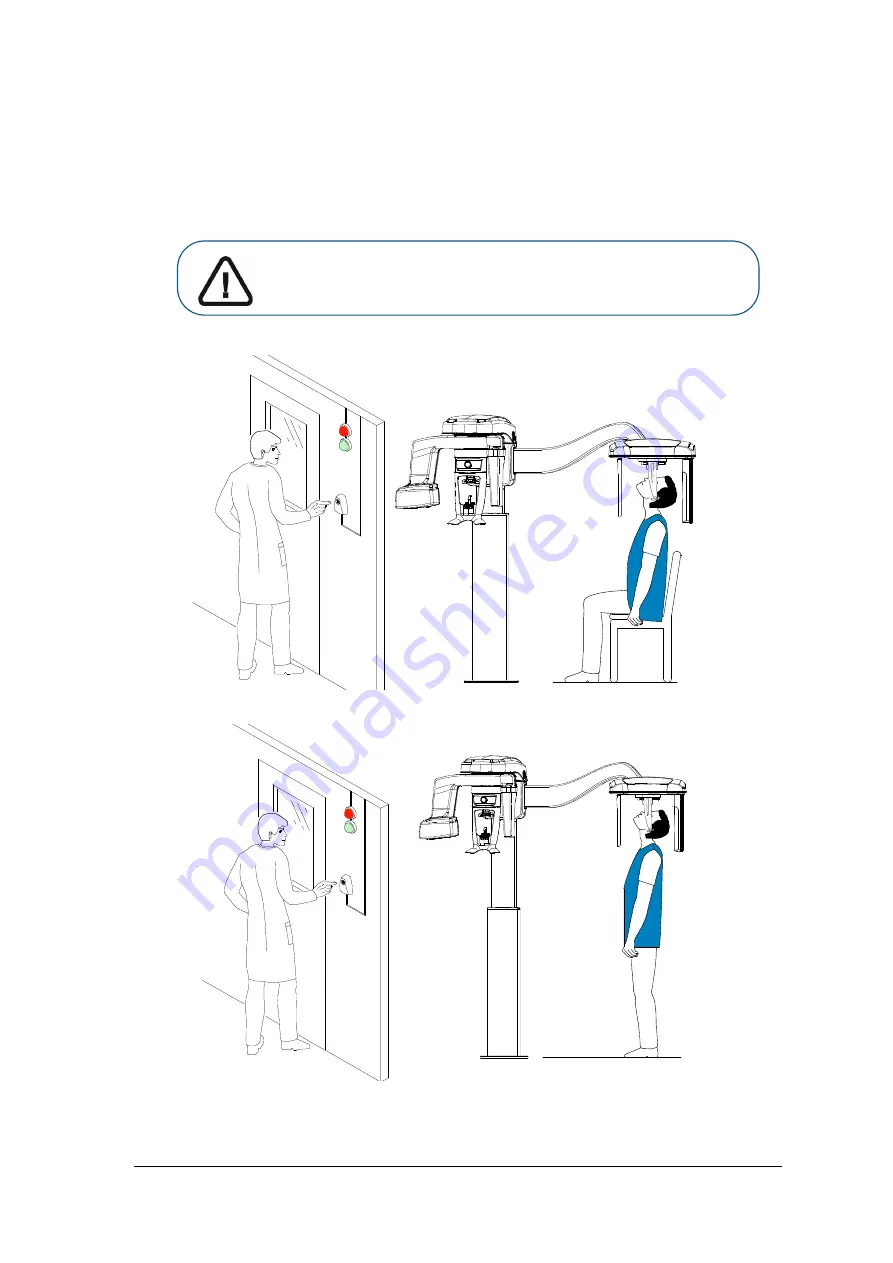
Leave the X-ray room and close the door. You must keep visual contact with the patient during 
acquisition.

Important:  If you have a problem that requires you to stop the 
acquisition, release the exposure button of the remote control or 
press the red emergency stop button.

Содержание CS 8100 Access

Страница 1: ...User Guide CS 8100 CS 8100 3D Family CS 8100 CS 8100 Access CS 8100 3D CS 8100 3D Access CS 8100SC CS 8100SC Access CS 8100SC 3D CS 8100SC 3D Access...

Страница 2: ...used teeth acquisition The system has the capability to expand the field of view to the 3D full upper and lower jaw acquisition with license upgrade CS 8100SC 3D panoramic modality dental volumetric r...

Страница 3: ...tching on the Unit 19 Increasing the operating life of the X ray tube 19 Firewall or Network Settings 20 Accessing the Cephalometric Acquisition Interface 21 Chapter 5 Acquiring Images using the Cepha...

Страница 4: ...Carpus Image for the Adult and Pediatric Patient available as an option 43 Preparing the Unit and Setting the Acquisition Parameters 43 Preparing and Positioning the Adult and Pediatric Patient 44 La...

Страница 5: ...ize information or indicate potential risk to personnel or equipment WARNING Warns you to avoid injury to yourself or others by following the safety instructions precisely CAUTION Alerts you to a cond...

Страница 6: ...2 Chapter 1 Conventions in This Guide...

Страница 7: ...and lower jaw acquisition CS 8100 3D Access panoramic modality and dental volumetric reconstruction modality limited to 3D focused teeth acquisition The system has the capability to expand the field...

Страница 8: ...nd down movement of the unit mobile components Rotation and translation movement of the rotative arm and the cephalostat Figure 1 CS 8100SC Unit Mobile Components Figure 2 CS 8100SC 3D Unit Mobile Com...

Страница 9: ...it head 12 Frankfort positioning indicator 3 Emergency stop knob 13 Secondary collimator 4 ON OFF button 14 Nasion support 5 Cephalostat arm 15 Head clamps and ear cones 6 Cephalostat head 16 Cephalom...

Страница 10: ...collimator 4 ON OFF button 14 Nasion support 5 Cephalostat arm 15 Head clamps and ear cones 6 Cephalostat head 16 Cephalometric digital sensor 7 X ray source assembly 17 X ray remote control 8 Head a...

Страница 11: ...Ed04 7 Digital Sensor Locations The following figures illustrates the locations of the digital sensors and cepahometric sensors of the units Figure 5 CS 8100SC digital sensor and cephalometric sensor...

Страница 12: ...al components of the CS 8100 Family head and chin rest Figure 7 CS 8100 Family Head and Chin Rest Functional Components 1 Positioning Panel 5 Bite block support 2 Frontal head rest adjustment knob 6 C...

Страница 13: ...Head and Chin Rest Figure 8 illustrates the functional components of the CS 8100 3D Family head and chin rest Figure 8 CS 8100 3D Family Head and Chin Rest Functional Components 1 Positioning Panel 4...

Страница 14: ...laces the rotative arm in a parallel position to the unit head leaving more free space around the unit To do so press and hold both buttons until the Ready Indicator LED switches off When you release...

Страница 15: ...etric Modality Positioning Accessories The following accessories are used when positioning a patient using the Cephalometric Modality Table 1 Cephalometric Modality Positioning Accessories Accessory D...

Страница 16: ...utside the X ray room You must press and hold the exposure button until the end of acquisition Premature release of the exposure button interrupts the acquisition Figure 11 X ray Remote Control 1 Expo...

Страница 17: ...igned and developed specifically to support image diagnosis Acquisition Interface The Acquisition interface is a user friendly interface specifically designed and developed for the CS 8100 and CS 8100...

Страница 18: ...acquisition frames 3 Selected Parameter Display Displays the current acquisition parameter settings 4 System Status Screen Displays various alert or warning messages originating from the unit 5 Genera...

Страница 19: ...3 Selector Button Selects different acquisition setting options Click Program to select examination type options Click Patient to select patient type parameters Click Parameters to select exposure par...

Страница 20: ...a lateral exam Click for an oblique exam Click for a frontal AP Anterior Posterior exam Click for a submento vertex exam Click for a frontal PA Posterior Anterior exam Click for a carpus exam 2 FoV o...

Страница 21: ...t mode The selected parameters must be based on the age and morphology of the patient Figure 3 Cephalometric Acquisition Interface Patient Pane Note A selected patient mode sets the kV and mA Patient...

Страница 22: ...tion If the default parameter setting is not adapted to your patient type you can manually adapt the parameter setting to the patient type and save this setting as the default setting To save a parame...

Страница 23: ...e will close 3 You can now proceed to start the Acquisition interface from the imaging software Increasing the operating life of the X ray tube To increase the operating life of the X ray tube follow...

Страница 24: ...s follow these steps 1 On your desktop double click to open the CS Imaging Software The Windows Security Alert dialog box displays Select Private networks Public networks and click Allow access 2 Clic...

Страница 25: ...tion Interface follow these steps 1 Select and double click the patient card in the patient list The Imaging window is displayed 2 In the Imaging window click to access the Cephalometric Acquisition I...

Страница 26: ...22 Chapter 4 Getting Started...

Страница 27: ...sition Interface Preparing the Unit and Setting the Acquisition Parameters To set the acquisition parameters carry out the following steps 1 On the unit position the head clamps manually for the later...

Страница 28: ...your patient type click the Parameter button Select the appropriate parameters Click and select Memorize Anatomy setting if you want to save the new parameter settings as future default settings Impo...

Страница 29: ...nt to wear a lead apron Ensure that the apron lays flat across the patient s shoulders 3 Pull out at the top part of a head clamp bar to extend both bars 4 Ask the patient to do the following Move for...

Страница 30: ...clamp bar to retract both head clamp bars and to fit the ear cones into the ear auditory canals 7 Lower the nasion support to a vertical position 8 Use the Frankfort positioning indicator as a visual...

Страница 31: ...ed to the CS Imaging Software 3 Check the image quality if satisfactory remove the ear cones and the nasion support and release the patient X ray Dose Emission Information Compliance with EURATOM 97 4...

Страница 32: ...sition Parameters To set the acquisition parameters follow these steps 1 On the unit position the head clamps manually for the frontal exam The frontal AP exam option becomes active on the Cephalometr...

Страница 33: ...ot adapted to your patient type click the Parameter button Select the appropriate parameters Click and select Memorize Anatomy setting if you want to save the new parameter settings as future default...

Страница 34: ...s the patient s shoulders 3 Pull out at the top part of a head clamp bar to extend both bars 4 Ask the patient to do the following Move forward Stand up straight in the following positions For a front...

Страница 35: ...S 8100 3D Family_SM987_Ed04 31 6 Gently push in at the top part of a head clamp bar to retract both head clamp bars and to fit the ear cones into the ear auditory canals Figure 5 1 Frontal AP Figure 5...

Страница 36: ...steps 1 Leave the X ray room and close the door You must keep visual contact with the patient during acquisition Figure 6 Frontal AP Figure 7 Frontal PA Important If you have a problem that requires y...

Страница 37: ...d to the CS Imaging Software 3 Check the image quality if satisfactory remove the ear cones and the nasion support and release the patient X ray Dose Emission Information Compliance with EURATOM 97 43...

Страница 38: ...sition parameters follow these steps 1 On the unit position the head clamps manually for an oblique exam The oblique exam option becomes active 2 On the Cephalometric Acquisition Interface select the...

Страница 39: ...1 Ask the patient to remove all metal objects 2 Ask the patient to wear a lead apron Ensure that the apron lays flat across the patient s shoulders 3 Pull out at the top part of a head clamp bar to e...

Страница 40: ...bars and to fit the ear cones into the ear auditory canals 7 Lower the nasion support to a vertical position Launching the X ray To launch the X ray follow these steps 1 Leave the X ray room and close...

Страница 41: ...d to the CS Imaging Software 3 Check the image quality if satisfactory remove the ear cones and the nasion support and release the patient X ray Dose Emission Information Compliance with EURATOM 97 43...

Страница 42: ...t the acquisition parameters follow these steps 1 On the unit position the head clamps manually for a frontal AP exam The frontal AP exam option becomes active 2 On the Cephalometric Acquisition Inter...

Страница 43: ...patient follow these steps 1 Ask the patient to remove all metal objects 2 Ask the patient to wear a lead apron Ensure that the apron lays flat across the patient s shoulders 3 Pull out at the top par...

Страница 44: ...etric Modality 5 On the control panel press and hold to level the ear cones to the patient s auditory canals 6 Gently push in at the top part of a head clamp bar to retract both head clamp bars and to...

Страница 45: ...To launch the X ray follow these steps 1 Leave the X ray room and close the door You must keep visual contact with the patient during acquisition Important If you have a problem that requires you to s...

Страница 46: ...maging Software 3 Check the image quality if satisfactory remove the ear cones and the nasion support and release the patient X ray Dose Emission Information Compliance with EURATOM 97 43 Directive Yo...

Страница 47: ...ion the head clamps manually for a frontal AP exam 2 Remove the cap A take the carpus panel B and push it C into the magnetic carpus panel slot D When the carpus panel is connected to the unit the acq...

Страница 48: ...ton Select the appropriate parameters Click and select Memorize Anatomy setting if you want to save the new parameter settings as future default settings Preparing and Positioning the Adult and Pediat...

Страница 49: ...carpus panel Launching the X ray To launch the X ray follow these steps IMPORTANT Make sure that the hand wrist and forearm are in a completely vertical position hand is approximately in the middle of...

Страница 50: ...image quality if satisfactory remove the ear cones and the nasion support and release the patient X ray Dose Emission Information Compliance with EURATOM 97 43 Directive You can right click on each im...

Страница 51: ...rried out by an authorized service technician Controlling the Image Quality To maintain optimum image quality it must be controlled once a month To control the image quality follow these steps 1 On yo...

Страница 52: ...48 Chapter 6 Maintenance 3 Select the desired test and follow the on screen instructions...

Страница 53: ...n interface reaches zero Thermal security Cooling in progress Wait until the Generator Cooling Indicator on the Acquisition interface reaches zero Release handswitch The acquisition has ended Release...

Страница 54: ...50 Chapter 7 Troubleshooting...

Страница 55: ...ory TROPHY 4 Rue F Pelloutier Croissy Beaubourg 77435 Marne la Vall e Cedex 2 France European Authorized Representative TROPHY 4 Rue F Pelloutier Croissy Beaubourg 77435 Marne la Vall e Cedex 2 France...

Страница 56: ...SM987 Ed04 2019 02 For more information visit www carestreamdental com...

Отзывы: