


UI SmartSeatPro
II
User Guide. Iss1 06/22
25
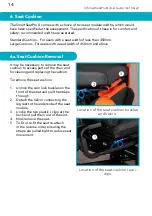
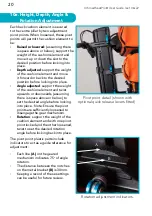
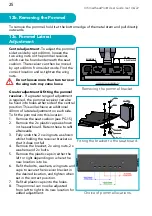
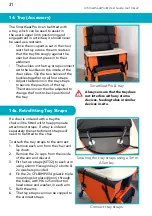
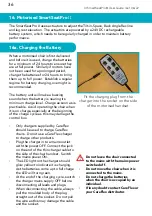
To remove the pommel, hold it at the bottom edge of the metal stem and pull directly
outwards.
12b. Removing the Pommel
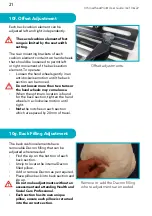
Removing the pommel bracket.
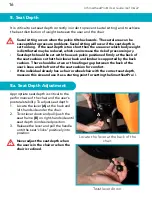
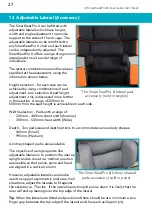
40mm
ADJUSTMENT
WING NUT
VIEW FROM UNDERNEATH
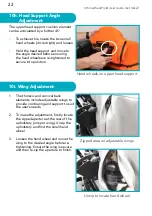
Fitting the bracket to the seat board.
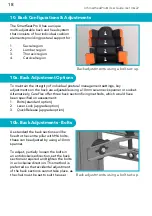
CAP
RECEIVER
WASHER
WING NUT
BOLT
POMMEL
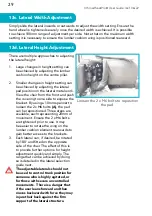
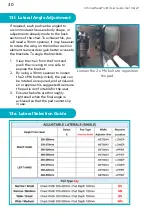
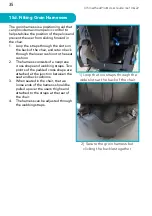
12c. Pommel Lateral
Adjustment
Central adjustment - To adjust the pommel
side to side by up to 40mm, loosen the
two wing nuts on the pommel receiver,
which can be found underneath the seat
cushion. The receiver can then be moved
by up to 40mm from side to side. Find the
correct location and re-tighten the wing
nuts.
•
Do not loosen more than turn turns or
the wing nuts may come loose
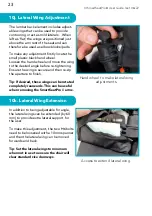
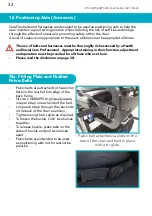
Greater adjustment & fitting the pommel
receiver – If a greater range of adjustment
is required, the pommel receiver can also
be fixed into holes either side of the central
position. This will achieve an additional
40mm of lateral adjustment on each side.
To fit the pommel into this location:
1. Remove the seat cushion (see PG.15)
2. Remove the 2 x plastic caps as shown
in the seat board. Retain these to refit
afterwards.
3. Fully undo the 2 x wing nuts as shown
whilst holding the receiver bracket so
that it does not fall.
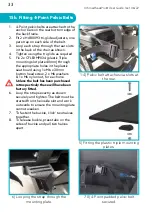
4. Remove the bracket, 2 x wing nuts, 2 x
washers and 2 x bolts.
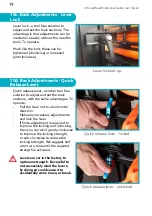
5. Remove the plastic caps in either the
left or right depending on where the
new location is to be.
6. Refit the bolts, washers, wing nuts and
caps to secure the receiver bracket in
the desired location, and tighten when
set in the correct position.
7. Refit all plastic caps into the holes.
8. The pommel can now be adjusted
from left to right in its new location for
added adjustment.
Choice of pommel locations.


