background image

8527-0544-2M Rev B 

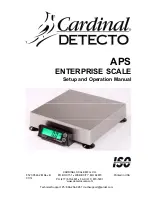
 APS Enterprise Scale 

7

SETUP AND CONFIGURATION 

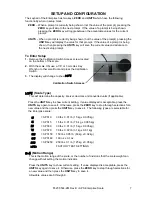
The keypad of the Enterprise has two keys, ZERO and UNITS which have the following 
functionality when in setup mode: 

ZERO – When a prompt is currently being shown (not the value of the prompt), pressing the 

ZERO key will skip to the next prompt.  If the value of a prompt is being shown, 
pressing the ZERO key will toggle between the acceptable values for the current 
prompt. 


UNITS – When a prompt is currently being shown (not the value of the prompt), pressing the 

UNITS key will display the value for that prompt.  If the value of a prompt is being 
shown, then pressing the UNITS key will save the current value and advance to 
the next setup prompt. 


To Enter Setup 

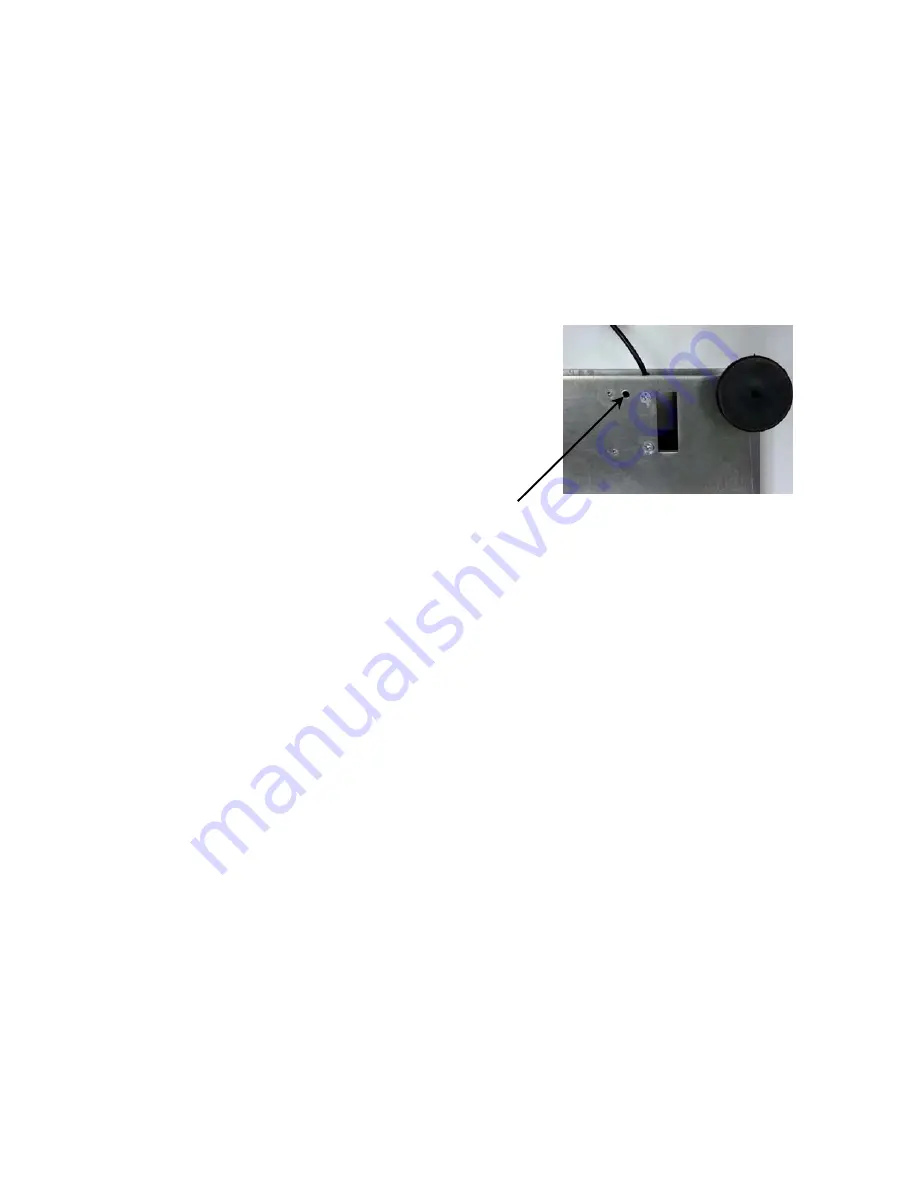
1.  Remove the Calibration Switch Access screw located 

on the bottom of the scale. 

2.  With the scale ON, use a 1/8” or 3 mm Hex Key 

Wrench or other small tool and press the Calibration 
Switch.   

3.  The display will change to show 

type


Type

 (Scale Type) 

This will determine the capacity, interval, decimal, and converted units (if applicable). 
 

Press the UNITS key to show current setting.  If value displayed is acceptable, press the 
UNITS key again to save it.  Otherwise, press the ZERO key to step through selections for a 
new value and then press the UNITS key to save it.  The following types are selectable for 
the Enterprise scale:  


10 

= APS10 

30 lb x 0.01 lb  (15 kg x 0.005 kg) 

15 

= APS15 

15 lb x 0.01 lb  (7.5 kg x 0.005 kg) 

30 

= APS30 

30 lb x 0.01 lb  (15 kg x 0.005 kg) 

70 

= APS70 

70 lb x 0.02 lb  (31 kg x 0.01 kg) 

150 

= APS150 

150 lb x 0.05 lb  (60 kg x 0.02 kg) 

160 

= APS160 

160 oz x 0.1 oz 

250 

= APS250 

250 lb x 0.1 lb  (125 kg x 0.05 kg) 

TEST 


FACTORY TEST SETTINGS 


UnS

 (Motion Range) 

This is the motion range of the scale, or the number of divisions that the scale weight can 
change without setting the motion indicator.   
 
Press the UNITS key to show current setting.  If value displayed is acceptable, press the 
UNITS key again to save it.  Otherwise, press the ZERO key to step through selections for 
a new value and then press the UNITS key to save it.   

Allowable values are 0 through 9. 


Calibration Switch Access  

Содержание APS

Страница 1: ... ENTERPRISE SCALE Setup and Operation Manual CARDINAL SCALE MFG CO 8527 0544 2M Rev B PO BOX 151 WEBB CITY MO 64870 Printed in USA 07 14 PH 417 673 4631 FAX 417 673 5001 www detectoscale com Technical Support Ph 866 254 8261 techsupport cardet com ...

Страница 2: ...8527 0544 2M Rev B APS Enterprise Scale II ...

Страница 3: ...e Display Serial Port 2 Page 5 POS Serial Port 3 Page 5 Serial Data Cable 8527 0545 0A Page 5 USB Cable Installation Page 5 Power Adapter Page 5 KEYPAD FUNCTIONS Page 6 ANNUNCIATORS Page 6 SETUP AND CONFIGURATION Page 7 To Enter Setup Page 7 type Scale Type Page 7 Uns Motion Range Page 7 Filter Adjustable Digital Filtering Page 8 Calib Calibration Page 8 Port1 Serial Port 1 Page 9 Port2 Serial Por...

Страница 4: ...and ease of application however success and safety in working with tools depend to a great extent upon the individual accuracy skill and caution For this reason the Seller is not able to guarantee the result of any procedure contained herein Nor can they assume responsibility for any damage to property or injury to persons occasioned from the procedures Persons engaging the procedures do so entire...

Страница 5: ...lb 0 01 lb 3000 APS30 12 in x 14 in 31 cm x 36 cm 15 kg 0 005 kg 3000 TSP 15kg 70 lb 0 02 lb 3500 APS70 12 in x 14 in 31 cm x 36 cm 31 kg 0 01 kg 3500 TSP 30kg 150 lb 0 05 lb 3000 APS150 12 in x 14 in 31 cm x 36 cm 60 kg 0 02 kg 3000 TSP 100kg 250 lb 0 1 lb 2500 APS250 18 in x 18 in 46 cm x 46 cm 125 kg 0 05 kg 2500 TSP 100kg Power Requirements 100 to 240 VAC 50 60Hz 12 VDC 1A wall plug in UL CSA ...

Страница 6: ... be in place to operate the scale 3 To mount the display on the scale base use the two included mounting screws in the hardware pack Insert the screws through the two holes in the scale display bracket and attach the bracket to the scale base Route the cable into the scale and plug into scale display port see interconnection section for port location and more information 4 Determine where the scal...

Страница 7: ...e located It should be a smooth surface capable of supporting both the scale and any load to be placed on the scale It should not be in direct sunlight nor should it be subject to air flow from heating cooling vents fans or similar devices 5 Plug in 12VDC adapter to use scale Refer to Electrical Power section of this manual for more instruction 6 The scale is now ready for use Level Adjustment Pla...

Страница 8: ... must be identified and steps must be taken to prevent possible adverse effects on the scale Examples of available alternatives include isolation transformers power regulators uninterruptible power supplies or simple line filters Transient Suppression The following recommendations will help to reduce transients Do not run signal cables from the scale along side or parallel to wiring carrying AC po...

Страница 9: ... the scale base where marked and then plug the other end into an available serial port on the POS device 4 Included Serial Data Cable 8527 0545 0A Wiring Diagram Serial Data Cable 8527 0545 0A USB Cable Installation USB To use the USB interface obtain a industry standard USB cable and plug it into the scale base where marked and then plug the other end into a USB port on your computer Power Adapte...

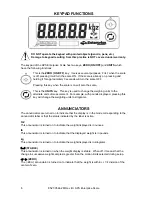
Страница 10: ...o the alternate units of measurement For example with pounds displayed pressing this key will change the weighting units to kilograms ANNUNCIATORS The annunciators are turned on to indicate that the display is in the mode corresponding to the annunciator label or that the status indicated by the label is active OZ This annunciator is turned on to indicate the weight displayed is in ounces lb This ...

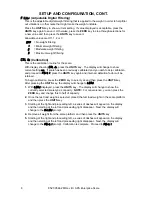
Страница 11: ...ype Type Scale Type This will determine the capacity interval decimal and converted units if applicable Press the UNITS key to show current setting If value displayed is acceptable press the UNITS key again to save it Otherwise press the ZERO key to step through selections for a new value and then press the UNITS key to save it The following types are selectable for the Enterprise scale 10 APS10 3...

Страница 12: ... and proceed to PORT1 press the UNITS key again and internal calibration factor will be retained To begin calibration press the ZERO key to select yes and then press the UNITS key After pressing the UNITS key the display will change to LOAd 1 With LOAd displayed press the UNITS key The display will change to show the currently selected scale type s capacity NOTE For convenience you can press the Z...

Страница 13: ... acceptable press the UNITS key again to save it Otherwise press the ZERO key to step through selections for a new value and then press the UNITS key to save it Options for port2 output format are the same as PORT1 PORt3 POS Serial Port 3 OPOS Compatible This is the third serial port output format selection NOTE The serial port parameters for this port are fixed at 9600 baud 7 data bits 1 stop bit...

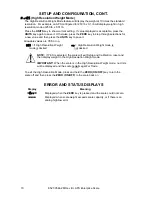
Страница 14: ...o save it Allowable values are YES or no YES If High Resolution Weight mode is desired no High Resolution Weight mode is not desired NOTE If YES is selected the scale will exit Setup and Calibration reset and then display weight in the High Resolution Weight mode IMPORTANT When the scale is in the High Resolution Weight mode no Units will be displayed and the scale is not Legal For Trade To exit t...

Страница 15: ...e bracket can be attached to the wall using the appropriate hardware for the type of wall construction The remote display can be removed from the bracket and mounted on the wall using the included velcro strips Using the remote display post it can be mounted to a table bench or in a retail environment the checkstand ...

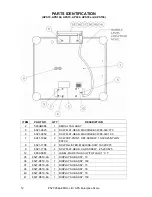
Страница 16: ...SCW 06 32X1 00 7 6021 1069 2 SCW CUP POINT SET SCREW 10 32X 25 NYLON PATCH 8 6021 1108 2 SCW FILLISTER MACHINE SCW 10 32X 375 9 6021 1706 4 SCW FLAT HEAD CAP SCREW 25 20X 625 12 6650 0087 1 LABEL MADE IN USA WITH FLAG 1 X 1 35 8527 D510 0A 1 DISPLAY SUB ASSY 10 36 8527 D510 1A 1 DISPLAY SUB ASSY 160 37 8527 D510 2A 1 DISPLAY SUB ASSY 15 38 8527 D510 3A 1 DISPLAY SUB ASSY 30 40 8527 D510 5A 1 DISPL...

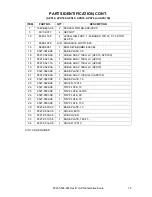
Страница 17: ...C APS15 APS160 17 8527 0521 0A 1 CABLE ASSY 15KG LC APS10 18 8527 0521 1A 1 CABLE ASSY 15KG LC APS30 19 8527 0522 0A 1 CABLE ASSY 30KG LC APS70 20 8527 0523 08 1 BASE PLATE 150 21 8527 0524 0A 1 CABLE ASSY 100KG LC APS150 22 8527 0527 08 1 BASE PLATE 70 23 8527 0528 08 1 COVER 12X14 24 8527 0529 08 TOP PLATE 10 25 8527 0530 08 1 TOP PLATE 160 15 26 8527 0531 08 1 TOP PLATE 30 27 8527 0532 08 1 TOP...

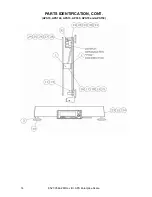
Страница 18: ...8527 0544 2M Rev B APS Enterprise Scale 14 PARTS IDENTIFICATION CONT APS10 APS160 APS15 APS30 APS70 and APS150 ...

Страница 19: ...APS30 APS70 and APS150 ITEM PART NO QTY DESCRIPTION 4 6021 0623 4 SCW PAN HEAD MACHINE SCW 06 32X 750 7 6021 1069 2 SCW CUP POINT SET SCREW 10 32X 25 NYLON PATCH 9 6021 1706 4 SCW FLAT HEAD CAP SCREW 25 20X 625 13 6680 0004 4 WASHER LOCK INT TOOTH 6 TYPE A Z PL 29 8527 C500 0A 1 ANALOG PCB ...

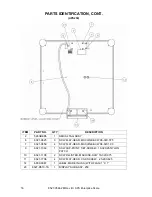
Страница 20: ...625 3 SCW FLAT HEAD MACHINE SCW 06 32X 375 7 6021 0659 4 SCW FLAT HEAD MACHINE SCW 06 32X1 00 9 6021 1069 1 SCW CUP POINT SET SCREW 10 32X 25 NYLON PATCH 10 6021 1108 2 SCW FILLISTER MACHINE SCW 10 32X 375 11 6021 1706 4 SCW FLAT HEAD CAP SCREW 25 20X 625 14 6650 0087 1 LABEL MADE IN USA WITH FLAG 1 X 1 23 8527 D510 7A 1 DISPLAY SUB ASSY 250 ...

Страница 21: ...8527 0544 2M Rev B APS Enterprise Scale 17 PARTS IDENTIFICATION CONT APS250 ...

Страница 22: ...021 0950 4 SCW HEX HEAD MACHINE SCW 10 32X1 50 Z P 10 6021 1108 2 SCW FILLISTER MACHINE SCW 10 32X 375 12 6540 1123 4 LEVELLER SCREW 3 8 16 X 1 1 4 BLACK 13 6560 1072 A R ADHESIVE LOCTITE 49 16 6690 0001 1 BULLSEYE BUBBLE LEVEL 17 8527 0524 1A 1 CABLE ASSY 100KG LC 18 8527 0525 08 1 BASE PLATE 250 19 8527 0526 08 1 COVER 18X18 20 8527 0534 08 1 TOP PLATE 250 22 8527 C505 08 1 PCB COVER A R AS REQU...

Страница 23: ... 19 PARTS IDENTIFICATION CONT APS250 ITEM PART NO QTY DESCRIPTION 5 6013 0315 4 NUT 6 32 HEX SMALL PATTERN Z P 11 6021 1706 4 SCW FLAT HEAD CAP SCREW 25 20X 625 15 6680 0004 4 WASHER LOCK INT TOOTH 6 TYPE A Z PL 21 8527 C500 0A 1 ANALOG PCB ...

Страница 24: ...PLAY ITEM PART NO QTY DESCRIPTION 1 5930 0146 08 1 CAPACITY LABEL 2 6021 2078 4 SCW PAN HEAD PHILLIPS 1 32X3 8 THD FORM SS 3 8527 0515 08 1 APS KEYPAD 8 8527 C502 4A 1 PCB ASSY APSRD DISPLAY 9 8527 D506 08 1 ENCLOSURE FRONT 10 8527 D507 08 1 ENCLOSURE BACK 11 8527 D508 08 1 ENCLOSURE MOUNT ...

Страница 25: ...8527 0544 2M Rev B APS Enterprise Scale 21 ...

Страница 26: ...8527 0544 2M Rev B APS Enterprise Scale 22 ...

Отзывы: