Instruction manual CM465
Please keep this instruction manual for future reference
32
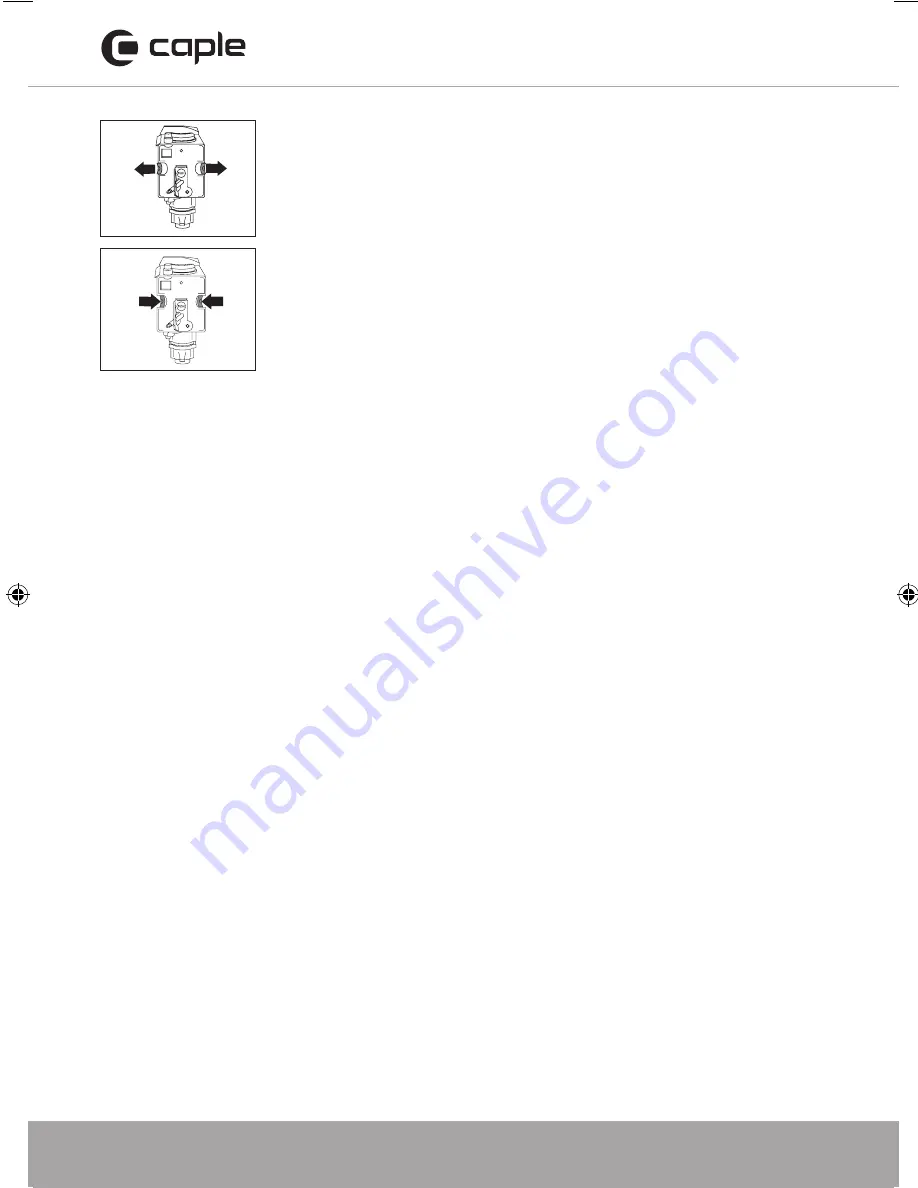
7. Once inserted, make sure the two coloured buttons have
snapped back out, otherwise the service door cannot be
closed.
- The two coloured buttons are correctly snapped out (A).
- The two coloured buttons are not snapped out (B).
8. Replace the drip tray and waste coffee container.
9. Close the service door.
NOTES:
- If the brewing unit is not put in place correctly, the service
door cannot be closed.
- If it is difficult to insert the brewing unit, it must be made
into the right height (before inserting) by pressing the
brewing unit firmly together from top and bottom.
- If it is still difficult to insert the brewing unit:
- Leave it out of the appliance, place the drip tray, close the
service door, switch the main switch on the back of the
appliance to ‘off’ and then to ‘on’ again.
- Wait for all the lights to go off, then open the door,
remove the drip tray and replace the brewing unit.
- Replace the drip tray, together with the grounds
container.
- Close the service door.
EN 30
7. Once inserted, make sure the two red buttons have snapped back
out, otherwise the service door cannot be closed.
•
The two red buttons are correctly snapped out (A).
•
The two red buttons are not snapped out (B).
8. Replace the drip tray and waste coffee container.
9. Close the service door.
Notes
• If the brewing unit is not put in place correctly, the service door
cannot be closed.
• If it is diffi cult to insert the brewing unit, it must be made into the
right height (before inserting) by pressing the brewing unit fi rmly
together from top and bottom.
• If it is still diffi cult to insert the brewing unit:
•
Leave it out of the appliance, place the drip tray, close the
service door, switch the main switch on the back of the appliance
to ‘off’ and then to ‘on’ again.
•
Wait for all the lights to go off, then open the door, remove the
drip tray and replace the brewing unit.
•
Replace the drip tray, together with the grounds container.
•
Close the service door.
Cleaning the milk container
Always clean the tubes inside the milk container when you prepare milk.
If there is still milk in the container, do not leave it out of the refrigerator
for longer than strictly necessary. Clean the container each time you
prepare milk as described in the section “Making cappuccino”.
All components can be washed in a dishwasher, placing them in
the top basket of the dishwasher.
1. Turn the milk container lid clockwise then remove it.
2. Remove the milk spout (S) and intake tube (M).
MAINTENANCE
1 CAPPUCCINO
2 CAFFELA
TTE
S
M
A
B
CM465 Coffee Machine Instruction manual.indd 32
17/08/2017 13:59


