background image


Installation Instructions     Model : Z3314--44 

Further information Phone (03) 9761 4603                               [email protected] 


❷ 

❸ 


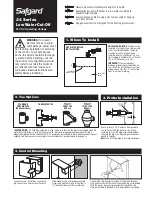
Adjust  the  Tap  Side  body  to  the  correct  height 
and  then  tighten  using  a  32mm  spanner  or 
adjustable smooth jawed shifter. 


Note: Make sure that the locking nuts are fully 
tightened,  otherwise  the  side  body  may  turn 
while turning the On Off lever. 


Feed the cover plate 

6

, onto the tap side body, 

until it is flush with the counter top surface. 


Thread the retaining flange and handle 

7,

 onto 

the  cartridge,  securing  it  firmly  by  hand  only. 
See the “Removing and replacing a handle”, on 
page “12” for additional details. 


❶ 


Thread  the  bottom  brass  lock  nut 

1

,  followed  by  the 

bottom rubber  washer 

2

, onto the Side  body 

3

, thread 

section.  


Repeat for the opposite side. 


Insert the Side body 

3

, through the tap hole cut outs in 

the counter top. 


Feed  the  top  rubber  washer 

4

  over  the  thread  section 

followed by the top brass lock nut 

5

.  


Continue……. 

Содержание ARENA Z3314-44

Страница 1: ...at Nicolazzi Factory Lead Free Brass Compliant to AZ NZS 3718 Suitable even and uneven pressure Handles are interchangeable Specifications WM22315 AS NZS3662 Canterbury Sink Tap Co Max Min Operating P...

Страница 2: ...Please note The recommended pressure for best performance is between 270 kPa and 420 kPa More pressure than 420 kPa or less pressure than 270 kPa may affect the diverting action in side spray tap ware...

Страница 3: ...hole sizes Maximum 33mm diameter Under side clearance Maximum 40mm 3 Preparation Tap body Tap body cut out hole sizes Maximum 33mm diameter Under side clearance Maximum 60mm Continue Tap section Flus...

Страница 4: ...r plate 6 onto the tap side body until it is flush with the counter top surface Thread the retaining flange and handle 7 onto the cartridge securing it firmly by hand only See the Removing and replaci...

Страница 5: ...he escutcheon thread extension followed by the brass lock nut 17 Secure on to the worktop underside but do not over tighten 5 Thread the bottom brass lock nut 9 followed by the bottom rubber washer 10...

Страница 6: ...ly DO NOT over tighten 19 Install the supplied mounting stud 20 into tap the body spout and verify that they are securely installed 6 Continue Feed the O ring 21 over the water supply hose Note Insert...

Страница 7: ...o the stud Then screw the mounting nut 24 onto the stud Screw the mounting stud until the half ring rubber gasket mates up with the underside of the sink Check the position on the spout body then tigh...

Страница 8: ...any water leaks Installation Instructions Model Z3314 44 Further information Phone 03 9761 4603 sales sinkandtap com au Connect the Diverter Hot and Cold water supply flexi hoses 25 and 26 to the prot...

Страница 9: ...se 33 through from the bottom end of the hand spray escutcheon Connect the flexi hose to the curved joint holder ensuring that the O ring 32 is placed on the male end of the flexi hose Insert Check va...

Страница 10: ...603 sales sinkandtap com au 10 Before use Turn on the Hot and Cold supplies to the tap Maximum temperature for Hot water supply to the tapware is 62 C Minimum recommended pressure is 100 kPa Maximum r...

Страница 11: ...Spare Parts list Model Z3314 44 Further information Phone 03 9761 4603 sales sinkandtap com au 11...

Страница 12: ...Spare Parts list Model Z3314 44 Further information Phone 03 9761 4603 sales sinkandtap com au 12...

Страница 13: ...To reassemble reverse the disassembly procedure given above The retaining flange only needs to be hand tight NOTE DO NOT USE A SHIFTER TIGHTEN BY HAND ONLY Do not over tighten as this could damage th...

Страница 14: ...not replace the diverter Service or replace the hand spray if there is a continous leak Turn off the hot and cold supply lines to the tap set Not shown Remove the handle and retaining flange Refer to...

Страница 15: ...ot change the cartridge Unscrew and clean the aerator 1 Unscrew and clean the filters inside the supply connections 3 Check the supply lines for kinks or obstructions 2 3 and 4 Ensure that the Check v...

Страница 16: ...juice this will lighten the dark colouring Shiny Brass Polished Nickel has an ageing process and will tarnish over time Tuscan Brass is a living finish and also carries NO warranty It will lighten wit...

Отзывы: