110
Special Arrangements
■
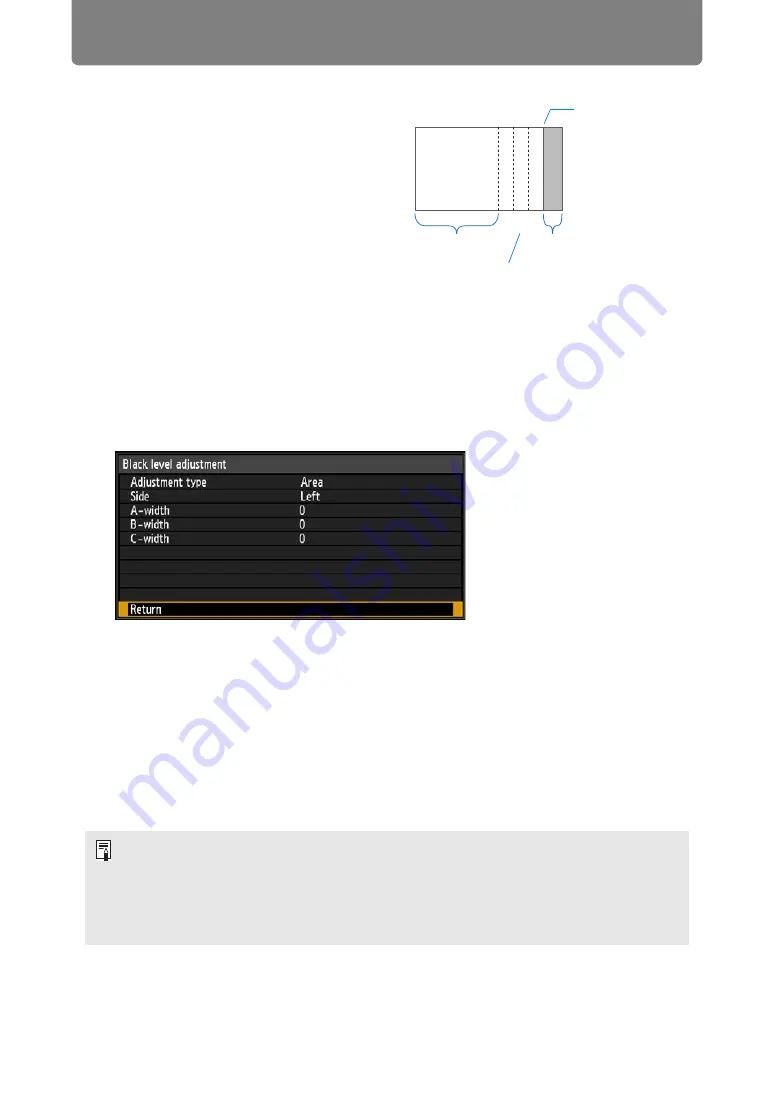
Making Overlapping Edges Less Noticeable
The black level along the right edge of area
D (along the blending area) may be more
noticeable than that of surrounding areas.
By adjusting the black level of area B, you
can make the transition smoother.
To compensate, adjust each area as
follows.
When the projected image has multiple
blending areas (on the top, bottom, and
each side), the width of areas A, B, and C
must be adjusted to suit these blending
areas.
In this example, instructions are given for
adjusting area B.
1
Select [Install settings] > [Professional settings] > [Edge blending] >
[Adjust] > [Black level adjustment] > [Adjust].
2
Select [Adjustment type] > [Area] > [Side] > [Right].
3
Select [B-width], and then adjust the width of area B to roughly match the
area where the black level is noticeable.
4
Select [Adjustment type] > [Black level]. Adjust [B-area base] as you
watch the image.
5
As you watch the image, adjust the width of areas A, B, and C.
6
Readjust the black level of area B, as needed.
• Results of adjusting the black level of area B are applied to all sides.
• If you perform adjustments using [Color blending adjustment] or other menus, that may
not eliminate the distracting colors and differences in brightness in areas where the
images overlap.
• Blending can be fine-tuned by adjusting [Adjustment type] > [Black level] > [Red],
[Green], and [Blue].
CBA
Area A: Black level cannot be adjusted.
Area B: Adjust to a black level different
from that of area D.
Area C: Adjust to provide a smooth
transition relative to the black
levels of areas B and D.
Left image
Position of end
marker (hidden)
D-area
Blending area
Areas C - A (default: 0)
Содержание WUX7500
Страница 41: ...41 Basic Guide ...
Страница 60: ...60 Installation Guide Before setting up the projector be sure to read Before Installation P24 ...
Страница 116: ...116 Menu Guide ...
Страница 206: ...206 Maintenance Product Specifications Troubleshooting ...


