


3.
Check the paper size
Check the
Page Size
list. When you want to change it, select another page size from the list. The list
displays only sizes that can be used for borderless printing.
4.
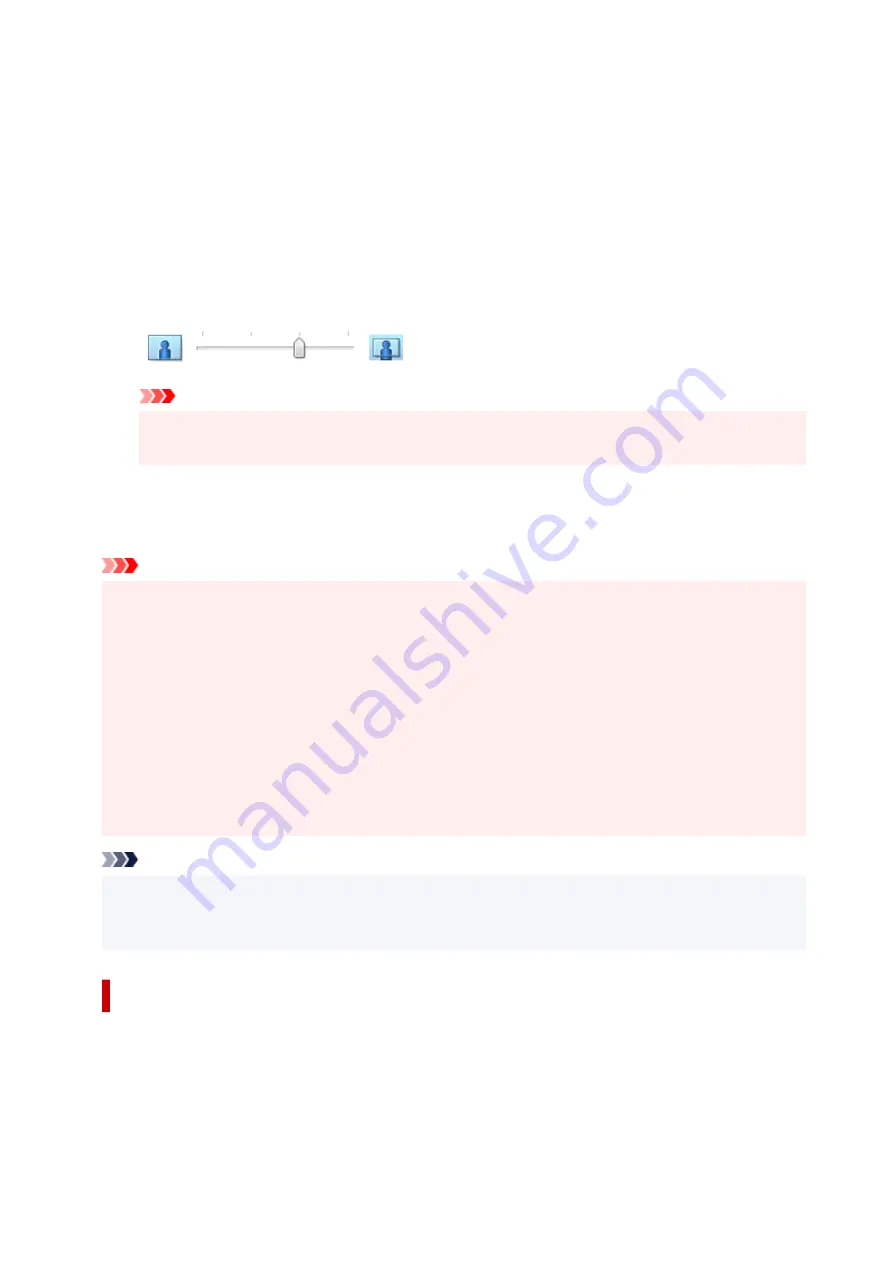
Adjust the amount of extension from the paper
If necessary, adjust the amount of extension using the
Amount of Extension
slider.
Moving the slider to the right increases the amount extending off the paper, and moving the slider to
the left decreases the amount.
It is recommended to set the slider at the second position from the right for most cases.
Important
• When the
Amount of Extension
slider is set to the rightmost position, the back side of the
paper may become smudged.
5.
Click
OK
When you execute print, the data is printed without any margins on the paper.
Important
• When a page size that cannot be used for borderless printing is selected, the size is automatically
changed to the valid page sizes for borderless printing.
• When
Borderless
is selected, the
Printer Paper Size
,
Duplex Printing
,
Stapling Side
settings, and
the
Stamp/Background...
button on the
Page Setup
tab appear grayed out and are unavailable.
• When
Envelope
,
High Resolution Paper
, or
T-Shirt Transfers
is selected from the
Media Type
list
on the
Main
tab, you cannot perform borderless printing.
• Depending on the type of the media used during borderless printing, the print quality may deteriorate
at the top and bottom of the sheet or stains may form.
• When the ratio of the height to the width differs from the image data, a portion of the image may not
be printed depending on the size of the media used.
In this case, crop the image data with an application software according to the paper size.
Note
• When
Plain Paper
is selected for
Media Type
on the
Main
tab, borderless printing is not
recommended. Therefore, the message for media selection appears.
When you are using plain paper for test printing, select
Plain Paper
, and click
OK
.
Expanding the Range of the Document to Print
Setting a large amount of extension allows you to perform borderless printing with no problems. However,
the portion of the document extending off the paper range will not be printed and for this reason, the
subjects around the perimeter of a photo may not be printed.
When you are not satisfied with the result of borderless printing, reduce the amount of extension. The
extension amount decreases as the
Amount of Extension
slider is moved to the left.
282
Содержание TS9500 Series
Страница 1: ...TS9500 series Online Manual English ...
Страница 10: ...5012 535 5100 536 5200 537 5B00 538 6000 539 C000 540 ...
Страница 38: ...13 Select Print 38 ...
Страница 78: ...4 If message saying setup is completed appears select OK For macOS Redo setup from the web page 78 ...
Страница 96: ...Note This setting item is not available depending on the printer you are using 8 Click Set 96 ...
Страница 119: ...Placing a Printable Disc Before Placing a Printable Disc Placing a Printable Disc Removing a Printable Disc 119 ...
Страница 134: ...134 ...
Страница 140: ...Inserting the Memory Card Before Inserting the Memory Card Inserting the Memory Card Removing the Memory Card 140 ...
Страница 146: ...Replacing Ink Tanks Replacing Ink Tanks Checking Ink Status on the Touch Screen Ink Tips 146 ...
Страница 157: ...Adjusting Print Head Position 157 ...
Страница 180: ...Safety Safety Precautions Regulatory Information WEEE EU EEA 180 ...
Страница 202: ...Main Components and Their Use Main Components Power Supply Using the Operation Panel 202 ...
Страница 203: ...Main Components Front View Rear View Inside View Operation Panel 203 ...
Страница 233: ...For more on setting items on the operation panel Setting Items on Operation Panel 233 ...
Страница 244: ...Language selection Changes the language for the messages and menus on the touch screen 244 ...
Страница 258: ...Information about Paper Supported Media Types Paper Load Limit Unsupported Media Types Handling Paper 258 ...
Страница 286: ...Note Selecting Scaled changes the printable area of the document 286 ...
Страница 304: ...In such cases take the appropriate action as described 304 ...
Страница 338: ...Printing Using Canon Application Software Easy PhotoPrint Editor Guide 338 ...
Страница 339: ...Printing Using a Web Service Using PIXMA MAXIFY Cloud Link Printing with Google Cloud Print 339 ...
Страница 354: ...Other device settings 354 ...
Страница 355: ...Disc Label Printing Copying Label Side of Disc Basic Printing Photo from Memory Card onto Disc Label 355 ...
Страница 377: ...Note To set the applications to integrate with see Settings Dialog Box 377 ...
Страница 390: ...ScanGear Scanner Driver Screens Basic Mode Tab Advanced Mode Tab 390 ...
Страница 415: ...Scanning Using Smartphone Tablet Using PIXMA MAXIFY Cloud Link Printing Scanning with Wireless Direct 415 ...
Страница 421: ...Network Communication Problems Cannot Find Printer on Network Network Connection Problems Other Network Problems 421 ...
Страница 454: ...Other Network Problems Checking Network Information Restoring to Factory Defaults 454 ...
Страница 459: ...Problems while Printing Scanning from Smartphone Tablet Cannot Print Scan from Smartphone Tablet 459 ...
Страница 485: ...Scanning Problems Windows Scanning Problems 485 ...
Страница 486: ...Scanning Problems Scanner Does Not Work ScanGear Scanner Driver Does Not Start 486 ...
Страница 500: ...Errors and Messages An Error Occurs Message Support Code Appears 500 ...
Страница 519: ...If the measures above do not solve the problem contact your nearest Canon service center to request a repair 519 ...


