background image

5

Préparatifs initiaux

  Utilisation de l’écran

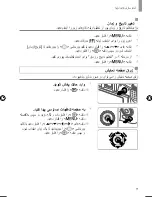
Ouvrez l’écran ( ) et faites-le pivoter en 
direction de l’objectif de 180° ( ).

Fermez l’écran dans cette orientation ( ).

   Réglage de la date et de l’heure

1

  Mettez l’appareil photo 

sous tension.

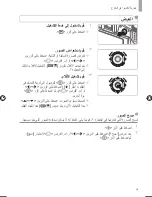
Appuyez sur la touche ON/OFF.

L’écran [Date/Heure] s’af

fi

 che. 

2

  Réglez la date et l’heure.

Appuyez sur les touches <

q

><

r

> pour 

choisir une option.

Appuyez sur les touches <

o

><

p

> ou 

tournez la molette <

5

> pour spéci

fi

 er 

la date et l’heure.

Une fois que vous avez terminé, appuyez 
sur la touche <

m

>.

3

 Dé

fi

 nissez le fuseau 

horaire local.

Appuyez sur les touches <

q

><

r

> ou 

tournez la molette <

5

> pour choisir 

le fuseau horaire local.

Appuyez sur la touche <

m

> une fois 

que vous avez terminé. Après l’af

fi

 chage 

d’un message de con

fi

 rmation, l’écran de 

réglage disparaît.

Pour mettre l’appareil photo hors tension, 
appuyez sur la touche ON/OFF.

EC334_GS_FR.indd   5

EC334_GS_FR.indd   5

24/07/2012   13:40:42

24/07/2012   13:40:42

Содержание PowerShot SX50 HS

Страница 1: ...ENGLISH FRAN AIS Getting Started Guide de mise en route CEL ST4JA2M0...

Страница 2: ...rd is included Purchase one of the following kinds of card as needed These memory cards can be used regardless of capacity For details on the number of shots and recording time per memory card refer t...

Страница 3: ...ERA Manuals Disk in the computer s CD ROM drive Follow the instructions displayed to view the manual Initial Preparations Charging the Battery 1 Remove the battery cover and insert the battery After a...

Страница 4: ...of the arrow Label 3 Check the card s write protect tab and insert the memory card Recording is not possible on memory cards with a write protect tab when the tab is in the locked downward position S...

Страница 5: ...played 2 Set the date and time Press the q r buttons to choose an option Press the o p buttons or turn the 5 dial to specify the date and time When finished press the m button 3 Set the local time zon...

Страница 6: ...hoose Date Time and then press the m button 4 Follow step 2 in Setting the Date and Time to adjust the settings 5 Press the n button Display Language The display language can be changed as needed 1 En...

Страница 7: ...A 2 Compose the shot To zoom in and enlarge the subject move the zoom lever toward i telephoto as you watch the screen and to zoom away from the subject move it toward j wide angle 3 Shoot still imag...

Страница 8: ...ess the movie control panel choose either press the q r buttons or turn the 5 dial and then press the m button again To adjust the volume press the o p buttons Playback now begins and after the movie...

Страница 9: ...recycling waste electrical and electronic equipment EEE and batteries and accumulators Improper handling of this type of waste could have a possible impact on the environment and human health due to p...

Страница 10: ...tes m moire compatibles Aucune carte m moire n est fournie Achetez un des types de carte suivants selon les besoins Vous pouvez utiliser ces cartes m moire quelle que soit leur capacit Pour en savoir...

Страница 11: ...Disk dans le lecteur de CD ROM de l ordinateur Suivez les instructions qui s affichent pour visualiser le manuel Pr paratifs initiaux Chargement de la batterie 1 Retirez le couvercle du logement de l...

Страница 12: ...tection contre l criture de la carte m moire et ins rez cette derni re L enregistrement n est pas possible sur les cartes m moire dont la languette de protection contre l criture est en position verro...

Страница 13: ...ez sur les touches q r pour choisir une option Appuyez sur les touches o p ou tournez la molette 5 pour sp cifier la date et l heure Une fois que vous avez termin appuyez sur la touche m 3 D finissez...

Страница 14: ...s appuyez sur la touche m 4 Ex cutez l tape 2 de la section R glage de la date et de l heure pour effectuer les r glages 5 Appuyez sur la touche n Langue d affichage Vous pouvez modifier la langue d a...

Страница 15: ...sez la vue Pour faire un zoom avant et agrandir le sujet d placez la commande de zoom vers i t l objectif tandis que vous regardez l cran et pour faire un zoom arri re d placez la vers j grand angle 3...

Страница 16: ...panneau de commande des vid os choisissez appuyez sur les touches q r ou tournez la molette 5 puis appuyez nouveau sur la touche m Pour r gler le volume appuyez sur les touches o p La lecture commence...

Страница 17: ...des quipements lectriques ou lectroniques EEE et des piles et accumulateurs Le traitement inappropri de ce type de d chet risque d avoir des r percussions sur l environnement et la sant humaine du fa...

Страница 18: ...CANON INC 30 2 Shimomaruko 3 chome Ohta ku Tokyo 146 8501 Japan CANON EUROPA N V Bovenkerkerweg 59 61 1185 XB Amstelveen The Netherlands CANON INC 2012...

Страница 19: ...z 1 z 5 q r z z m q r 5 m z o p z a 5 q r m...

Страница 20: ...A z ON OFF z A z i j z z AF z...

Страница 21: ...n 3 5 o p m n z 1 z m n z o p q r 5 m...

Страница 22: ...z z z ON OFF W z q r z o p 5 z m z 5 q r z m z ON OFF...

Страница 23: ...z z z z z z z...

Страница 24: ...DIGITAL CAMERA Manuals Disk Adobe Reader PDF z z z DIGITAL CAMERA Manuals Disk z z z z z...

Страница 25: ...NS DC11 CB 2LCE NB 10L Canon DIGITAL CAMERA Solution Disk DIGITAL CAMERA Manuals Disk DIGITAL CAMERA Manuals Disk SD SDHC SDXC Eye Fi SD Eye Fi Eye Fi Eye Fi Eye Fi...

Страница 26: ...CANON INC 30 2 Shimomaruko 3 chome Ohta ku Tokyo 146 8501 Japan CANON EUROPA N V Bovenkerkerweg 59 61 1185 XB Amstelveen The Netherlands CANON INC 2012...

Страница 27: ...z 1 z 5 q r z z m q r m 5 z o p z a 5 q r m...

Страница 28: ...A z ON OFF z A z i j z z AF z...

Страница 29: ...n 3 5 o p m n z 1 z m n z o p q r m 5...

Страница 30: ...z z z ON OFF W z q r z 5 o p z m z 5 q r z m z ON OFF...

Страница 31: ...z z z z z z z...

Страница 32: ...DIGITAL CAMERA Manuals Disk PDF Adobe Reader z z z DIGITAL CAMERA Manuals Disk z z z z z...

Страница 33: ...NS DC11 CB 2LCE NB 10L Canon DIGITAL CAMERA Solution Disk DIGITAL CAMERA Manuals Disk DIGITAL CAMERA Manuals Disk SD SDHC SDXC Eye Fi SD Eye Fi Eye Fi Eye Fi Eye Fi...

Страница 34: ...CANON INC 2012...

Отзывы: