2
2
a
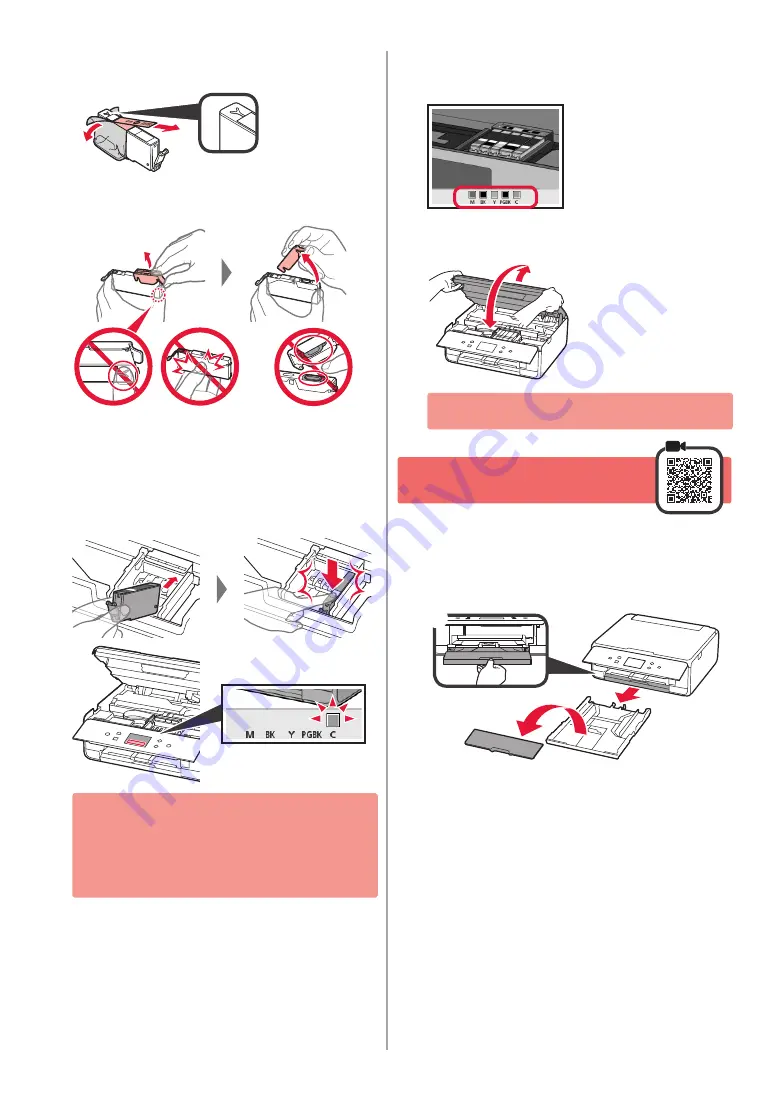
COMPLETELY remove the orange tape.
b
Remove the protective wrap.
a
b
3
Hook the orange cap with your finger to remove it
GENTLY.
Do not push the both sides of the
ink tank with the Y-shape air hole
blocked.
Do not touch.
4
Insert the ink tank into the print head and push it
down firmly until it snaps into place.
The color of the ink tank that you set appears on
screen.
If the color is not displayed on the screen even
though you have installed the ink tank, the color
of the ink tank may be wrong or you may have
installed an ink tank, such as one with a different
model number, that is not supported by this printer.
Either install an ink tank for the correct color or use
the provided ink tank for setup.
5
Install all the ink tanks the same way as in step
4, and then confirm that all the colors appear
on screen.
6
LIFT UP the scanning unit / cover, and then close
it.
If an error message appears on the screen, make
sure the ink tanks are installed correctly.
4. Loading Paper / Aligning
Print Head
To obtain a better print result, print a pattern for Print Head
Alignment and scan it.
1
a
Pull out the cassette.
b
Remove the cassette cover.
a
b


