background image

3

FR

ANÇ

AIS

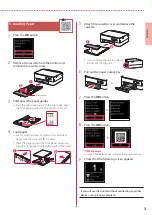
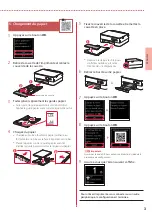
5. Chargement du papier

Appuyez sur le bouton 

OK

.

Retirez la cassette de l'imprimante et retirez le 
couvercle de la cassette.

a

b

Couvercle de la cassette

Faites glisser séparément les guides papier.

• 

Faites glisser le guide papier droit vers le bord droit. 
Alignez le guide papier avant sur la marque Lettre ou A4.

Chargez du papier.

• 

Chargez au moins 2 feuilles de papier ordinaire au 
format Lettre ou A4 avec la face à imprimer vers le bas.

• 

Placez le papier contre le guide papier avant et 
alignez le guide papier droit sur la largeur du papier.

a

b

Fixez le couvercle de la cassette et remettez la 
cassette en place.

a

b

• 

Observez-la depuis le côté pour 
confirmer qu'elle se présente 
comme dans le diagramme.

Retirez le bac de sortie papier.

Appuyez sur le bouton 

OK

.

Appuyez sur le bouton 

OK

.

 Important

Numérisez le code QR pour obtenir un didacticiel vidéo de la 

procédure de configuration.

Assurez-vous que l'écran suivant s'affiche.

Pour utiliser l'imprimante sans connecter aucun autre 
périphérique, la configuration est terminée.

Содержание PIXMA TS5365

Страница 1: ...ions d taill es et des vid os sont disponibles sur le site Web de Canon Configurer un ordinateur Configurer un smartphone Getting Started Read Safety and Important Information addendum first Online Se...

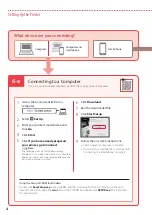
Страница 2: ...page 1 Connexion un ordinateur un smartphone ou une tablette page 4 Instructions vid o Manipulation de l imprimante Installing the Printer page 1 Connecting to a Computer Smartphone or Tablet page 4 H...

Страница 3: ...he orange tape and protective material inside b a 3 Close the scanning unit cover Open the scanning unit cover fully and then close it Caution Watch your fingers a b 3 Turning on the Printer 1 Connect...

Страница 4: ...ve tape It could stain your hands or surrounding objects Do not touch the areas shown in the figure Otherwise the printer may not print correctly 4 Set the Color FINE cartridge in the FINE cartridge h...

Страница 5: ...with the print side facing down Place the paper against the front paper guide and align the right paper guide to the width of the paper a b 5 Attach the cassette cover and replace the cassette a b Lo...

Страница 6: ...d macOS users For other operating systems continue setup by following the on screen instructions instead 6 Click Download 7 Run the downloaded file 8 Click Start Setup 9 Follow the on screen instructi...

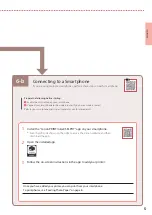
Страница 7: ...a Smartphone If you are using multiple smartphones perform these steps on each smartphone Prepare the following before starting a Enable the Wi Fi setting on your smartphone b Connect your smartphone...

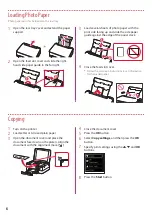
Страница 8: ...Close the feed slot cover Follow the on screen instructions to set information for the loaded paper Copying Photo paper can only be loaded in the rear tray 1 Turn on the printer 2 Load Letter or A4 si...

Страница 9: ...e trouvant l int rieur b a 3 Fermez l unit de num risation capot Ouvrez compl tement l unit de num risation capot puis fermez la Attention Surveillez vos doigts a b 3 Mise sous tension de l imprimante...

Страница 10: ...salir vos mains ou les objets environnants Ne touchez pas les zones pr sent es dans la figure Sinon l imprimante pourrait ne pas imprimer correctement 4 Installez la cartouche FINE couleur dans le por...

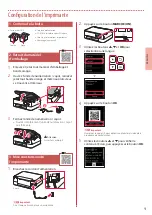
Страница 11: ...la face imprimer vers le bas Placez le papier contre le guide papier avant et alignez le guide papier droit sur la largeur du papier a b 5 Fixez le couvercle de la cassette et remettez la cassette en...

Страница 12: ...r les autres syst mes d exploitation continuez la configuration en suivant les instructions l cran 6 Cliquez sur T l charger 7 Ex cutez le fichier t l charg 8 Cliquez sur Commencer la configuration 9...

Страница 13: ...s utilisez plusieurs smartphones effectuez ces tapes sur chaque smartphone Pr parez les l ments suivants avant de d marrer a Activez le param tre Wi Fi sur votre smartphone b Connectez votre smartphon...

Страница 14: ...tion Suivez les instructions l cran pour d finir les informations sur le papier charg Copie Le papier photo peut tre charg uniquement dans le r ceptacle arri re 1 Mettez l imprimante sous tension 2 Ch...

Страница 15: ...RMC Regulatory Model Code K10500...

Страница 16: ...Acc s au Manuel en ligne partir de votre navigateur Access Online Manual From your browser PRINTED IN XXXXXXXX IMPRIM XX XXXXXXXX QT6 3164 V01 CANON INC 2019 XXXXXXXX...

Отзывы: