


2
Setting Up the Printer
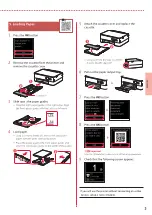
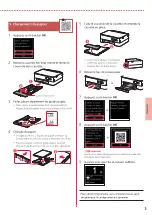
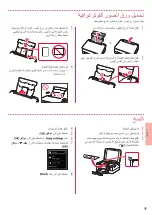
4. Installing the FINE Cartridges
1
Open the scanning unit / cover.
Caution
Do not touch the FINE cartridge holder until it stops moving.
2
Pinch and open the ink cartridge locking cover
on the left-hand side.
3
Remove the Color FINE cartridge from the
container and remove the protective tape.
a
Color
b
Important
•
Do not touch the ink on the protective tape. It could stain
your hands or surrounding objects.
•
Do not touch the areas shown in the
figure. Otherwise, the printer may not
print correctly.
4
Set the Color FINE cartridge in the FINE
cartridge holder.
Important
Do not bump the FINE cartridge.
Doing so may cause a malfunction.
5
Push down the ink cartridge locking cover firmly
until it snaps into place to close it completely.
6
Repeat steps 2 to 5 and install the Black FINE
cartridge as well, on the right-hand side.
7
Close the scanning unit / cover.
•
The printer will start initializing.
Caution
Watch your fingers.
a
b
Содержание PIXMA TS5340a
Страница 3: ...1 1 FINE Windows 2 1 2 b a 3 a b 3 1 2 ON 3 OK 4 OK QR 5 OK...
Страница 4: ...2 4 FINE 1 FINE 2 3 FINE a b 4 FINE FINE FINE 5 6 2 5 FINE 7 a b...
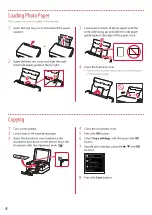
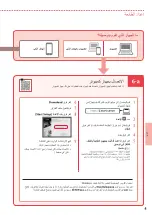
Страница 5: ...3 5 1 OK 2 a b 3 Letter A4 4 2 Letter A4 a b 5 a b 6 7 OK 8 OK QR 9...
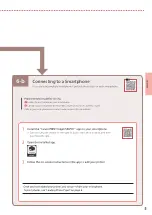
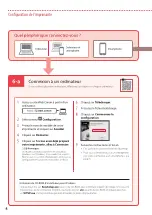
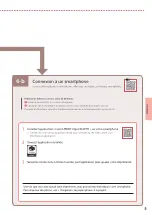
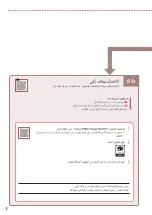
Страница 7: ...6 b 5 1 Canon PRINT Inkjet SELPHY Canon QR 2 3 a Wi Fi b 6 b 6...
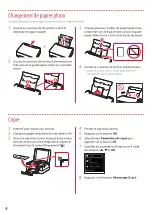
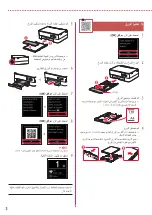
Страница 8: ...6 1 2 a b 3 a b 4 1 2 Letter A4 3 4 5 OK 6 Copy settings OK 7 OK 8 Start...
Страница 9: ...1 1 FINE Windows 2 1 2 b a 3 a b 3 1 2 ON 3 OK 4 OK QR 5 OK...
Страница 10: ...2 4 FINE 1 FINE 2 3 FINE a b 4 FINE FINE FINE 5 6 2 5 FINE 7 a b...
Страница 11: ...3 5 1 OK 2 a b 3 Letter A4 4 2 Letter A4 a b 5 a b 6 7 OK 8 OK QR 9...
Страница 13: ...6 b 5 1 Canon PRINT Inkjet SELPHY QR Canon 2 3 a Wi Fi b 6 b 6...
Страница 14: ...6 1 2 a b 3 a b 4 1 2 Letter A4 3 4 5 OK 6 Copy settings OK 7 OK 8 Start...
Страница 27: ...6 1 1 2 2 a b 3 3 a b 4 4 1 1 2 2 A4 Letter 3 3 4 4 5 5 OK 6 6 OK Copy settings 7 7 OK 8 8 Start...
Страница 28: ...6 b 5 1 1 Canon PRINT Inkjet SELPHY Canon 2 2 3 3 Wi Fi a b 6 b 6...
Страница 30: ...3 5 1 1 OK 2 2 a b 3 3 Letter A4 4 4 A4 Letter 2 a b 5 5 a b 6 6 7 7 OK 8 8 OK 9 9...
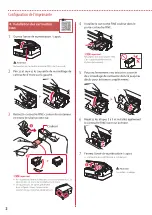
Страница 31: ...2 FINE 4 1 1 FINE 2 2 3 3 FINE a b 4 4 FINE FINE FINE 5 5 6 6 FINE 5 2 7 7 a b...
Страница 32: ...1 1 Windows FINE 2 1 1 2 2 b a 3 3 a b 3 1 1 2 2 ON 3 3 OK 4 4 OK 5 5 OK...
Страница 33: ...RMC Regulatory Model Code K10500 RMC Regulatory Model Code K10564...


