background image

5

Installing the MP Drivers

Installing the MP Drivers

„

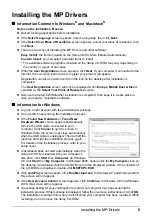
Information Common to Windows

®

 and Macintosh

®

Notes on the Installation Process

z

Quit all running applications before installation.

z

If the 

Select Language

 screen appears, select a language, then click 

Next.

z

If the 

Select Your Place of Residence

 screen appears, select your place of residence, then 

click 

Next.

z

There are two ways of installing the MP Drivers and other software*:

Easy Install

: the items included on the 

Setup CD-ROM

 are installed automatically

Custom Install

: you can select particular items to install

* The available software programs included on the 

Setup CD-ROM

 may vary depending on 

the country or region of purchase.

z

When the 

User Registration

 screen appears, click 

Next

. If your computer is connected to the 

Internet, the on-screen instructions to register your product will appear.

Registration can also be performed from the icon on the desktop after installation is 
completed.
The 

User Registration

 screen will only be displayed when 

Europe, Middle East, Africa

 is 

selected on the 

Select Your Place of Residence

 screen.

z

Remove the 

Setup CD-ROM

 after installation is completed, then keep it in a safe place in 

case you need to reinstall the software.

„

Information for Windows

z

Log into a user account with the administrator privilege.

z

Do not switch users during the installation process.

z

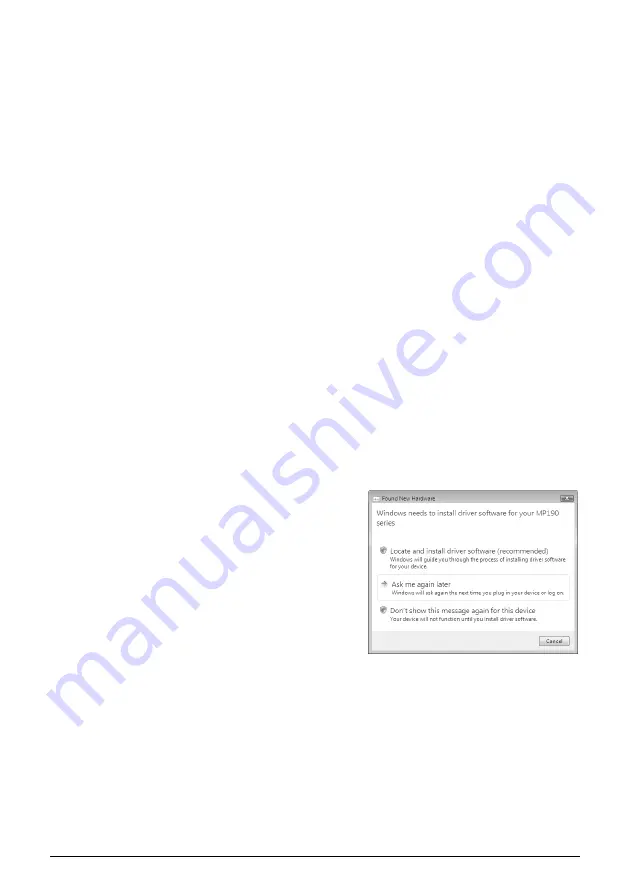
If the 

Found New Hardware

 or 

Found New 

Hardware Wizard

 screen appears automatically, 

remove the USB cable connected to your 
computer. Click 

Cancel

 to quit the screen. In 

Windows Vista, the screen may close automatically 
when the USB cable is unplugged. Then turn off the 
machine and start the installation process again. 
For details on the installation process, refer to your 
setup sheet.

z

If installation does not start automatically when the 

Setup CD-ROM

 is inserted into your computer’s 

disc drive, click 

Start

 then

 Computer

. (In Windows 

XP, click 

Start

 then 

My Computer

. In Windows 2000, double-click the 

My Computer

 icon on 

the desktop.) And double-click the CD-ROM icon on the displayed window. If the contents of 
the CD-ROM are displayed, double-click 

MSETUP4.EXE

.

z

If the 

AutoPlay

 screen appears, click 

Run Msetup4.exe

. In Windows XP and Windows 2000, 

this screen will not appear.

z

If the 

User Account Control

 screen appears, click 

Continue

. In Windows XP and Windows 

2000, this screen will not appear.

z

A message asking for your confirmation to restart your computer may appear during the 
installation process. If this message is displayed, follow the on-screen instructions and click 

OK

The installation resumes from where it left off when your computer has been restarted. While 
restarting, do not remove the 

Setup CD-ROM

.

Содержание PIXMA MP198

Страница 1: ...5 Reading the On screen Manuals 7 Loading Printing Paper 8 Operation Panel 9 Copying 10 Printing from Your Computer 11 Scanning Images 13 Replacing a FINE Cartridge 14 Specifications 16 QT5 1494 V01 XXXXXXXX CANON INC 2008 PRINTED IN VIETNAM The following FINE Cartridges are compatible with this product Q T 5 1 4 9 4 V 0 1 www canon asia com ...

Страница 2: ...Model Name K10320 MP198 ...

Страница 3: ... to the instruction manual of your application The steps described in this manual are in Windows Vista operating system Ultimate Edition hereafter referred to as Windows Vista and Mac OS X v 10 4 x When Using Mac OS X v 10 5 x For details on the printer driver functions refer to the PC Printing Guide on screen manual Trademark Notices z Microsoft is a registered trademark of Microsoft Corporation ...

Страница 4: ...dges are available for 5 years after production has stopped Safety Precautions Warning z Never attempt to plug the power plug into the power outlet or unplug the power plug when your hands are wet z Never damage modify stretch or excessively bend or twist the power cord Do not place heavy objects on the power cord z Never use any power supply other than the standard power supply available in the c...

Страница 5: ...your machine On screen Manuals User s Guide Read this guide when starting to use the machine If the Quick Start Guide does not provide you enough information please refer to the User s Guide which can be installed from the Setup CD ROM This guide provides detailed instructions for z copying z printing from your computer z scanning Additional guides are also available for advanced features Scanning...

Страница 6: ...E Cartridge Holder z Do not drop or shake FINE Cartridges as this may cause the ink to leak out and stain your clothes and hands Important z Wait until the FINE Cartridge Holder has moved to the left automatically and stop z Do not touch the electrical contacts or Print Head Nozzles on a FINE Cartridge The machine may not print out properly if you touch it z Do not reattach the protective tape onc...

Страница 7: ...r Windows z Log into a user account with the administrator privilege z Do not switch users during the installation process z If the Found New Hardware or Found New Hardware Wizard screen appears automatically remove the USB cable connected to your computer Click Cancel to quit the screen In Windows Vista the screen may close automatically when the USB cable is unplugged Then turn off the machine a...

Страница 8: ...ange both the printer settings or status Also this application has a menu to provide troubleshooting tips when problems arise Double click the icon on the desktop and experience how easy operating the machine can be Information for Macintosh z Since Mac OS 9 Mac OS X Classic environments or Mac OS X v 10 3 8 or earlier are not supported do not connect the machine to these Use Mac OS X 10 3 9 or la...

Страница 9: ...ktop System Requirements Browser Help Viewer Note z Microsoft Internet Explorer 5 0 or later must be installed z The on screen manual may not be displayed properly depending on your operating system or Internet Explorer version We recommend that you keep your system up to date with Windows Update Note If you installed the User s Guide from the Manual folder in the Setup CD ROM open the folder in w...

Страница 10: ...igher than the Load Limit Mark A 6 Align the paper stack against the right side of the Rear Tray 7 Pinch the Paper Guide and slide it against the left side of the paper stack Do not slide the Paper Guide too strong Paper may not be fed properly Important Always load paper in portrait orientation Loading paper in landscape orientation can cause the paper to be jammed Note If you cut plain paper to ...

Страница 11: ...g Guide on screen manual 7 Stop Reset button Cancels operations or a print job in progress 8 Color button Starts color copying Also finalizes your selection for the menu or setting item 9 Black button Starts black white copying Also finalizes your selection for the menu or setting item 10 Maintenance button Accesses the Maintenance menu 11 Fit to Page button Fit to Page lamp Enables disables the F...

Страница 12: ...to specify the page size and media type The Paper lamp indicates the selected page size and media type A4 or Letter Plain Paper A4 or Letter Photo Paper 4 x 6 Photo Paper 5 Press the Color button for color copying or the Black button for black white copying Using Useful Copy Function For details refer to Fit to Page Copying in Making Copies of the User s Guide on screen manual Note By pressing the...

Страница 13: ...s selected in Select Printer and click Preferences or Properties 5 Specify the required settings and click OK 6 Click Print or OK Note For details on the printer driver functions click Help or Instructions to view the online help or the PC Printing Guide on screen manual Instructions is only displayed when the on screen manuals are installed Note If straight lines are misaligned or print quality i...

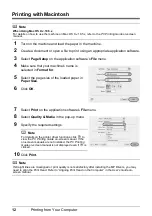
Страница 14: ...y Media in the pop up menu 9 Specify the required settings 10 Click Print Note When Using Mac OS X v 10 5 x For details on how to use the machine on Mac OS X v 10 5 x refer to the PC Printing Guide on screen manual Note For details on the printer driver functions click to view the PC Printing Guide on screen manual If the on screen manuals are not installed the PC Printing Guide on screen manual i...

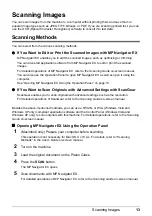
Страница 15: ...g the Operation Panel on page 13 z If You Want to Scan Originals with Advanced Settings with ScanGear ScanGear enables you to scan originals with advanced settings such as the resolution For detailed operations of ScanGear refer to the Scanning Guide on screen manual Besides the above mentioned methods you can use a TWAIN or WIA Windows Vista and Windows XP only compliant application software and ...

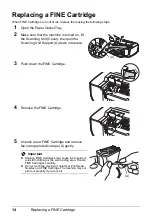
Страница 16: ...nning Unit Support A down into place 3 Push down the FINE Cartridge 4 Remove the FINE Cartridge 5 Unpack a new FINE Cartridge and remove the orange protective tape A gently Important z Shaking FINE Cartridges may cause ink to spill out and stain clothing or the surrounding area Handle FINE Cartridges carefully z Do not touch the electrical contacts or Print Head Nozzles on a FINE Cartridge The mac...

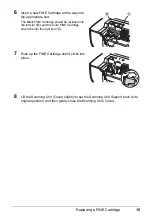
Страница 17: ...tridge should be installed into the left slot and the Color FINE Cartridge should be into the right slot 7 Push up the FINE Cartridge until it clicks into place 8 Lift the Scanning Unit Cover slightly to set the Scanning Unit Support back to its original position and then gently close the Scanning Unit Cover B C B C ...

Страница 18: ... environment Temperature 0 to 40 C 32 to 104 F Humidity 5 to 95 RH no condensation Power supply AC 100 240 V 50 60 Hz Power consumption Printing Copy Approx 13 W Standby minimum Approx 1 1 W OFF Approx 0 8 W External dimensions Approx 17 7 W x 13 9 D x 6 7 H inches Approx 451 W x 353 D x 169 H mm With the Paper Support and Paper Output Tray retracted Weight Approx 5 8 kg Approx 12 8 lb With the FI...

Страница 19: ...ter 512 MB Mac OS X v 10 4 Intel processor PowerPC G5 PowerPC G4 PowerPC G3 256 MB Mac OS X v 10 3 9 PowerPC G5 PowerPC G4 PowerPC G3 128 MB Note Hard Disk must be formatted as Mac OS Extended Journaled or Mac OS Extended Browser Internet Explorer 6 0 or later Safari Hard Disk Space 650 MB Note For bundled software installation 750 MB Note For bundled software installation CD ROM Drive Required Di...

Страница 20: ...18 ...

Страница 21: ...19 ...

Страница 22: ...20 ...

Страница 23: ...5 Reading the On screen Manuals 7 Loading Printing Paper 8 Operation Panel 9 Copying 10 Printing from Your Computer 11 Scanning Images 13 Replacing a FINE Cartridge 14 Specifications 16 QT5 1494 V01 XXXXXXXX CANON INC 2008 PRINTED IN VIETNAM The following FINE Cartridges are compatible with this product Q T 5 1 4 9 4 V 0 1 www canon asia com ...

Отзывы: