background image

7-b

6

Setting Up the Printer

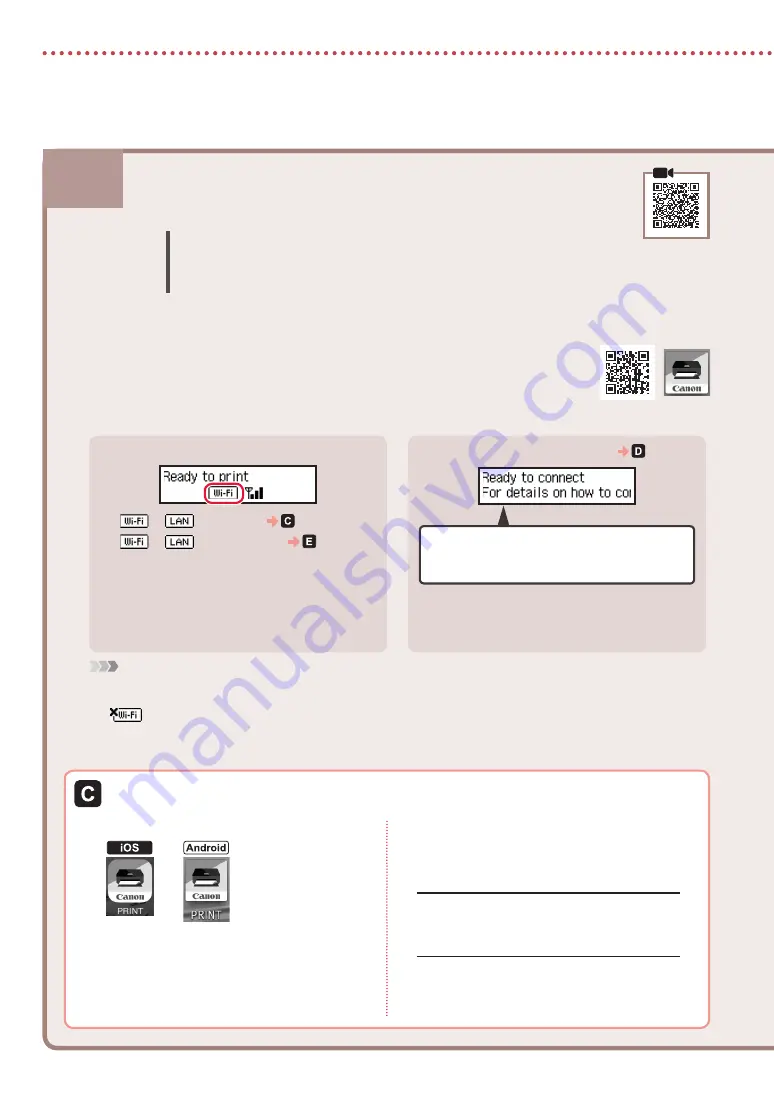
Install the "Canon PRINT Inkjet/SELPHY" app on your smartphone.

• 

Scan the QR code shown on the right to access the Canon website, and then download 
the app.

Check the printer's screen and proceed to each step.

If the following screen is displayed,    

Ready to connect 
For details on how to continue, refer to 
"Getting Started"

If the following screen is displayed

• 

If 

 or 

 is displayed,    

• 

If 

 or 

 is not displayed,    

 Note

• 

The printer's screen turns off when the printer is idle for 10 minutes. Press any button (except the 

ON

 button) on the operation 

panel to turn on the screen.

• 

If 

 appears, the printer cannot communicate by Wi-Fi connection. For details, refer to "

Frequently Asked Questions

" at 

"https://ij.start.canon".

Connecting to a Smartphone

If you are using multiple smartphones, perform these steps on each smartphone.

Prepare the following before starting.

a

  Enable the Wi-Fi setting on your smartphone.

b

  Connect your smartphone to the wireless router (if you have a wireless router).

 Refer to your smartphone and wireless router manuals for more details.

Open the installed app.

Follow the on-screen instructions to add 
your printer.

Once you have added your printer, you can 
print from the smartphone. To print photos, see 
"Loading Photo Paper" on page 8.

Содержание PIXMA G5000 Series

Страница 1: ...Hay v deos e instrucciones detalladas en el sitio web de Canon Configurar un ordenador Configurar un tel fono inteligente Getting Started Read Safety and Important Information addendum first Online Se...

Страница 2: ...1 Conexi n con un ordenador tel fono inteligente o tableta p gina 4 V deos instructivos C mo sujetar la impresora Installing the Printer page 1 Connecting to a Computer Smartphone or Tablet page 4 Hol...

Страница 3: ...n the top cover remove and dispose of the orange tape and protective material inside a b 3 Installing the Print Heads 1 Open the print head locking cover 2 Take out each print head from the package an...

Страница 4: ...of the ink bottle with the inlet 4 Slowly stand the ink bottle upside down and push down to pour the ink If the ink does not pour gently remove the ink bottle and try again b a 5 Gently remove the in...

Страница 5: ...nt side facing down Place the paper against the front paper guide and align the right paper guide to the width of the paper a b 5 Replace the cassette 6 Pull out the paper output tray 7 Follow the on...

Страница 6: ...site from a computer 2 Select Set Up 3 Enter your printer s model name and click Go 4 Click Start 5 Click If you have already prepared your printer go to Connect Note The following steps are for Windo...

Страница 7: ...If the User Account Control dialog box appears click Yes Windows 7 a Click Run Msetup4 exe When the AutoPlay screen appears click Run Msetup4 exe Note If the AutoPlay screen does not appear in the Sta...

Страница 8: ...he ON button on the operation panel to turn on the screen If appears the printer cannot communicate by Wi Fi connection For details refer to Frequently Asked Questions at https ij start canon Connecti...

Страница 9: ...your printer The printer is added with the most appropriate connection method for the environment you are using Note If a message saying No printer has been added Perform printer setup does not appear...

Страница 10: ...inter make sure of the following Refer to the Online Manual for details Check that both joint buttons are pressed down completely to avoid ink leaks Check that the position of the ink valve lever is c...

Страница 11: ...rior retire y tire la cinta naranja y el material de protecci n que hay dentro a b 3 Instalar los cabezales de impresi n 1 Abra la cubierta de bloqueo del cabezal de impresi n 2 Saque cada cabezal de...

Страница 12: ...con la entrada 4 Coloque el frasco de tinta boca abajo despacio y empuje hacia abajo para verter la tinta Si la tinta no se vierte retire suavemente el frasco de tinta e int ntelo de nuevo b a 5 Retir...

Страница 13: ...ee la gu a del papel derecha con el ancho del papel a b 5 Reemplace el cassette 6 Extraiga la bandeja de salida del papel 7 Siga las instrucciones en pantalla y luego pulse el bot n OK Compruebe que L...

Страница 14: ...ordenador 2 Seleccione Configurar 3 Escriba el nombre del modelo de su impresora y haga clic en Ir 4 Haga clic en Iniciar 5 Haga clic en Si ya ha preparado la impresora vaya a Conectar Nota Los sigui...

Страница 15: ...utar Msetup4 exe Run Msetup4 exe Cuando se muestre la pantalla Reproducci n autom tica AutoPlay haga clic en Ejecutar Msetup4 exe Run Msetup4 exe Nota Si no aparece la pantalla Reproducci n autom tica...

Страница 16: ...e control para encender la pantalla Si aparece la impresora no puede comunicarse mediante una conexi n Wi Fi Para obtener m s informaci n consulte Preguntas m s frecuentes en https ij start canon Cone...

Страница 17: ...adecuado para el ambiente que utilice Nota Si no aparece el siguiente mensaje No se ha agregado ninguna impresora Realizar preparaci n de impresora No printer has been added Perform printer setup desp...

Страница 18: ...ra aseg rese de lo siguiente Consulte el Manual en l nea para obtener m s informaci n Compruebe que ambos botones de uni n se hayan presionado hacia abajo completamente para evitar derrames de tinta C...

Страница 19: ...Videoteca sobre procedimientos How To Video Library RMC Regulatory Model Code K10495...

Страница 20: ...escritorio Manual en l nea Canon G5000 series Canon G5000 series Online Manual Desde su navegador Access Online Manual From the Canon G5000 series Online Manual desktop shortcut From your browser PRI...

Отзывы: