3
ENGLISH
3
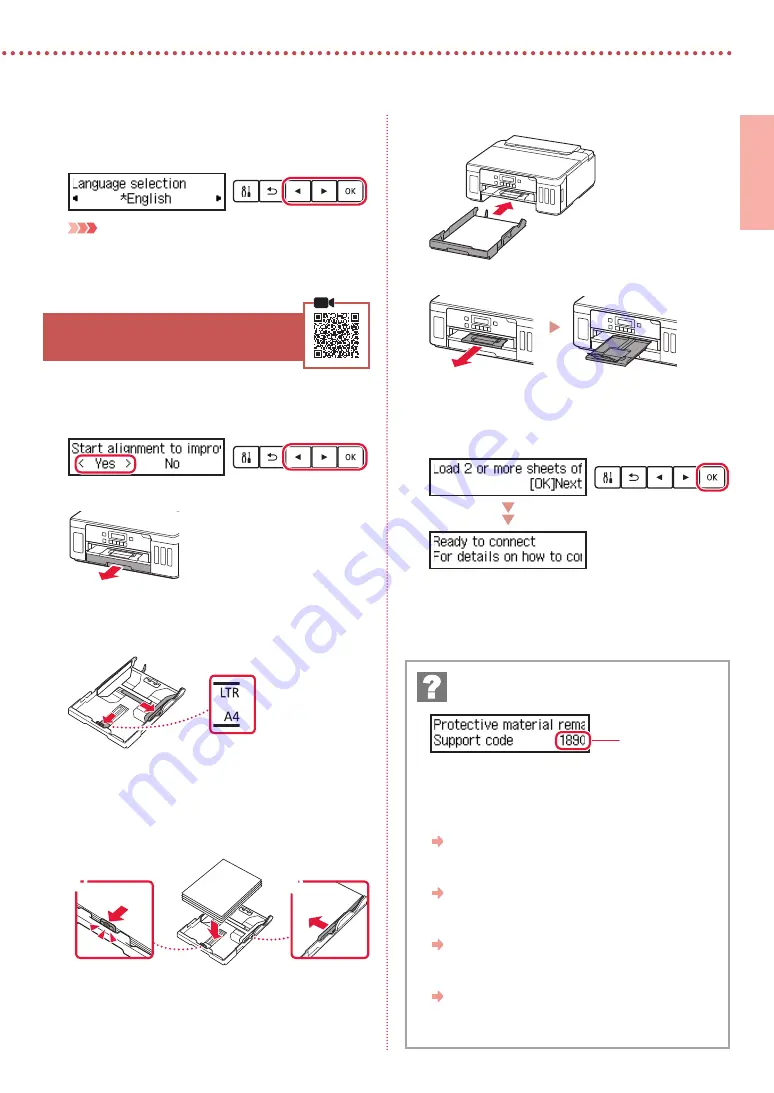
When the following screen appears, use the
[
and
]
buttons to select a language, and then
press the
OK
button.
Important
If an error appears on the screen, see "If an error message
(support code) appears on the screen" on page 3 and
follow the instructions.
6. Loading Paper
1
When the following screen appears, use the
[
and
]
buttons to select
Yes
, and then press the
OK
button.
2
Remove the cassette from the printer.
3
Slide apart the paper guides.
•
Slide the right paper guide to the right edge. Align
the front paper guide with the Letter or A4 mark.
4
Load paper.
•
Load 2 or more sheets of Letter or A4 sized plain
paper with the print side facing down.
•
Place the paper against the front paper guide, and
align the right paper guide to the width of the paper.
a
b
5
Replace the cassette.
6
Pull out the paper output tray.
7
Follow the on-screen instructions, and then
press the
OK
button.
•
Check that
Ready to connect
appears on the
printer's screen.
Check the support code, and then follow the
instructions if the displayed code is written below.
•
1890
The protective materials are not removed.
"2. Removing Packing Materials" on page 1
•
1470
The print heads are not installed correctly.
"3. Installing the Print Heads" on page 1
•
1471
No print heads are installed.
"3. Installing the Print Heads" on page 1
•
1642
There may be insufficient ink.
"4. Pouring Ink" on page 2
For all other cases, refer to the
Online Manual
.
If an error message (support code) appears on
the screen
Support code


