


4
4
4-19
4-19
Parts Replacement and Cleaning Procedure > Clutch Solenoid Motor Fan PCB (DADF) > Removing the Release Motor(M2)
Parts Replacement and Cleaning Procedure > Clutch Solenoid Motor Fan PCB (DADF) > Removing the Release Motor(M2)
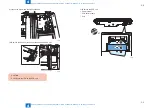
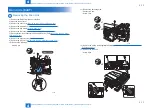
Clutch Solenoid Motor Fan PCB (DADF)
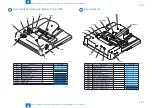
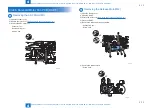
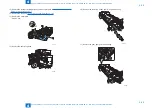
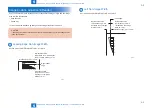
Removing the ADF Motor(M1)
1) Open the feeder cover.
2)Remove the rear cover.(
"Removing the Rear Cover"(page 4-13).
3) Remove the ADF motor unit.
- Connector 1 pc.
- Tension spring 1 pc.
- Screw 2 pcs.
x2
F-4-38
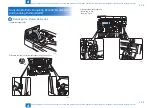
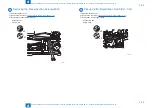
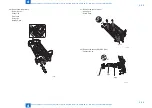
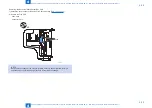
Removing the Release Motor(M2)
1) Open the feeder cover.
2 Open the DADF.
3) Detach the front cover.(
"Removing the Front Cover"(page 4-13).
4) Close the DADF.
5) Remove the release motor support plate.
- Connector 2 pcs.
- Screw 5 pcs.
x5
x2
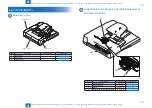
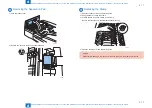
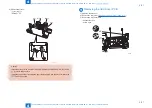
6) Remove the release motor.
- Screw 2 pcs.
x2
F-4-39
F-4-40
Содержание Perfect Binder D1
Страница 4: ...Blank Page...
Страница 8: ...Safety Precautions Notes Before it Works Serving...
Страница 16: ...2 2 Technology Technology Technology Reader Controls Reader Basic Configuration DADF Controls DADF...
Страница 69: ...5 5 Adjustment Adjustment Image position adjustment Reader Overview DADF Adjustment Method DADF...


