manualshive.com logo in svg
background image

6

5

4

3

2

1

Color Image Reader Unit - D1/D2

SERVICE MANUAL Rev

4

Product Outline

Technology

Periodic Servicing

Parts Replacement and Cleaning Procedure

Adjustment

Installation

Appendix

Содержание Perfect Binder D1

Страница 1: ...6 5 4 3 2 1 Color Image Reader Unit D1 D2 SERVICE MANUAL Rev4 Product Outline Technology Periodic Servicing Parts Replacement and Cleaning Procedure Adjustment Installation Appendix...

Страница 2: ...mation as the need arises In the event of major changes in the contents of this manual over a long or short period Canon will issue a new edition of this manual The following paragraph does not apply...

Страница 3: ...witch closing the front door and closing the delivery unit door which results in supplying the machine with power 2 In the digital circuits 1 is used to indicate that the voltage level of a given sign...

Страница 4: ...Blank Page...

Страница 5: ...c Configuration DADF 2 13 Component Configuration 2 13 Outline of Electric Circuits 2 13 Sensor Layout 2 14 Drive Configuration 2 14 Outline of Operation Modes 2 15 Outline 2 15 Forward Pickup Deliver...

Страница 6: ...2 4 19 Removing the Pressurization Solenoid SL1 4 20 Pickup Clutch Registration Clutch CL1 CL2 4 20 Removing the ADF Driver PCB 4 21 Removing the LED PCB 4 22 Removing the Fan 4 22 Removing the Sensor...

Страница 7: ...ontents 6 4 Installation Procedure 6 5 Operation Check 6 16 Appendix Service Tools ii Solvents and Oils ii Special Tools ii General Circuit Diagram DADF iii General Circuit Diagram iii General Circuit...

Страница 8: ...Safety Precautions Notes Before it Works Serving...

Страница 9: ...Notes Before it Works Serving Caution At servicing be sure to turn off the power source according to the specified steps and disconnect the power plug Caution Do not turn off the power switch when dow...

Страница 10: ...1 1 Product Outline Product Outline Features Reader Specifications Reader Names of Parts Reader Features DADF Specifications DADF Names of Parts DADF...

Страница 11: ...Stream reading with CCD fixed Maximum original size 297mm x 432mm In book mode Read resolution 600 dpi main scanning x 600 dpi sub scanning Gradation 256 gradation Carriage position detection CCD HP...

Страница 12: ...rnal View 1 Reader Front Cover 2 Reader Front Sub Cover 3 Reader Left Cover 7 Reader Right Cover 5 Reader PCB Cover 4 Reader Rear Cover 10 Stream Read Glass 9 Copyboard Glass 6 Rear Small Cover Reader...

Страница 13: ...ion with the copy board cover at 5 and 25 deg Original Size Sensor 0 SR4 Helps identify original size AB INCH AB A Original Size Sensor 1 SR5 Helps identify original size INCH AB INCH A CCD unit Indir...

Страница 14: ...e sheetFeed 60 90g m2 Document size AB type B6 A5 B5 A4 B5R A5R A4R B4 A3 B6 Cross feed only INCH type STMT LTR LTRR LGL 11 17 STMT Cross feed only Others 8K 16K Document width 148 297mm Document leng...

Страница 15: ...lide guide F 1 6 Cross Section 13 12 3 5 4 6 7 8 9 10 15 14 1 2 11 No Part name 1 Lower registration roller 2 Upper registration roller 3 Feed roller 4 Separation pad unit 5 Pickup roller 6 Document s...

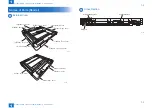
Страница 16: ...2 2 Technology Technology Technology Reader Controls Reader Basic Configuration DADF Controls DADF...

Страница 17: ...ction control LED CCD HP sensor Footnote F Scanner motor moves forward toward right B Scanner motor moves backward toward left Light ON LED on CCD unit lights on ON When CCD HP sensor photo interrupte...

Страница 18: ...e motor and controls its direction speed of rotation CCD HP sensor SR1 detection signal Checks if CCD is at home position Copyboard cover open closed sensor front SR2 rear SR3 detection signal Detects...

Страница 19: ...e the image end is reached 2 Backward movement after scanning an image After scanning an image CCD moves backward to CCD shading position at a specific speed 260 mm sec F 2 6 CCD Overview The machine...

Страница 20: ...mirror No 3 mirror No 1 mirror No 5 Lens Green G line Blue B line Black White B W line Items Description CCD Receives the reflected light that has gone through the lens and converts it into electric...

Страница 21: ...the sensor output The original size is identified by the combination of these output result Control Details For main scanning direction the machine moves the CCD unit to the following CCD original det...

Страница 22: ...e that the AB type A4R size is set CCD unit shading position LED OFF Original sensor OFF CCDoriginal detection position CCD unit Original sensor Reader unit ADF Position of detection 1 Position of det...

Страница 23: ...Original sensor OFF F 2 14 F 2 15 F 2 16 F 2 17 Dirt Sensor Control Overview The machine changes the original read point or executes image correction depending on the presence absence of dust on the s...

Страница 24: ...job dust bypass Presence of dust is detected at points A B and C in this order in the same manner as at the end of the job Read will take place at the point where least dust is detected A B C F 2 19...

Страница 25: ...er PCB 2 CCD PCB Digital image signal EEP ROM SRAM CPU Shading correction adjustment ASIC EEP ROM F 2 21 CCD Drive The machine s CCD sensor is a 4 line linear image sensor consisting of 7500 pixels Af...

Страница 26: ...shading coefficient The difference between the two will be held as the shading correction value for use in correcting variation among CCD pixels when scanning the original thus evening out the density...

Страница 27: ...F 2 24 Reader Heater Control The reader heater is installed the to prevent dew condensation in the reader unit Reader heater ON timing If the environmental switch is turned ON the reader heater is alw...

Страница 28: ...ts of this machine are controlled by the main controller PCB2 The main controller PCB2 detect the input signals from sensors to output the signals that drive DC loads such as motors solenoids clutches...

Страница 29: ...sensor PS1 Document width sensor2 PS2 Document width sensor1 F 2 26 T 2 4 Drive Configuration CL2 CL1 M1 SL1 SL2 M2 No Part name Content M1 ADF motor Feeds documents M2 Release motor Prevents a docume...

Страница 30: ...e Forward pickup delivery Picks up reads and then delivers a document Single sided document Simplex printing Single sided document Duplex printing Forward feed reverse delivery Picks up reads reverses...

Страница 31: ...second document sheet Start of reading of second document sheet End ob job F 2 29 Forward Pickup Reverse Delivery Operation Duplex read operation when two document sheets are placed NOTE This operati...

Страница 32: ...al position Idle feed of first document sheet Removal of idle registration loop of first document sheet and release of re pickup and delivery roller End of reading of reverse side of first document sh...

Страница 33: ...resence absence detection Detects whether there is a document on the Detects whether there is a document on the Document set sensor SR5 Last document detection Detects whether the document being picke...

Страница 34: ...ument widths and initial document sizes type Sensor name Document width sensor 1 PS2 Document width sensor 2 PS1 Document length sensor 1 SR9 Document length sensor 2 SR8 AB type A3 ON ON ON ON B4 OFF...

Страница 35: ...nsor SR11 01 0090 ADF OP Copyboard cover open closed sensor Reader 01 0091 ADF OP Copyboard cover open closed sensor Reader 01 0092 COVER OP Cover open closed sensor SR6 01 0093 COVER OP Cover open cl...

Страница 36: ...3 3 Periodic Servicing Periodic Servicing Work of Service Reader Work of service DADF List of Work for Scheduled Servicing DADF...

Страница 37: ...in the CCD unit 5 CL Open the CCD upper cover 4 Screws Creaning tool for No 5 Mirror is in the Reader Unit Part No FL3 3207 Stream reading glass Copyboard glass T 3 1 F 3 1 Scanner shaft Scanner shaft...

Страница 38: ...7 White level position adjustment Platen roller Refer to page 5 8 Caution Carry out all the above adjustments after removing the DADF from the reader unit T 3 3 Periodic Servicing When the parts are r...

Страница 39: ...per registration roller 1 CL 4 Lower registration roller 1 CL 5 Feed guide dust collection tape FL3 2942 1 CR Refer to page 4 18 6 Upper delivery reversal roller 1 CL 7 Lower delivery reversal roller...

Страница 40: ...4 4 Parts Replacement and Cleaning Procedure Parts Replacement and Cleaning Procedure List of Parts Reader List of Parts DADF Consumable Parts Requiring Periodic Replacement and Cleaning Points DADF...

Страница 41: ...Glass FL3 3206 Refer to page 4 9 List of Clutchs Solenoids Motors Fans PCBs No Name Part No Refer to M1 Scanner motor PCB1 Relay Board List of Sensors No Name Part No Refer to SR1 CCD HP Sensor SR2 C...

Страница 42: ...ers Reader Removing the Reader Left Cover 1 Remove the reader left cover 2 screws RS tightening M3 x2 Removing the Reader Front Cover 1 Open the platen cover ADF platen board cover 2 Remove the reader...

Страница 43: ...re External Covers Reader Removing the Reader Rear Cover Removing the Reader Rear Cover 1 Open the platen cover ADF platen board cover 2 Remove the reader rear small cover 2 claws x2 3 Remove the ADF...

Страница 44: ...llowing service mode to output a P PRINT COPYER FUNCTION MISC P P PRINT 2 Open the platen cover ADF platen board cover 3 Remove the reader right cover Removing the Reader Right Cover page 4 3 4 Remove...

Страница 45: ...ement and Cleaning Procedure Main Units Parts Reader Removing the CCD Unit 9 Loosen the screw and then loosen the belt 10 Remove the belt from the hook at the back of the CCD unit CAUTION Do not touch...

Страница 46: ...mode is read Checking the transparency of the glass for the book mode COPIER FUNCTION CCD DFWLV1 for color 4 2 Place a sheet of paper which the user usually uses on the DF tray and execute the follow...

Страница 47: ...R ADJUST CCD W PLT X Y Z Input of standard white plate data 2 Enter the service mode and then select the following D1 Only COPIER FUNCTION CCD DF WLVL1 2 3 4 DF white level adjustment 1 Place a sheet...

Страница 48: ...h alcohol Be sure to install the ADF scan glass with its seat facing front left F 4 18 Action to Take after Replacing the ADF Scan Glass 1 Enter the service mode and then select the following D1 Only...

Страница 49: ...ving the ADF Scan Glass Action to Take after Replacing the ADF Scan Glass Read the white level in the BOOK mode Check the transparency of the glass for BOOK mode 4 Place a sheet of paper that the user...

Страница 50: ...rs Rear cover Front cover Feeder cover No Part name Part number Reference 1 Front cover Refer to page 4 13 2 Rear cover Refer to page 4 13 3 Feeder cover Refer to page 4 14 F 4 19 T 4 6 Consumable Par...

Страница 51: ...r to page 4 29 PCB3 LED PCB Refer to page 4 22 FM1 Fan Refer to page 4 22 F 4 21 T 4 8 List of Sensors SR7 SR9 SR8 PS1 PCB2 PS2 PCB2 SR1 SR11 SR2 SR3 SR4 SR5 SR6 No Part name Part number Reference SR1...

Страница 52: ...Rear Cover External Covers DADF Removing the Front Cover 1 Open the feeder cover 2 Remove the screw x1 3 Open the DADF F 4 23 F 4 24 4 Detach the front cover Screw 2 pcs x2 Removing the Rear Cover 1...

Страница 53: ...r Parts Replacement and Cleaning Procedure External Covers DADF Removing the Feeder Cover Removing the Feeder Cover 1 Open the feeder cover 2 Open the DADF 3 Detach the front cover Removing the Front...

Страница 54: ...r Cover page 4 14 5 Remove the tray holder Refer to page 4 23 6 Remove the rear cover Removing the Rear Cover page 4 13 7 Disconnect the nine connectors from the ADF driver PCB Removing the ADF Driver...

Страница 55: ...Procedure Consumable Parts Requiring Periodic Replacement and Cleaning Points DADF Removing the Pickup Roller Unit Consumable Parts Requiring Periodic Replacement and Cleaning Points DADF Removing th...

Страница 56: ...e Stamp Removing the Separation Pad 1 Open the feeder cover 2 Remove two hooks to remove the separation pad x2 F 4 34 F 4 35 Replacing the Stamp 1 Open the feeder cover and separation guide 2 Using tw...

Страница 57: ...ler Guide Parts Replacement and Cleaning Procedure Consumable Parts Requiring Periodic Replacement and Cleaning Points DADF Exchanging the Feed Roller Guide Exchanging the Feed Roller Guide 1 Open the...

Страница 58: ...ing the ADF Motor M1 1 Open the feeder cover 2 Remove the rear cover Removing the Rear Cover page 4 13 3 Remove the ADF motor unit Connector 1 pc Tension spring 1 pc Screw 2 pcs x2 F 4 38 Removing the...

Страница 59: ...gistration Clutch CL1 CL2 Removing the Pressurization Solenoid SL1 1 Open the feeder cover 2 Remove the rear cover Removing the Rear Cover page 4 13 3 Remove the pressurization solenoid Connector 1 pc...

Страница 60: ...c Bearing 1 pc White Black W B CL1 CL2 Caution Install the pickup clutch with the clutch gear white aligned with the mark W white on the clutch support plate Install the registration clutch with the g...

Страница 61: ...the LED PCB 1 Open the feeder cover 2 Open the DADF 3 Detach the front cover Removing the Front Cover page 4 13 4 Close the DADF 5 Remove the LED PCB Screw 1 pc Connector 1 pc x1 x1 F 4 45 Removing t...

Страница 62: ...over 3 Detach the front cover Removing the Front Cover page 4 13 4 Remove the feeder cover Removing the Rear Cover page 4 13 5 Remove the tray holder Screw 1 pc x1 6 Remove the rear cover Removing the...

Страница 63: ...Removing the Sensor SR1 SR2 SR3 12 Remove the pickup clutch registration clutch support base Pickup Clutch Registration Clutch CL1 CL2 page 4 20 13 Remove the feed unit Removing the Feed Unit page 4 1...

Страница 64: ...g the Sensor SR1 SR2 SR3 Parts Replacement and Cleaning Procedure Clutch Solenoid Motor Fan PCB DADF Removing the Sensor SR1 SR2 SR3 18 While pushing the hook in the direction of the arrow remove the...

Страница 65: ...acement and Cleaning Procedure Clutch Solenoid Motor Fan PCB DADF Removing the Sensor SR1 SR2 SR3 20 Remove the read roller 2 Resin ring 1 pc Pulley 1 pc Gear 2 pcs E ring 1 pc Bearing 3 pcs F 4 58 21...

Страница 66: ...over page 4 13 3 Remove the timing sensor Connector 1 pc x1 Removing the Document Set Sensor SR5 1 Open the feeder cover 2 Remove the rear cover Removing the Rear Cover page 4 13 3 Remove the document...

Страница 67: ...document detection sensor Connector 1 pc SR7 x1 Removing the Document Length Sensor SR8 SR9 1 Detach the cover on the reverse side of the document tray Refer to page 4 27 2 Remove the document length...

Страница 68: ...or Fan PCB DADF Removing the Release Motor HP Sensor SR11 Removing the Document Width Sensor PS1 PS2 1 Detach the cover on the reverse side of the document tray Refer to page 4 27 2 Remove the Tray PC...

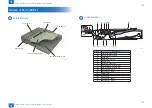
Страница 69: ...5 5 Adjustment Adjustment Image position adjustment Reader Overview DADF Adjustment Method DADF...

Страница 70: ...m in this adjustment enter the changed value in the service label Leading Edge Non Image Width Service mode COPIER ADJUST ADJ XY ADJ X 2 5 4 6 8 1012141618 20 0 1st side of copy 2 5 1 5mm Image leadin...

Страница 71: ...ent Platen roller Caution Carry out all the above adjustments after removing the DADF from the reader unit T 5 1 Adjustment Method DADF Adjusting the Height Pre check Check whether the front and rear...

Страница 72: ...instructed it does not interfere the soundproofing sheet stuck on the bottom of the DADF when closing it Protrusions Sheet Document reader Paper Protrusions Document reader Sheet 2 Pulling out the set...

Страница 73: ...er is floating turn the adjusting screw clockwise to bring the spacer closer to the glass If only the rear spacer or both front and rear spacers are floating turn the adjusting screw counterclockwise...

Страница 74: ...this manual Copy it or clip it out 2 Check the perpendicularity at the leading edges of the test chart and copy Measure dimensions A and B on the test chart and dimensions A and B on the copy If it i...

Страница 75: ...ced to the rear increase the setting unit of adjustment 0 1 mm Adjusting the Trailing Edge Registration 1 Place the Test Chart in the DADF and make a copy 2 Compare the copy against the Test Chart for...

Страница 76: ...used by the user on the copyboard glass and close the DADF 3 Press DF WLVL1 to highlight 4 Press OK Automatic adjustment starts if it ends successfully the screen shows OK 5 Remove the paper from the...

Страница 77: ...6 6 Installation Installation How to Utilize This Installation Proceduer Caution During Installation Turning OFF the Host Machine Power Checking the Contents Installation Procedure Operation Check...

Страница 78: ...the Shipping Carton After unpacking confirm the parts contained in the package by referring to the illustration of Bundled Components described in this procedure The below symbol appears on the illus...

Страница 79: ...ly as it might cause frame deformation Put the reader unit on the top of the packaging box be careful not to get your fingers caught NOTE When installing the USB Device Port unit at the same time perf...

Страница 80: ...a copyrighted item is not permitted without the permission of the copyright owner YOU MAY BE COMMITTING A CRIMINAL OFFENCE FOR WHICH YOU MAY BE PROSECUTED This list is a guide only and is not a comple...

Страница 81: ...re Installation Installation Procedure Installation Procedure 1 Remove packing materials and tapes from the reader unit 2 Remove the rear right upper cover 2 screws x2 F 6 3 3 Open the waste toner box...

Страница 82: ...he HDD model disconnect 2 connectors from the controller PCB x2 F 6 5 5 Remove the controller cover by sliding it to the right 1 screw x1 CAUTION The HDD is attached to the controller cover for the HD...

Страница 83: ...et the left stay with the bosses aligned Bump the projection of the reader unit against rear right stay of the host machine After tightening 1 screw in the order of 1 as shown in the illustration thgh...

Страница 84: ...fixing screws of the scanner unit x2 NOTE As the fixing screws of the scanner unit will be needed when moving the machine be sure to keep them F 6 8 8 Remove the connector cover by releasing the hook...

Страница 85: ...10 Connect the included 2 flexible cables to the reader controller PCB x2 F 6 11 11 Connect 2 flexible cables to the controller PCB of the host machine x2 F 6 12 12 Connect 2 connectors of the reader...

Страница 86: ...platen cover 15 Remove the reader front cover 2 screws x2 F 6 15 16 Attach the fixation plate right included in the host machine 2 screws TP M4X6 included in the host machine x2 F 6 16 17 Attach the...

Страница 87: ...18 When 3 Way Unit has been not installed Open the right lower cover then remove 2 screws to remove the right upper cover of the host machine x2 F 6 19 19 Remove the cover from back side of the operat...

Страница 88: ...2 Installation Installation Procedure Installation Installation Procedure 21 Attach the cover removed in step 19 F 6 22 22 Attach the operation panel using 4 screws TP M4X6 included in the host machin...

Страница 89: ...x2 F 6 24 24 Attach the reader right cover 2 screws RS tight M3X8 x2 NOTE Put three claws of the cover on hooks of the reader unit F 6 25 25 Attach the reader left cover 2 screws RS tight M3X8 x2 NOT...

Страница 90: ...language on the same label already pasted as needed F 6 28 28 D1 Only Affix the included finger pinch caution label 2 written in your language CAUTION To avoid injury do not place your hands or finger...

Страница 91: ...nge covers F 6 31 32 Attach the covers of the host machine removed in previous steps Attach the controller cover removed in step 5 If disconnecting connectors in step 4 connect it Attach the rear cove...

Страница 92: ...nstallation Operation Check Operation Check 1 Connect the power plug of the host machine to the outlet 2 Turn ON the main power switch 3 Check the operation such as paper feed to make sure that proble...

Страница 93: ...Appendix Service Tools General Circuit Diagram Reader General Circuit Diagram DADF Signal Name List Reader Signal Name List DADF...

Страница 94: ...e Uses Composition Remarks 1 Vic Clean Cleaning e g glass plastic rubber parts external covers Hydrocarbon fluorine family Alcohol Surface activating agent Water Do not bring near fire Procure locally...

Страница 95: ...J9 MT1 MT11 1 2 3 4 5 6 7 8 9 10111213141516171819202122232425 J504 2 3 1 J503 10 9 8 2 3 4 5 6 1 7 J509 J89H 1 2 3 4 J88 1 2 3 4 J7 2 1 J11 J84H 1 2 J84 1 2 J85 MT5 MT4 1 2 J6 3 4 5 6 1 2 J4 1 2 3 J...

Страница 96: ...UT1 TXOUT1 TXOUT2 TXOUT2 TXCLK TXCLK GND GND 50 49 24 38 36 34 32 30 28 26 20 18 16 1 2 3 4 5 6 7 8 9 10 11 13 15 17 19 21 23 25 27 29 31 33 35 37 12 14 22 40 39 41 43 45 47 42 44 46 48 J1 50 49 24 38...

Страница 97: ...GND GND 13 12V 12V 14 GND GND 15 GND GND 16 5V 5V 17 5V 5V 18 GND GND 19 GND GND 20 EEP_RXD EEP_RXD 21 EEP_TXD EEP_TXD 22 EEP_CLK EEP_CLK 23 EEP_CS EEP_CS 24 GND GND 25 SCI_DI SCI_Input T 7 2 Jack No...

Страница 98: ...id signal J7 1 24V 2 PICK CL Pickup clutch signal 3 24V 4 REG CL Registration clutch signal J8 1 24V 2 GND 3 FAN LOCK FAN lock signal J9 1 5V 2 GND 3 RKMOT HP SENS Release motor HP sensor signal 4 COV...

Страница 99: ...W1 SENS Document width sensor 1 signal 2 SIZE W2 SENS Document width sensor 2 signal 3 LAST SENS Last document detection sensor signal 4 SIZE L2 SENS Document length sensor 2 signal 5 SIZE L1 SENS Doc...

Отзывы: